Track form conversions with Google Tag Manager
Set up Google Tag Manager triggers for a form's view and submit events and fire a Google Ads conversion or a Meta Pixel event from them.
This guide walks through conversion tracking for a form made with Tinyform, using Google Tag Manager (GTM) as the hub and Google Ads and Meta Pixel as the destinations. It assumes you have a GTM container; if not, create one first in GTM.
How does it work
The form has no GTM setting of its own. Two places put a tag next to a form, and which one you use decides which triggers below will fire:
- An embedded form on your own site, with
Track form eventsswitched on in the embed dialog, pushestinyform_form_viewandtinyform_form_submitinto the page'sdataLayer. The custom-event triggers in Step 2 are built on those. - A form on a custom domain loads whatever you paste into the domain's
Code injectionbox, so a GTM container installed there counts the form's page view with GTM's own Page View trigger. A form on its own page pushes no form events, so a conversion there is best counted on the pageRedirect on completionsends the visitor to.
Track form events with Google Tag Manager or Meta Pixel explains the two routes side by side.
Step 1: Install Google Tag Manager
For an embedded form, install the GTM container on your website the usual way, then on the form's Share tab open the embed options, switch on Track form events, and paste the snippet from Get the code where the form goes.
For a form on a custom domain:
- In GTM, open the container and go to Admin, then Install Google Tag Manager. GTM shows two pieces of code.
- In Tinyform, open
Domains, pick the domain, and scroll toGeneral settings. - Paste both pieces into
Code injectionand pressSave changes. See Code injection.
The box should hold your container's own GTM- id where the placeholder was.
Step 2: Create triggers in Google Tag Manager
An embedded form with Track form events on pushes two custom events into dataLayer. GTM needs a trigger for each before a tag can use them. Every event also carries formId, which you can read with a Data Layer Variable named formId if one page holds several forms and you want a trigger for one of them.
A trigger for every form view
Use case: a retargeting pixel for everyone who saw the form.
- In GTM go to Triggers, then New.
- Choose Custom Event as the trigger type.
- For Event name enter
tinyform_form_view. - Name the trigger, for example
CE - tinyform_form_view. - Save.
A trigger for completed forms
Use case: a conversion, or a retargeting pixel for people who submitted.
- Go to Triggers, then New.
- Choose Custom Event as the trigger type.
- For Event name enter
tinyform_form_submit. - Name the trigger, for example
CE - tinyform_form_submit. - Save.
Triggers for a specific page of the form
Not available. The form announces one view per form shown, not one per page, so there is no event to build a "reached page 2" trigger on. Per-question drop-off is on the form's Insights tab under Drop-offs, counted on the server without any tag.
Step 3: Set up retargeting pixels and conversion tracking on the triggers
With the two triggers in place, any tag can fire on them. Two common cases follow.
Send a conversion to Google Ads when a form is submitted
First add the Conversion Linker, if the container does not have one yet:
- Go to Tags, then New.
- Choose Conversion Linker as the tag type.
- Use All Pages as the trigger.
- Name it, for example
Google - Conversion Linker. - Save.
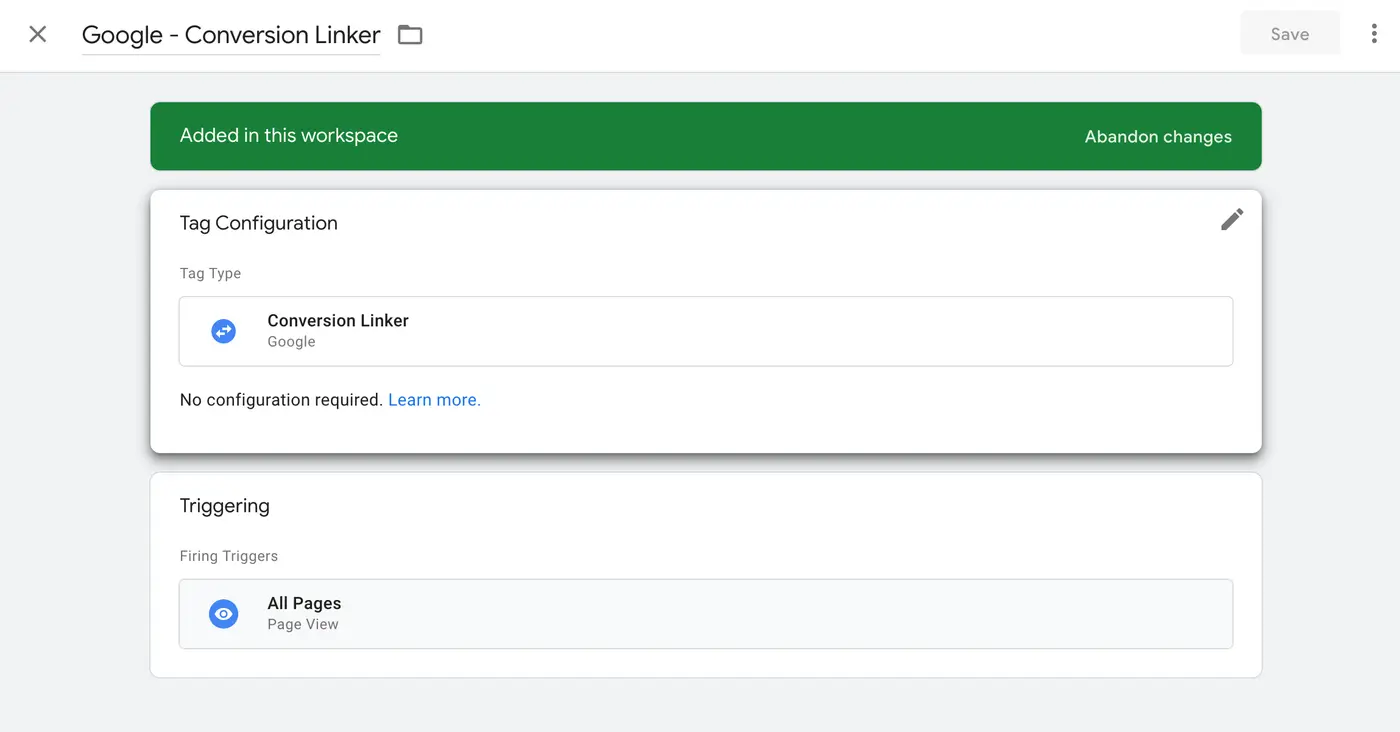
Then the conversion itself:
- Go to Tags, then New.
- Choose Google Ads Conversion Tracking as the tag type.
- Enter your Conversion ID and Conversion Label from Google Ads, plus any other field you need.
- Pick
CE - tinyform_form_submitas the trigger. - Name it, for example
Google Ads - Conversion - Form submitted. - Save.
Send an event to Meta for every form view
Start by adding the Pixel tag template so you do not have to write the tag by hand:
- Go to Templates, then Tag Templates, then Search Gallery.
- Search for Facebook Pixel and add the template published by facebookarchive to the workspace.
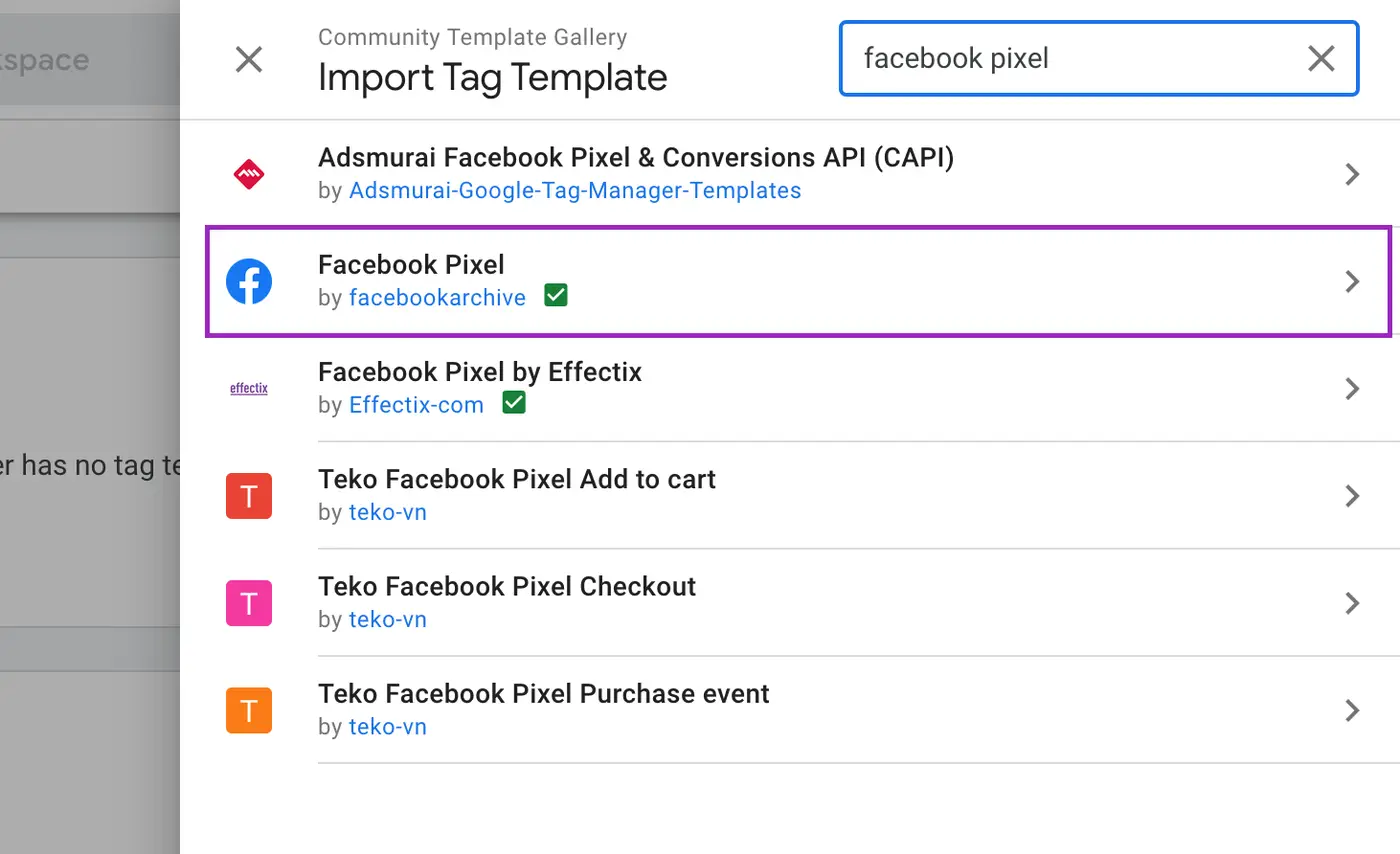
Now the tag:
- Go to Tags, then New.
- Choose Facebook Pixel as the tag type.
- Enter your Pixel ID and pick the event to send. If the Pixel tracks only this form, the standard
PageViewevent is a good choice.
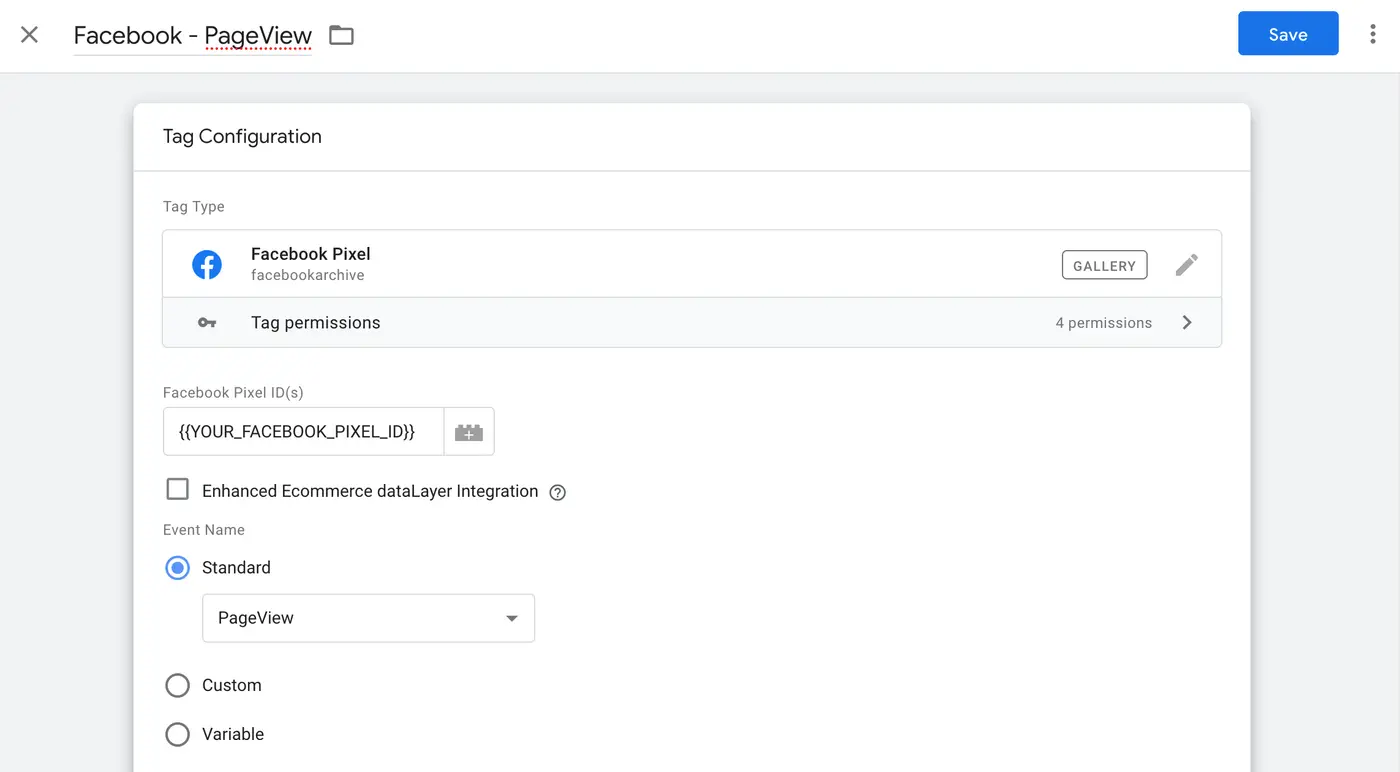
- Pick
CE - tinyform_form_viewas the trigger. - Name it, for example
Facebook - PageView. - Save.
If Meta Pixel is loaded on the host page directly rather than through GTM, the embed already calls it with a custom event named tinyform_form_view or tinyform_form_submit, and you can build an audience or a custom conversion on those names in Meta without a GTM tag at all.
Step 4: Preview and publish your container
Use GTM's Preview mode to open the page holding the form, view it, submit it, and confirm that each trigger fires and each tag sends. Then publish the container.