Custom domains
Serve your forms on your own domain or subdomain, give each one a readable URL, and control the title, image and scripts every page on it carries.
A form link that carries your own name is easier to trust and easier to remember than one on somebody else's hostname. Tinyform can serve your published forms on a domain or subdomain you own, and once it does, each form gets a short path of your choosing.
✔️ Your own hostname and a readable path per form
✔️ Link previews, favicon and code injection per domain
✔️ Hosting and HTTPS handled for you
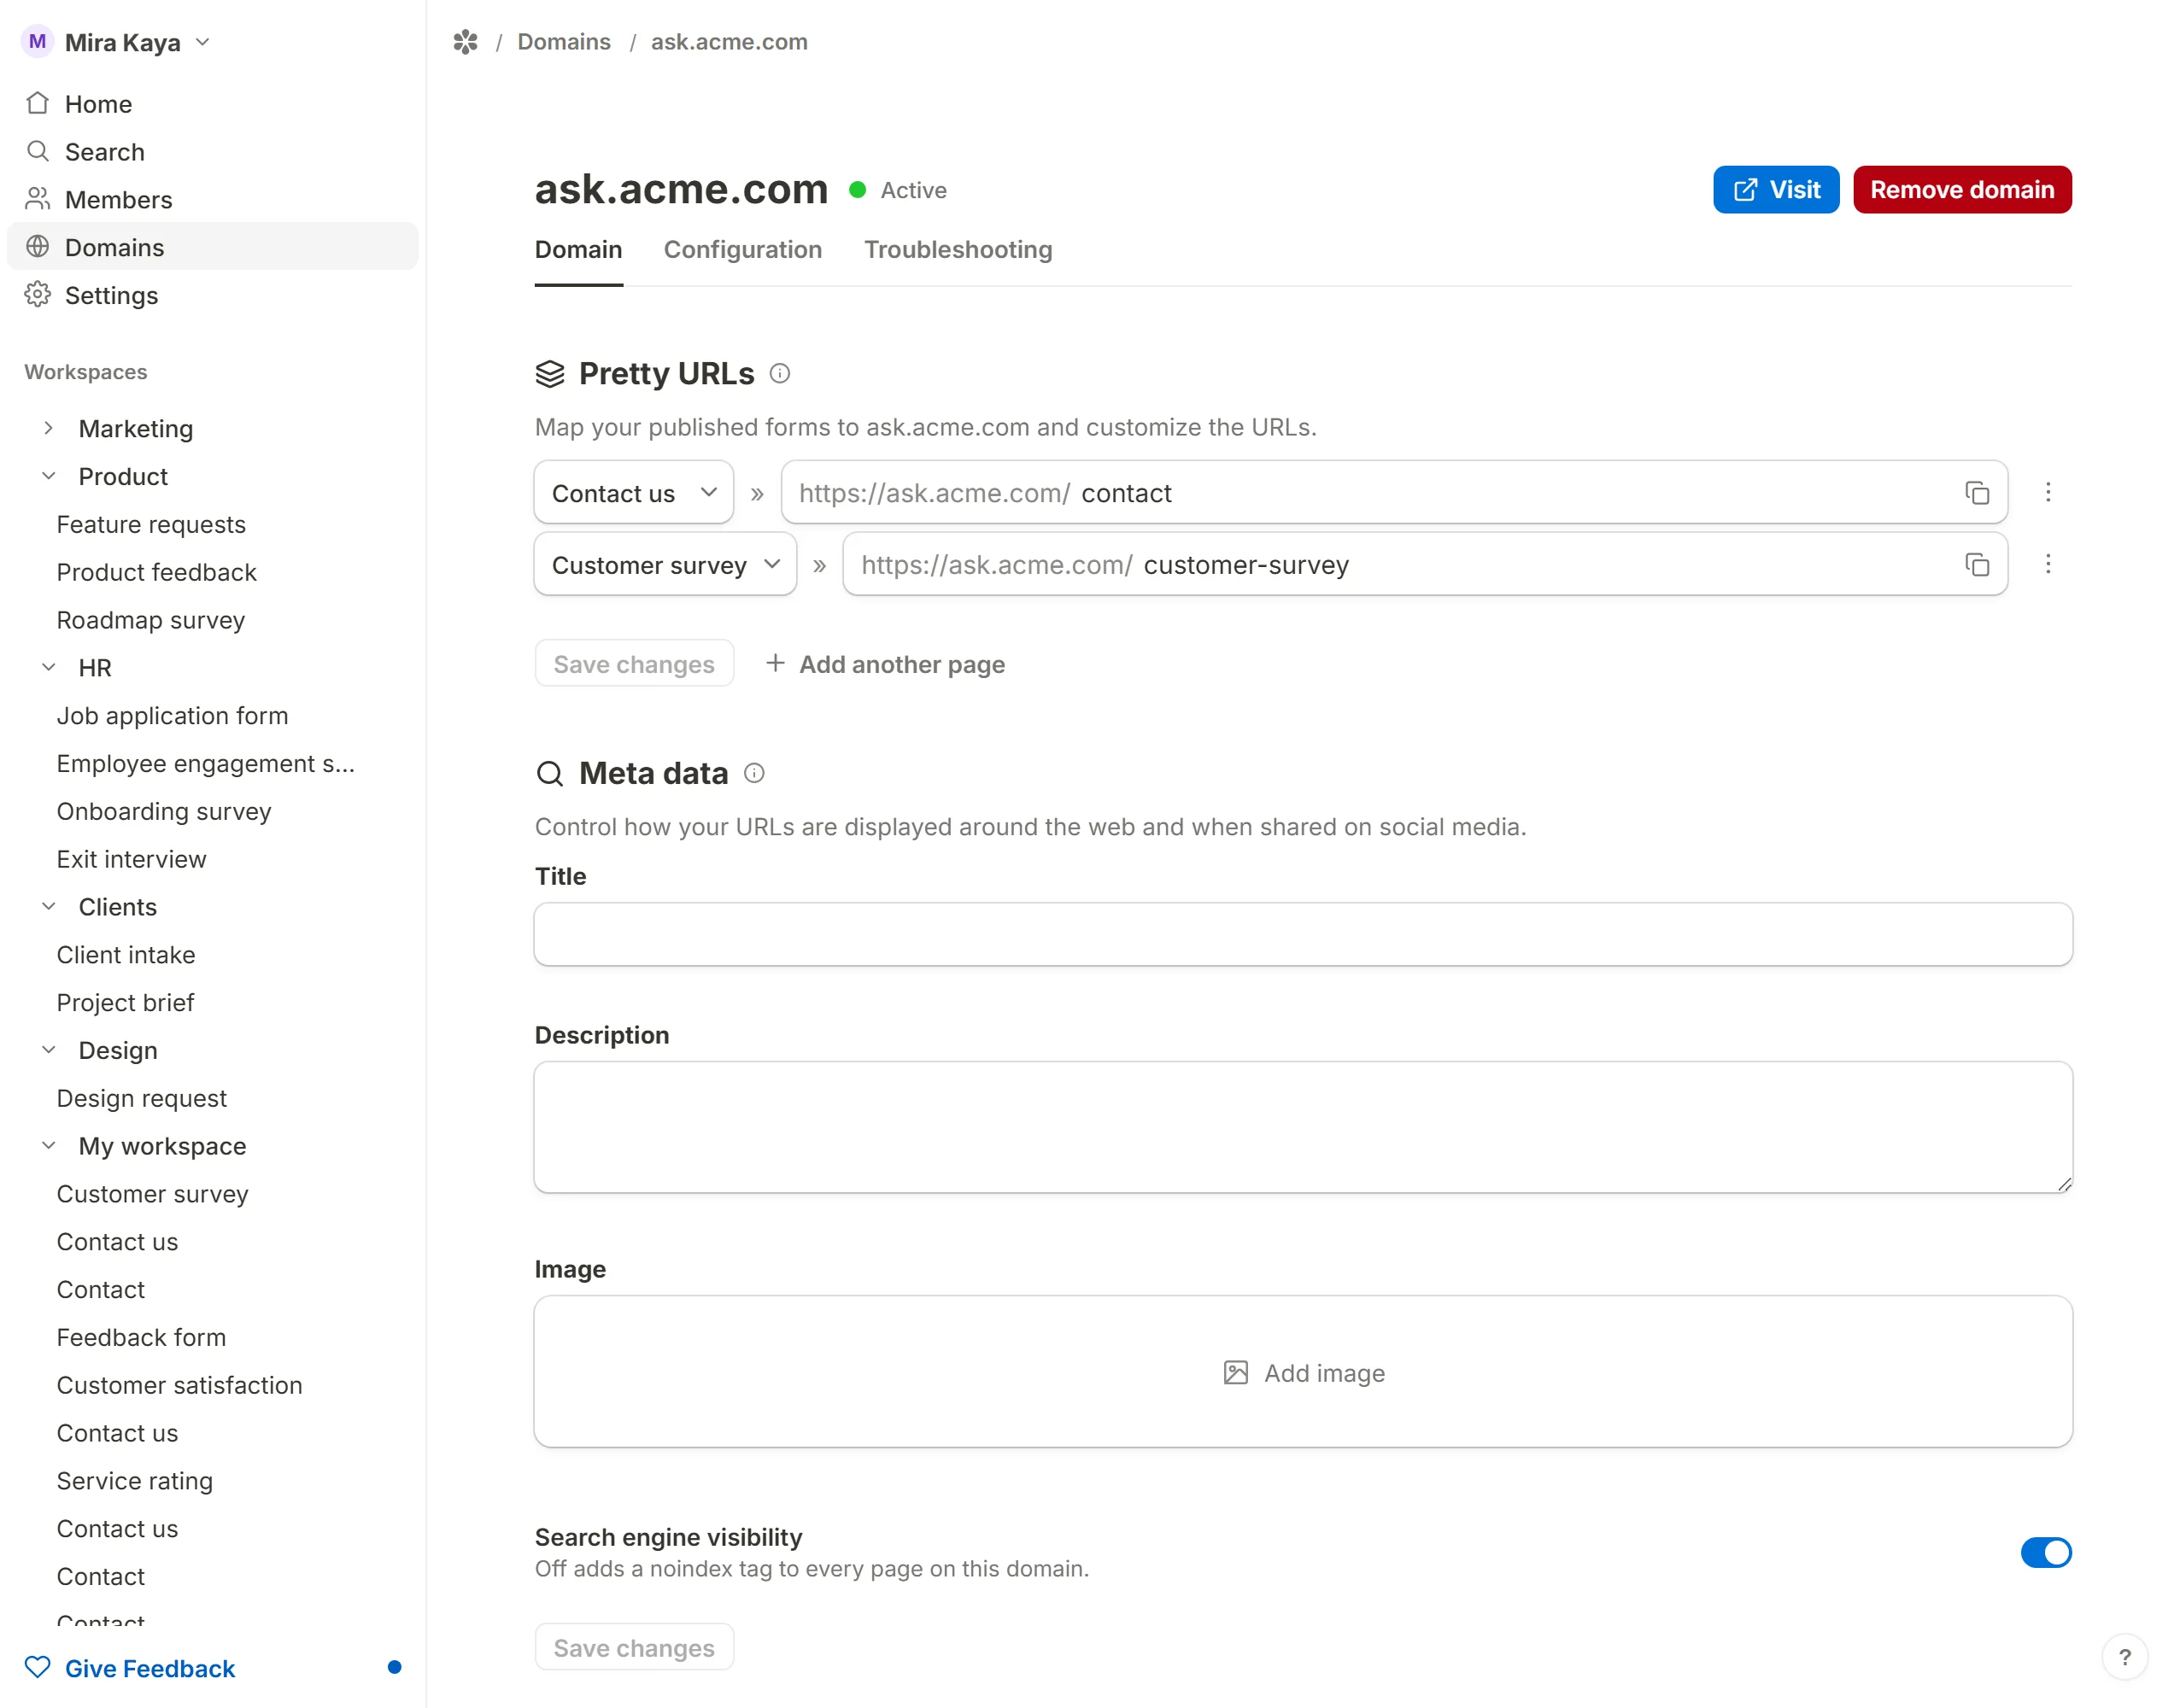
Say your company's site is acme.com and you would like your forms to live under ask.acme.com. You connect that subdomain to your workspace once, point its DNS at Tinyform, and from then on every published form can be given an address of its own:
ask.acme.com/contactask.acme.com/customer-survey
The rest of this page walks through connecting the domain, creating the DNS records, and setting up the URLs and metadata on it.
1. Connect a custom domain
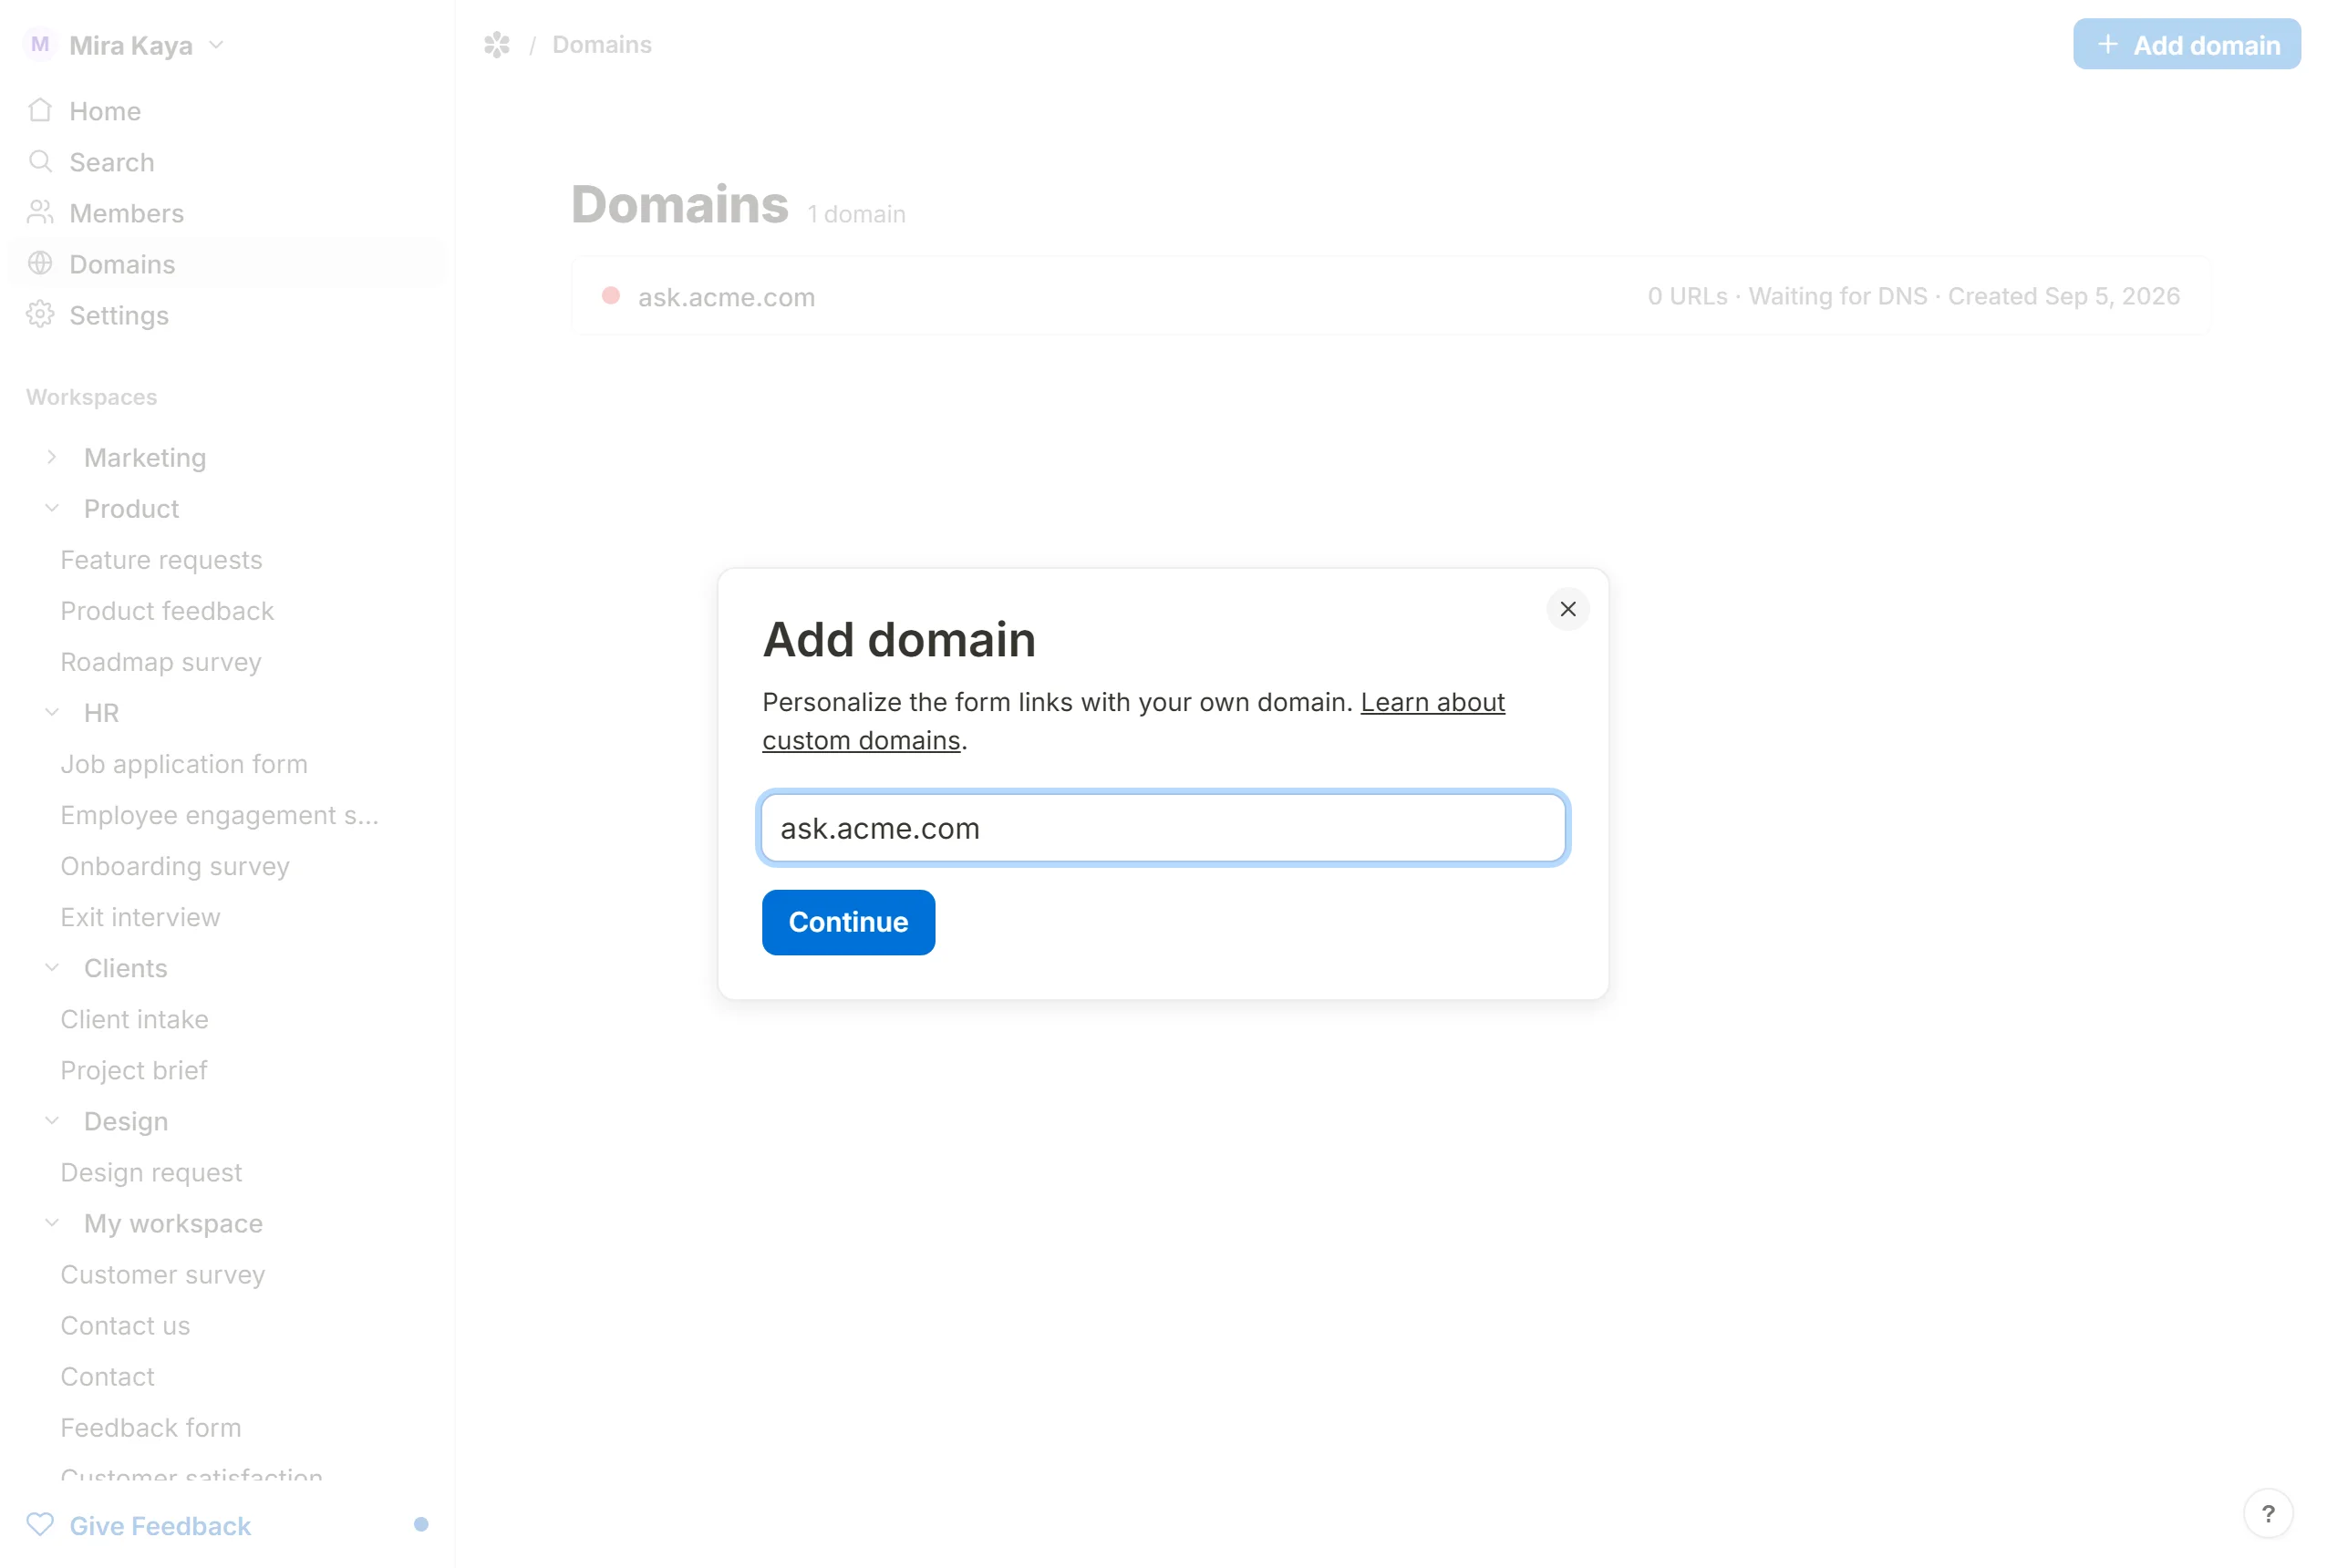
Open Domains in the sidebar and press + Add domain. A dialog asks for one thing: the hostname.
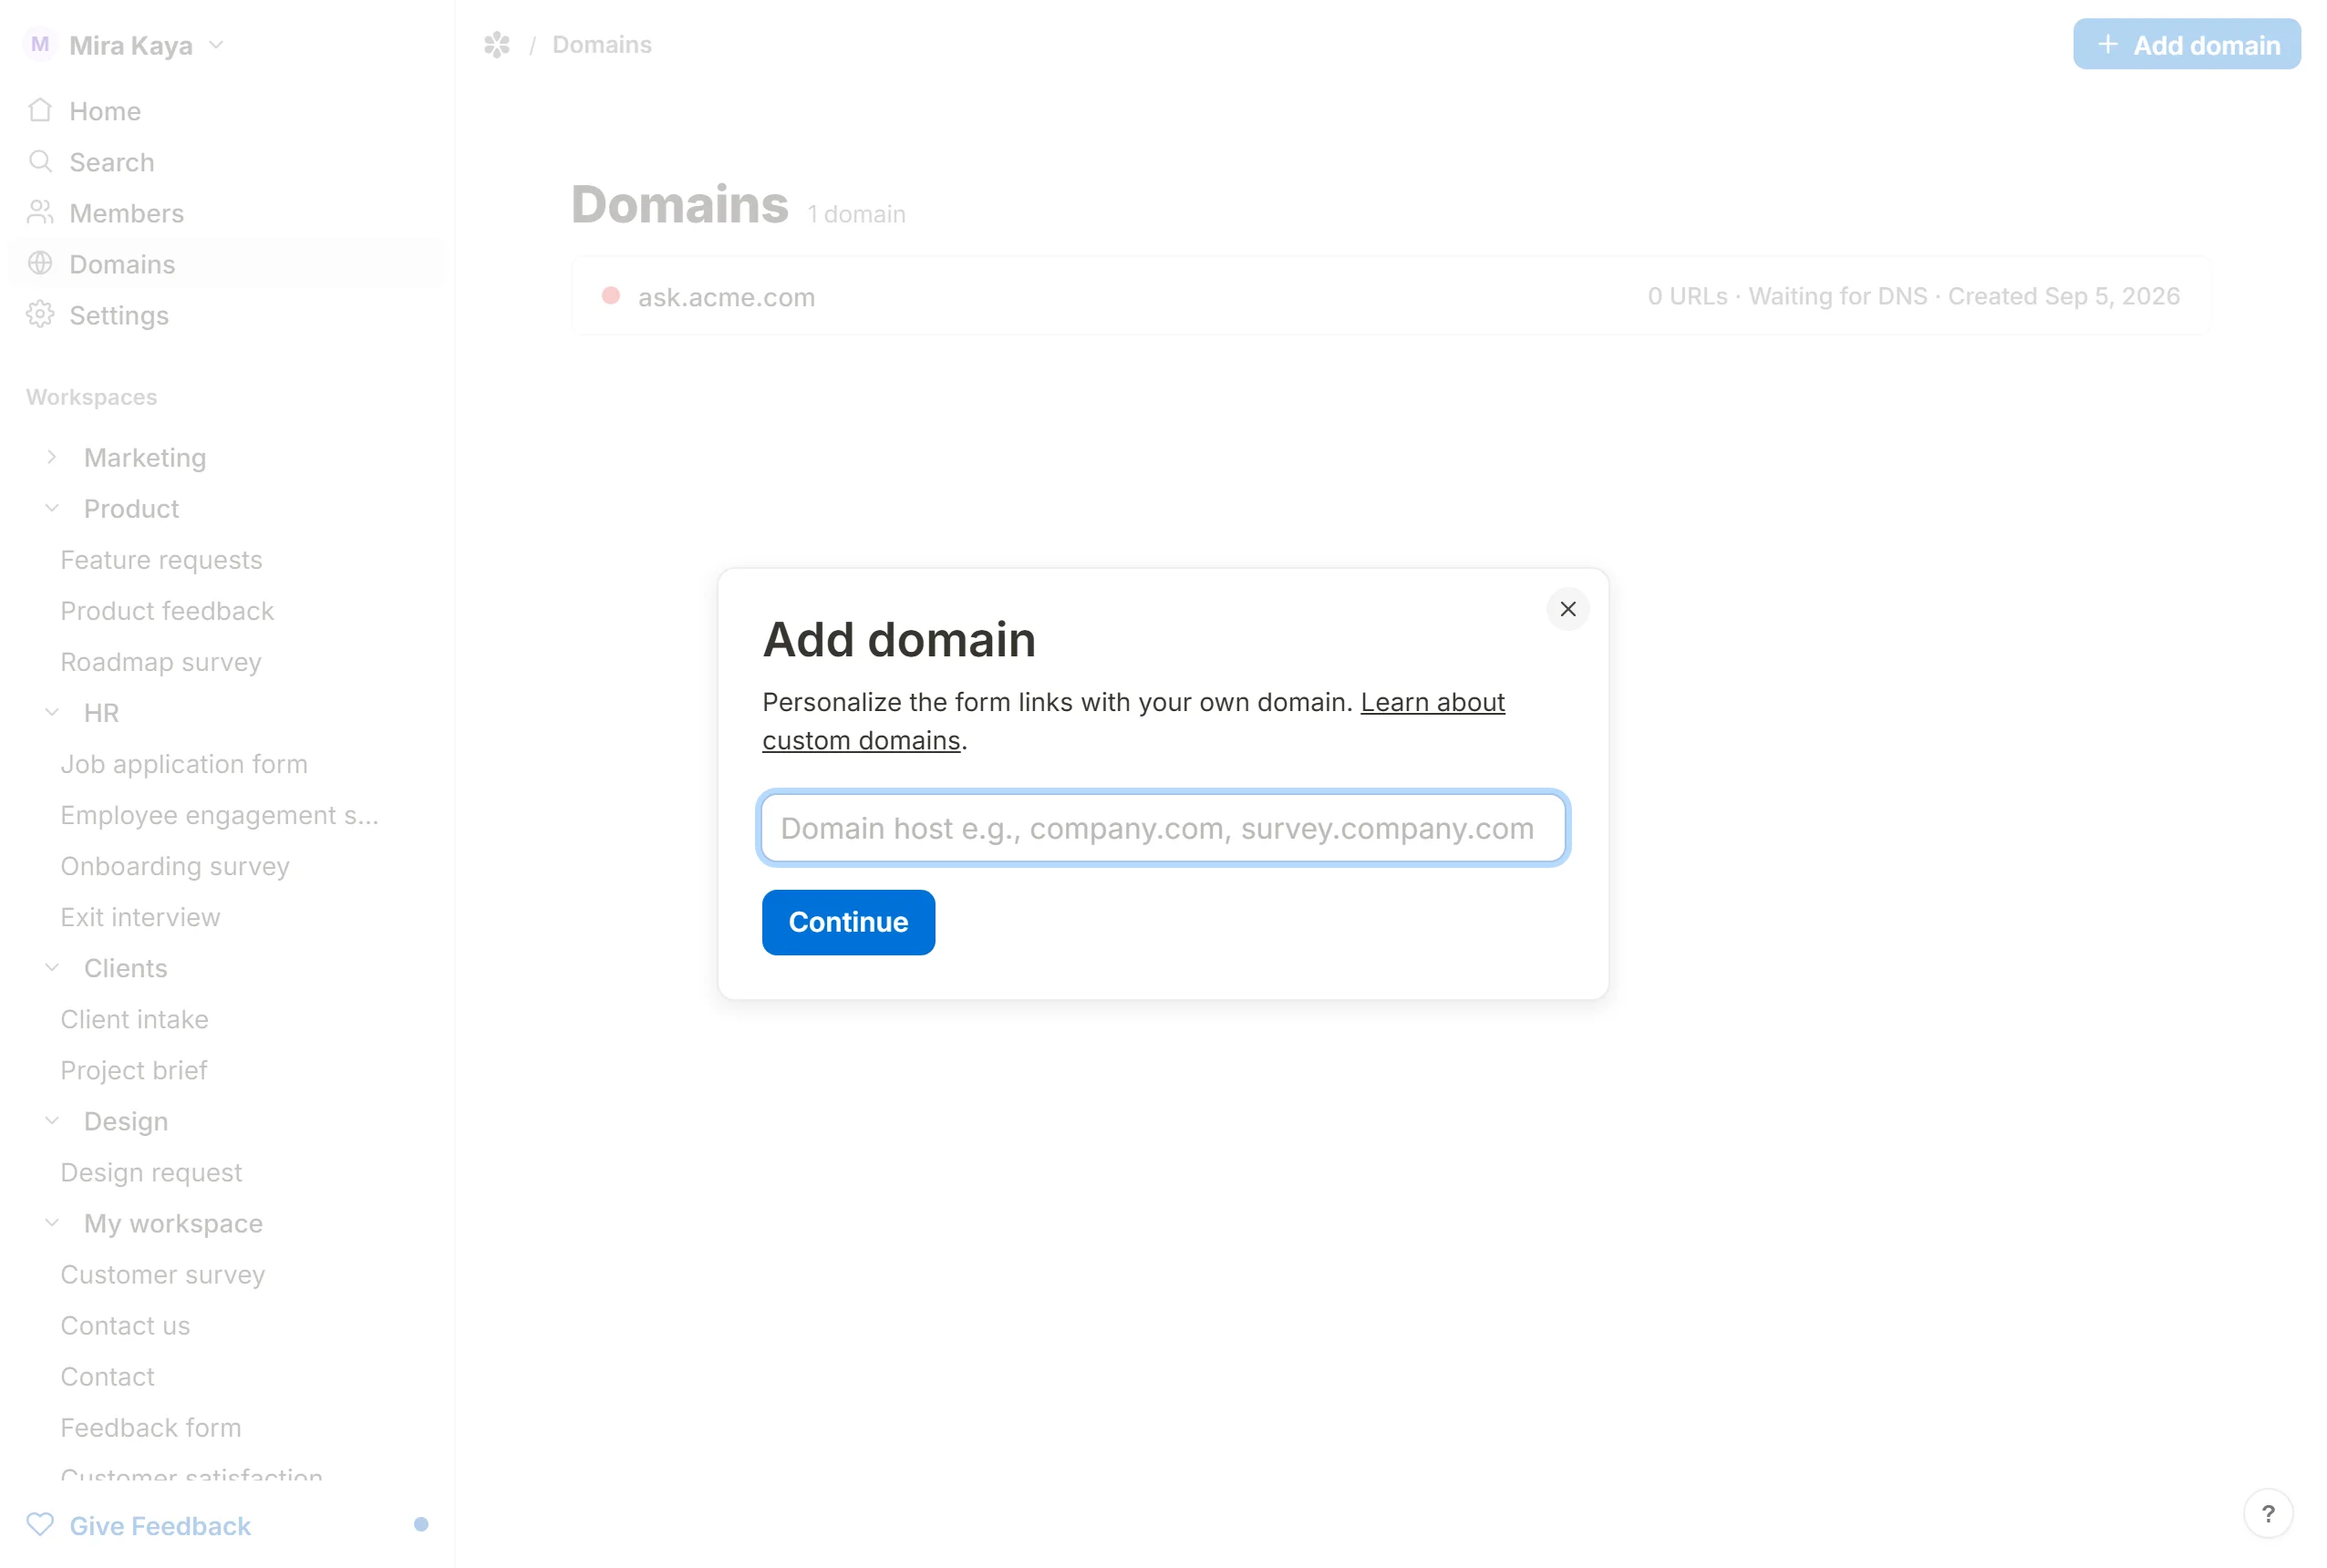
Either shape works:
- a root domain, such as
acme.com - a subdomain, such as
ask.acme.com
Type the hostname alone. If you paste a full URL, the scheme, port and path are stripped for you. Press Continue and you land on the new domain's page. The same hostname can only be connected to one workspace; trying it a second time answers "That domain is already connected."
2. Add DNS records at your domain provider
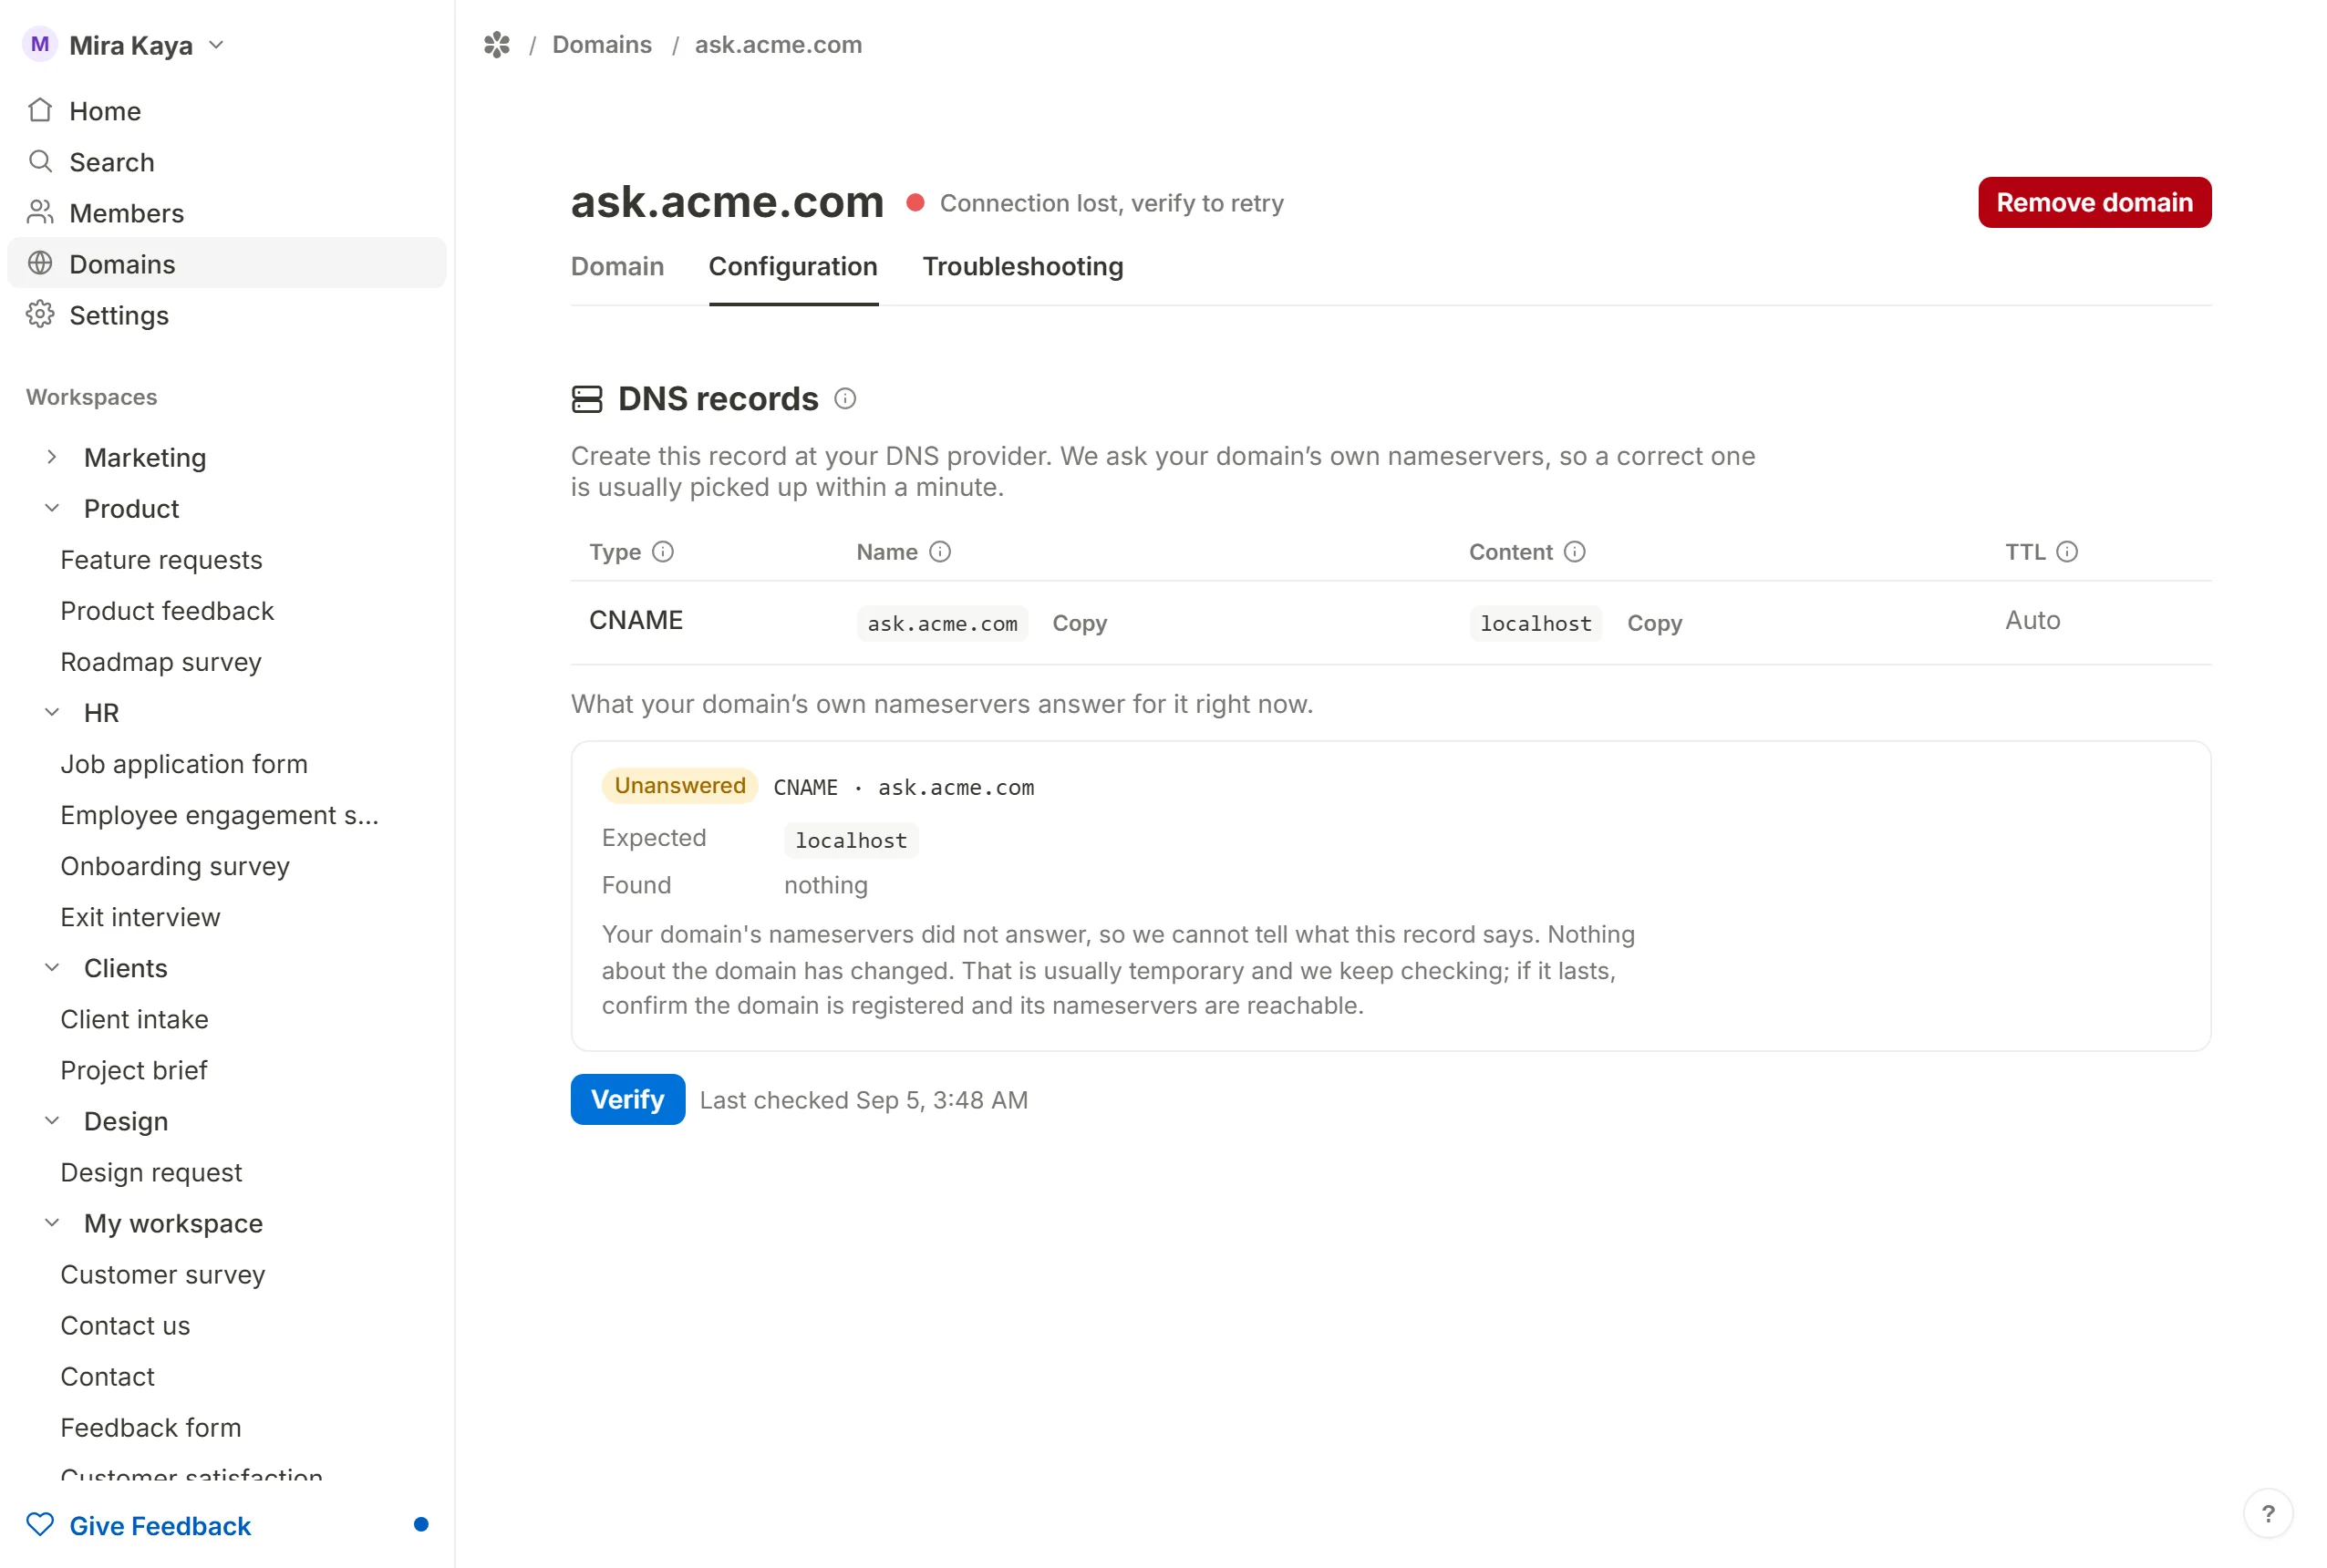
A domain that is not active yet opens on its Configuration tab. It lists the records to create at your DNS provider, with a copy button beside each value, in the columns most providers use: Type, Name, Content and TTL.
- A subdomain needs one
CNAMErecord pointing at the hostname the page gives you. - A root domain needs a provider that supports ALIAS, ANAME or CNAME flattening for the same record, or, where a plain address is published for it, a single
Arecord instead. The page tells you which of the two applies.
Leave the TTL at your provider's default; there is nothing to tune.
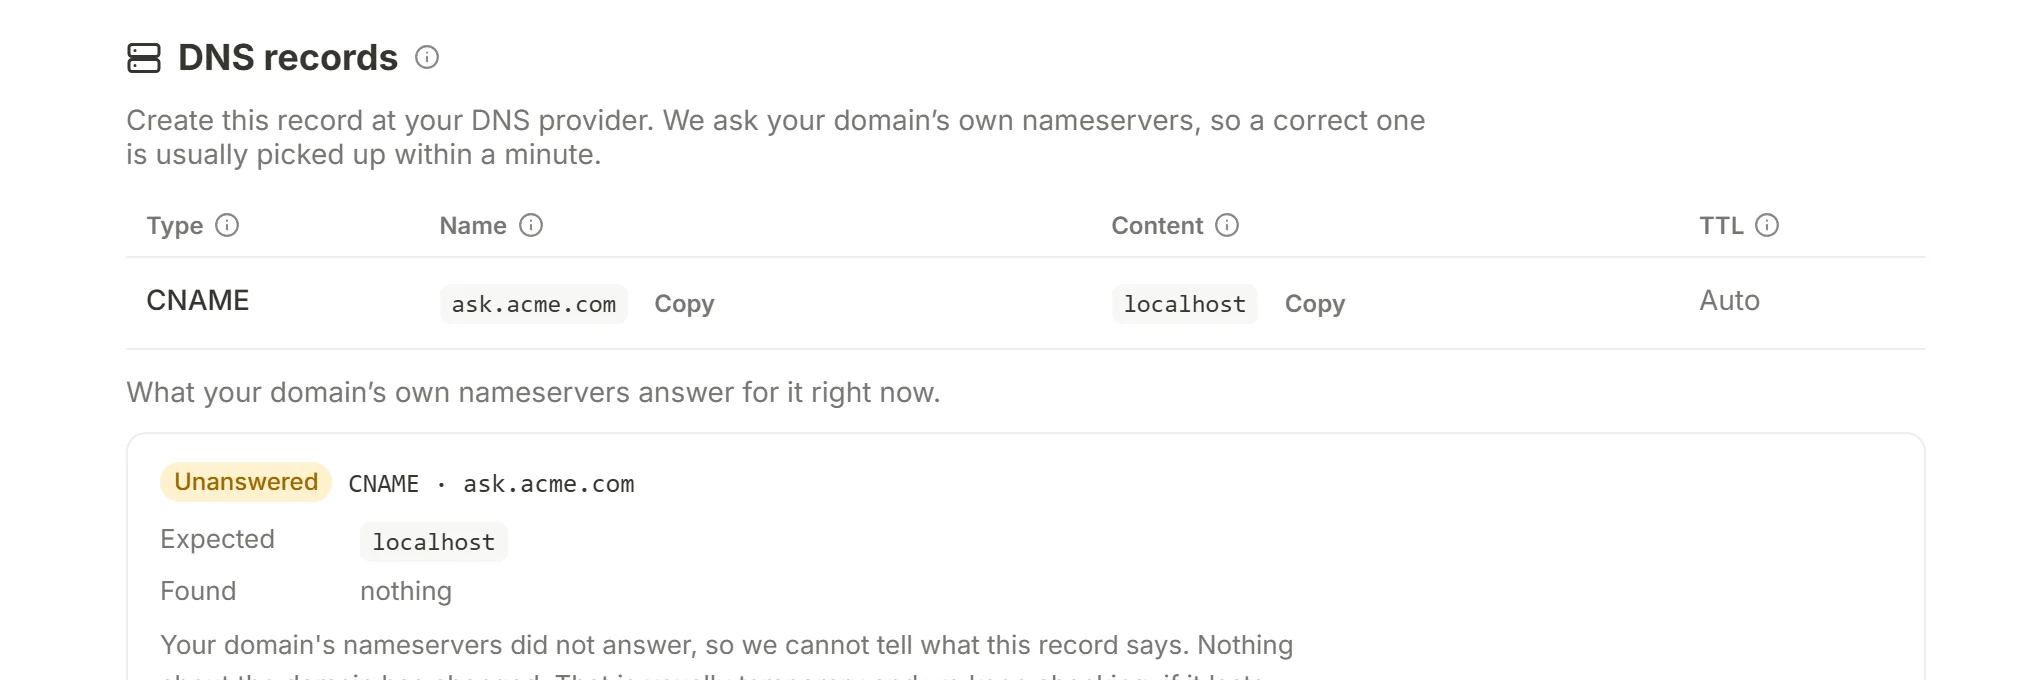
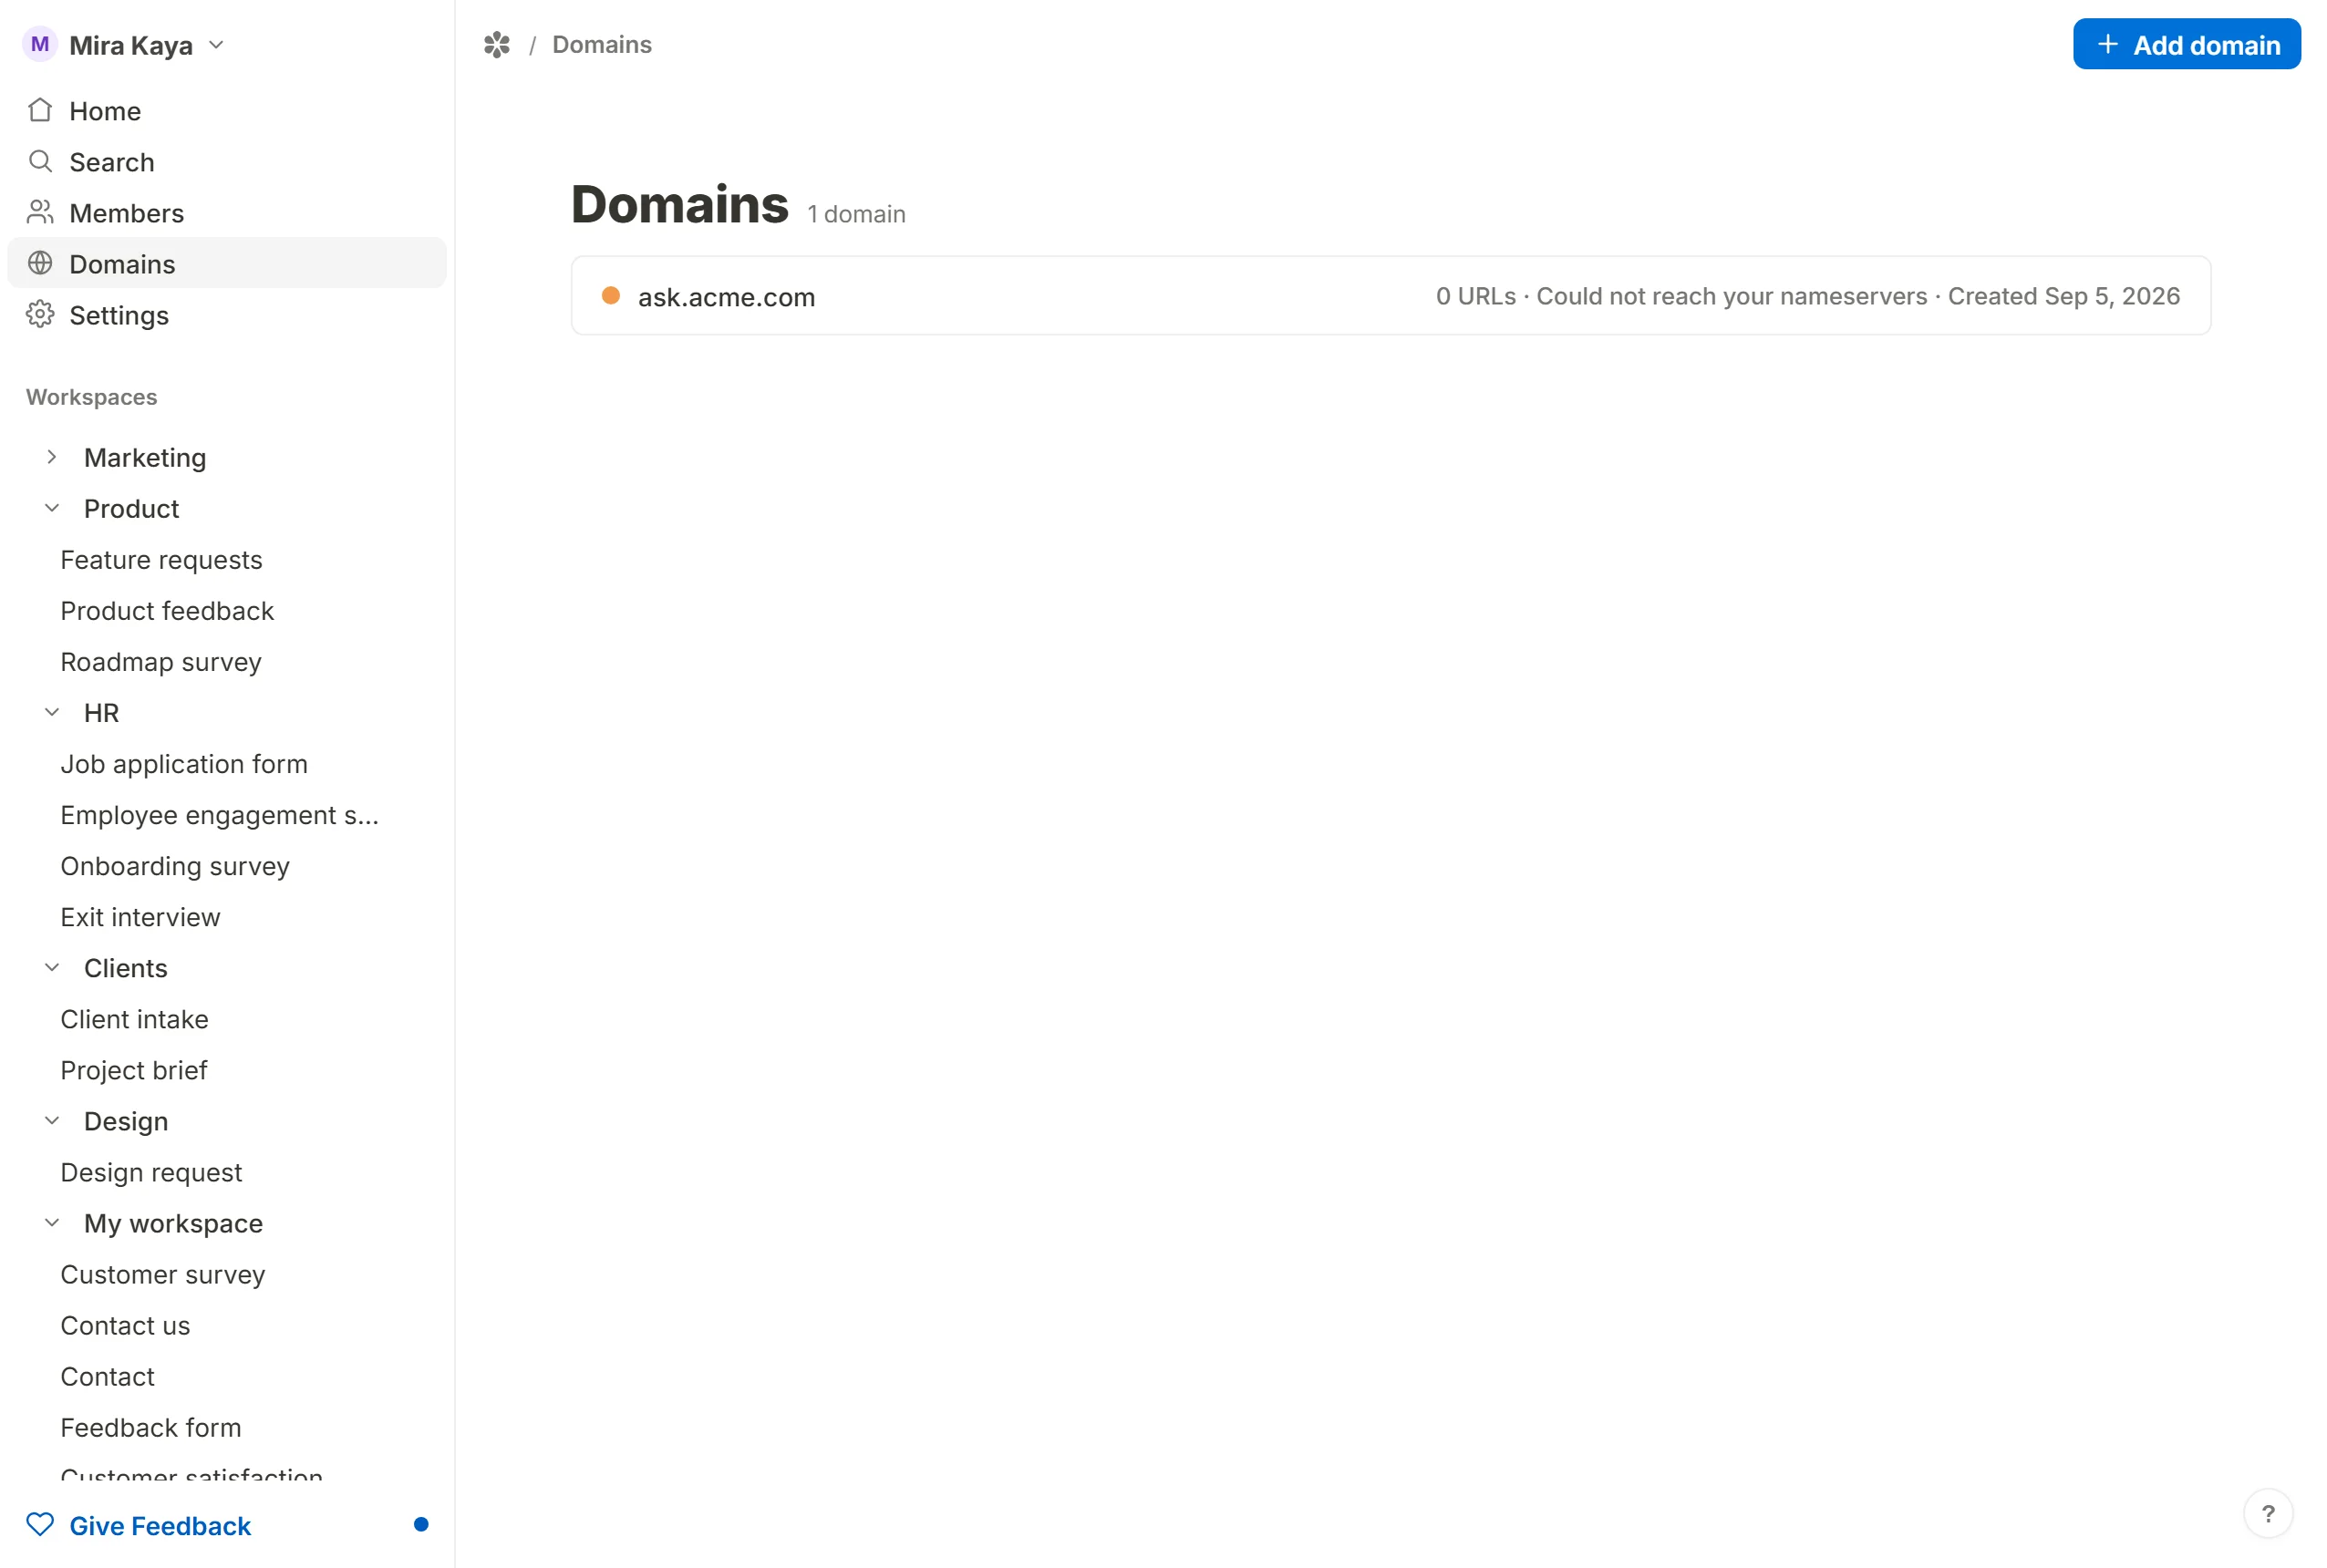
Once the records are in place, wait for verification. Tinyform asks your domain's own nameservers rather than a public resolver, so a correct record is usually picked up within a minute instead of after a cache expires. The check runs on its own, frequently at first and less often as time passes, and Verify runs it on demand.
When the name resolves, the domain turns green and is active. The HTTPS certificate is issued the first time the domain is visited and renewed before it expires. There is no separate step for you.
A domain that was active and stops resolving turns red with "Connection lost, verify to retry".
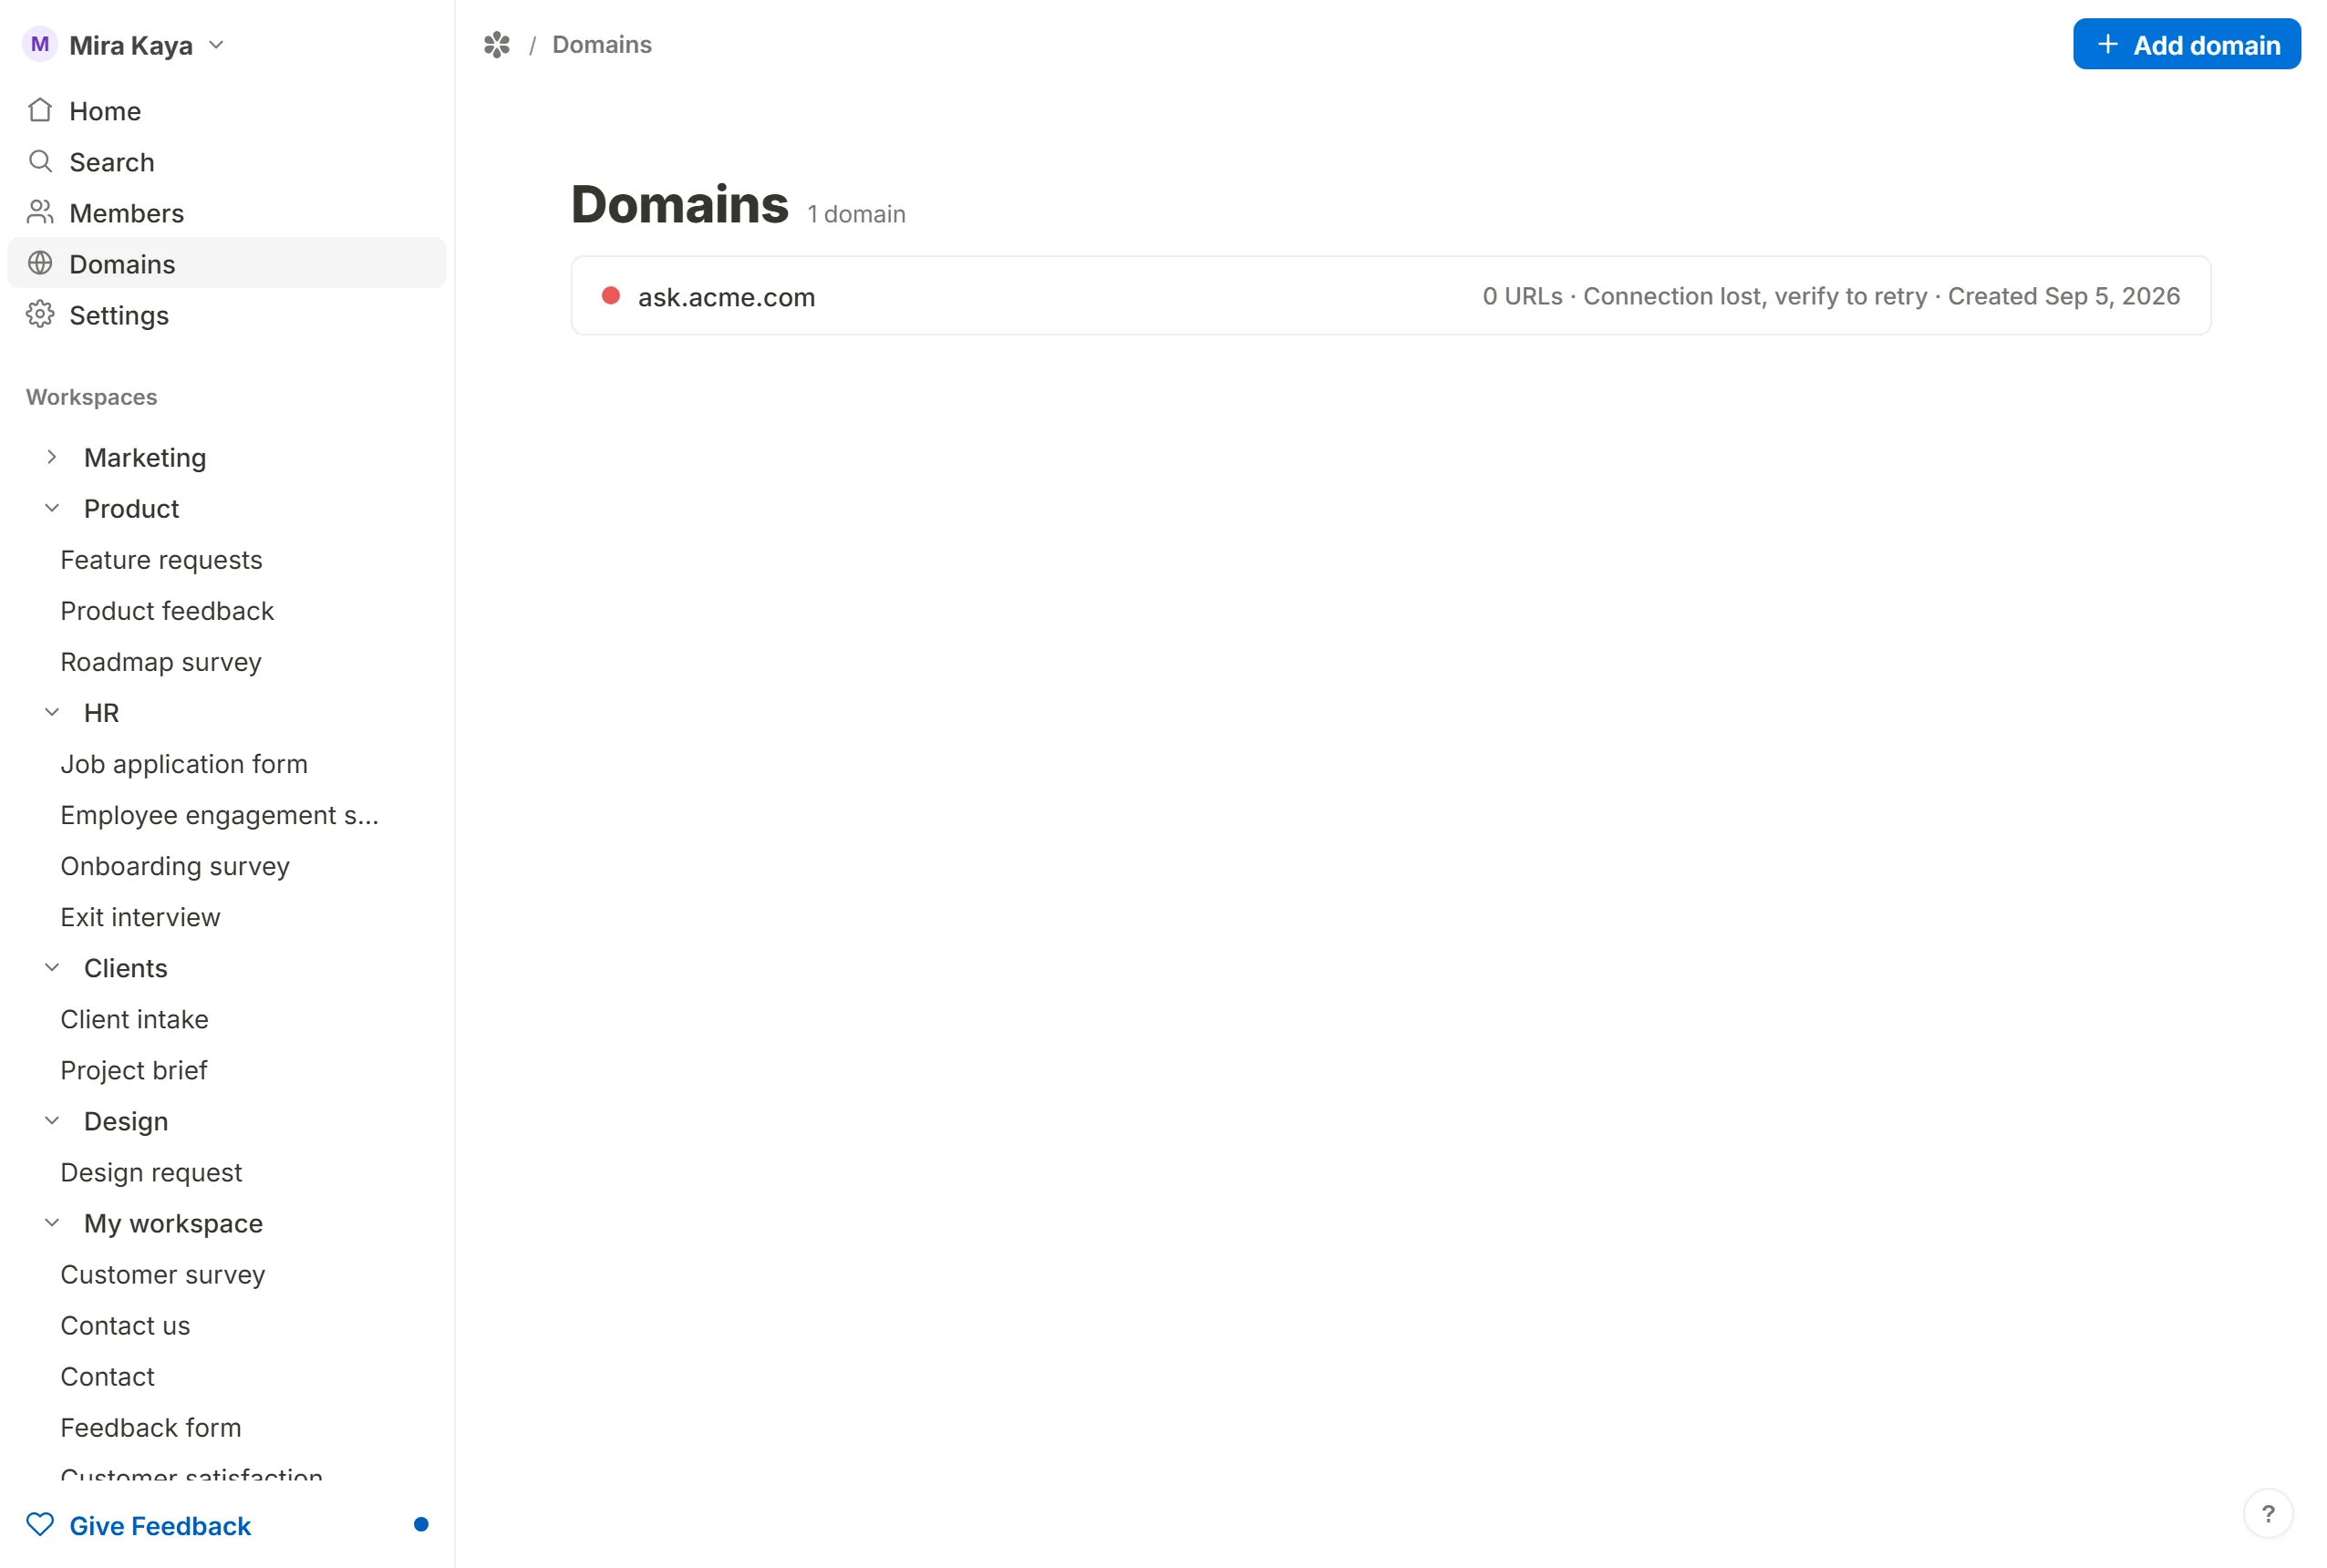
Compare the records at your provider with the ones on the page. Under the table, the Configuration tab shows what your nameservers currently answer for each record, so a typo or a leftover record is named rather than guessed at. Fix it and press Verify again.
Domain status
| Dot | Meaning |
|---|---|
| 🔴 Waiting for DNS | The records have not been found yet, or one points somewhere else |
| 🟠 Could not reach your nameservers | The lookup got no answer; nothing about the domain changed, and the check keeps retrying |
| 🟢 Active | The domain resolves and serves your forms |
| 🔴 Connection lost, verify to retry | A domain that was active has stopped resolving |
Each record also carries its own badge: Found, Missing, Mismatch (the name points elsewhere) or Unanswered (the nameservers did not reply). The Troubleshooting tab runs the same lookup live whenever you open it and has a Check again button, which is useful while you watch a record change, or to inspect a domain that is already active.
3. Configure your domain settings
An active domain opens on its Domain tab. This is where the URLs, the metadata and the general settings live.
Pretty URLs
Each row maps one of your published forms to a path on the domain. Pick the form on the left, type the slug on the right after the fixed https://yourdomain/ part, and press Save changes. + Add another page adds a row. A slug is 1 to 64 characters of lowercase letters, digits and dashes, and only a published form from this workspace can be picked; the row refuses a slug already used on the same domain.
The first URL on the list also answers the bare hostname, so a visitor who types the domain alone lands on a form rather than an error.
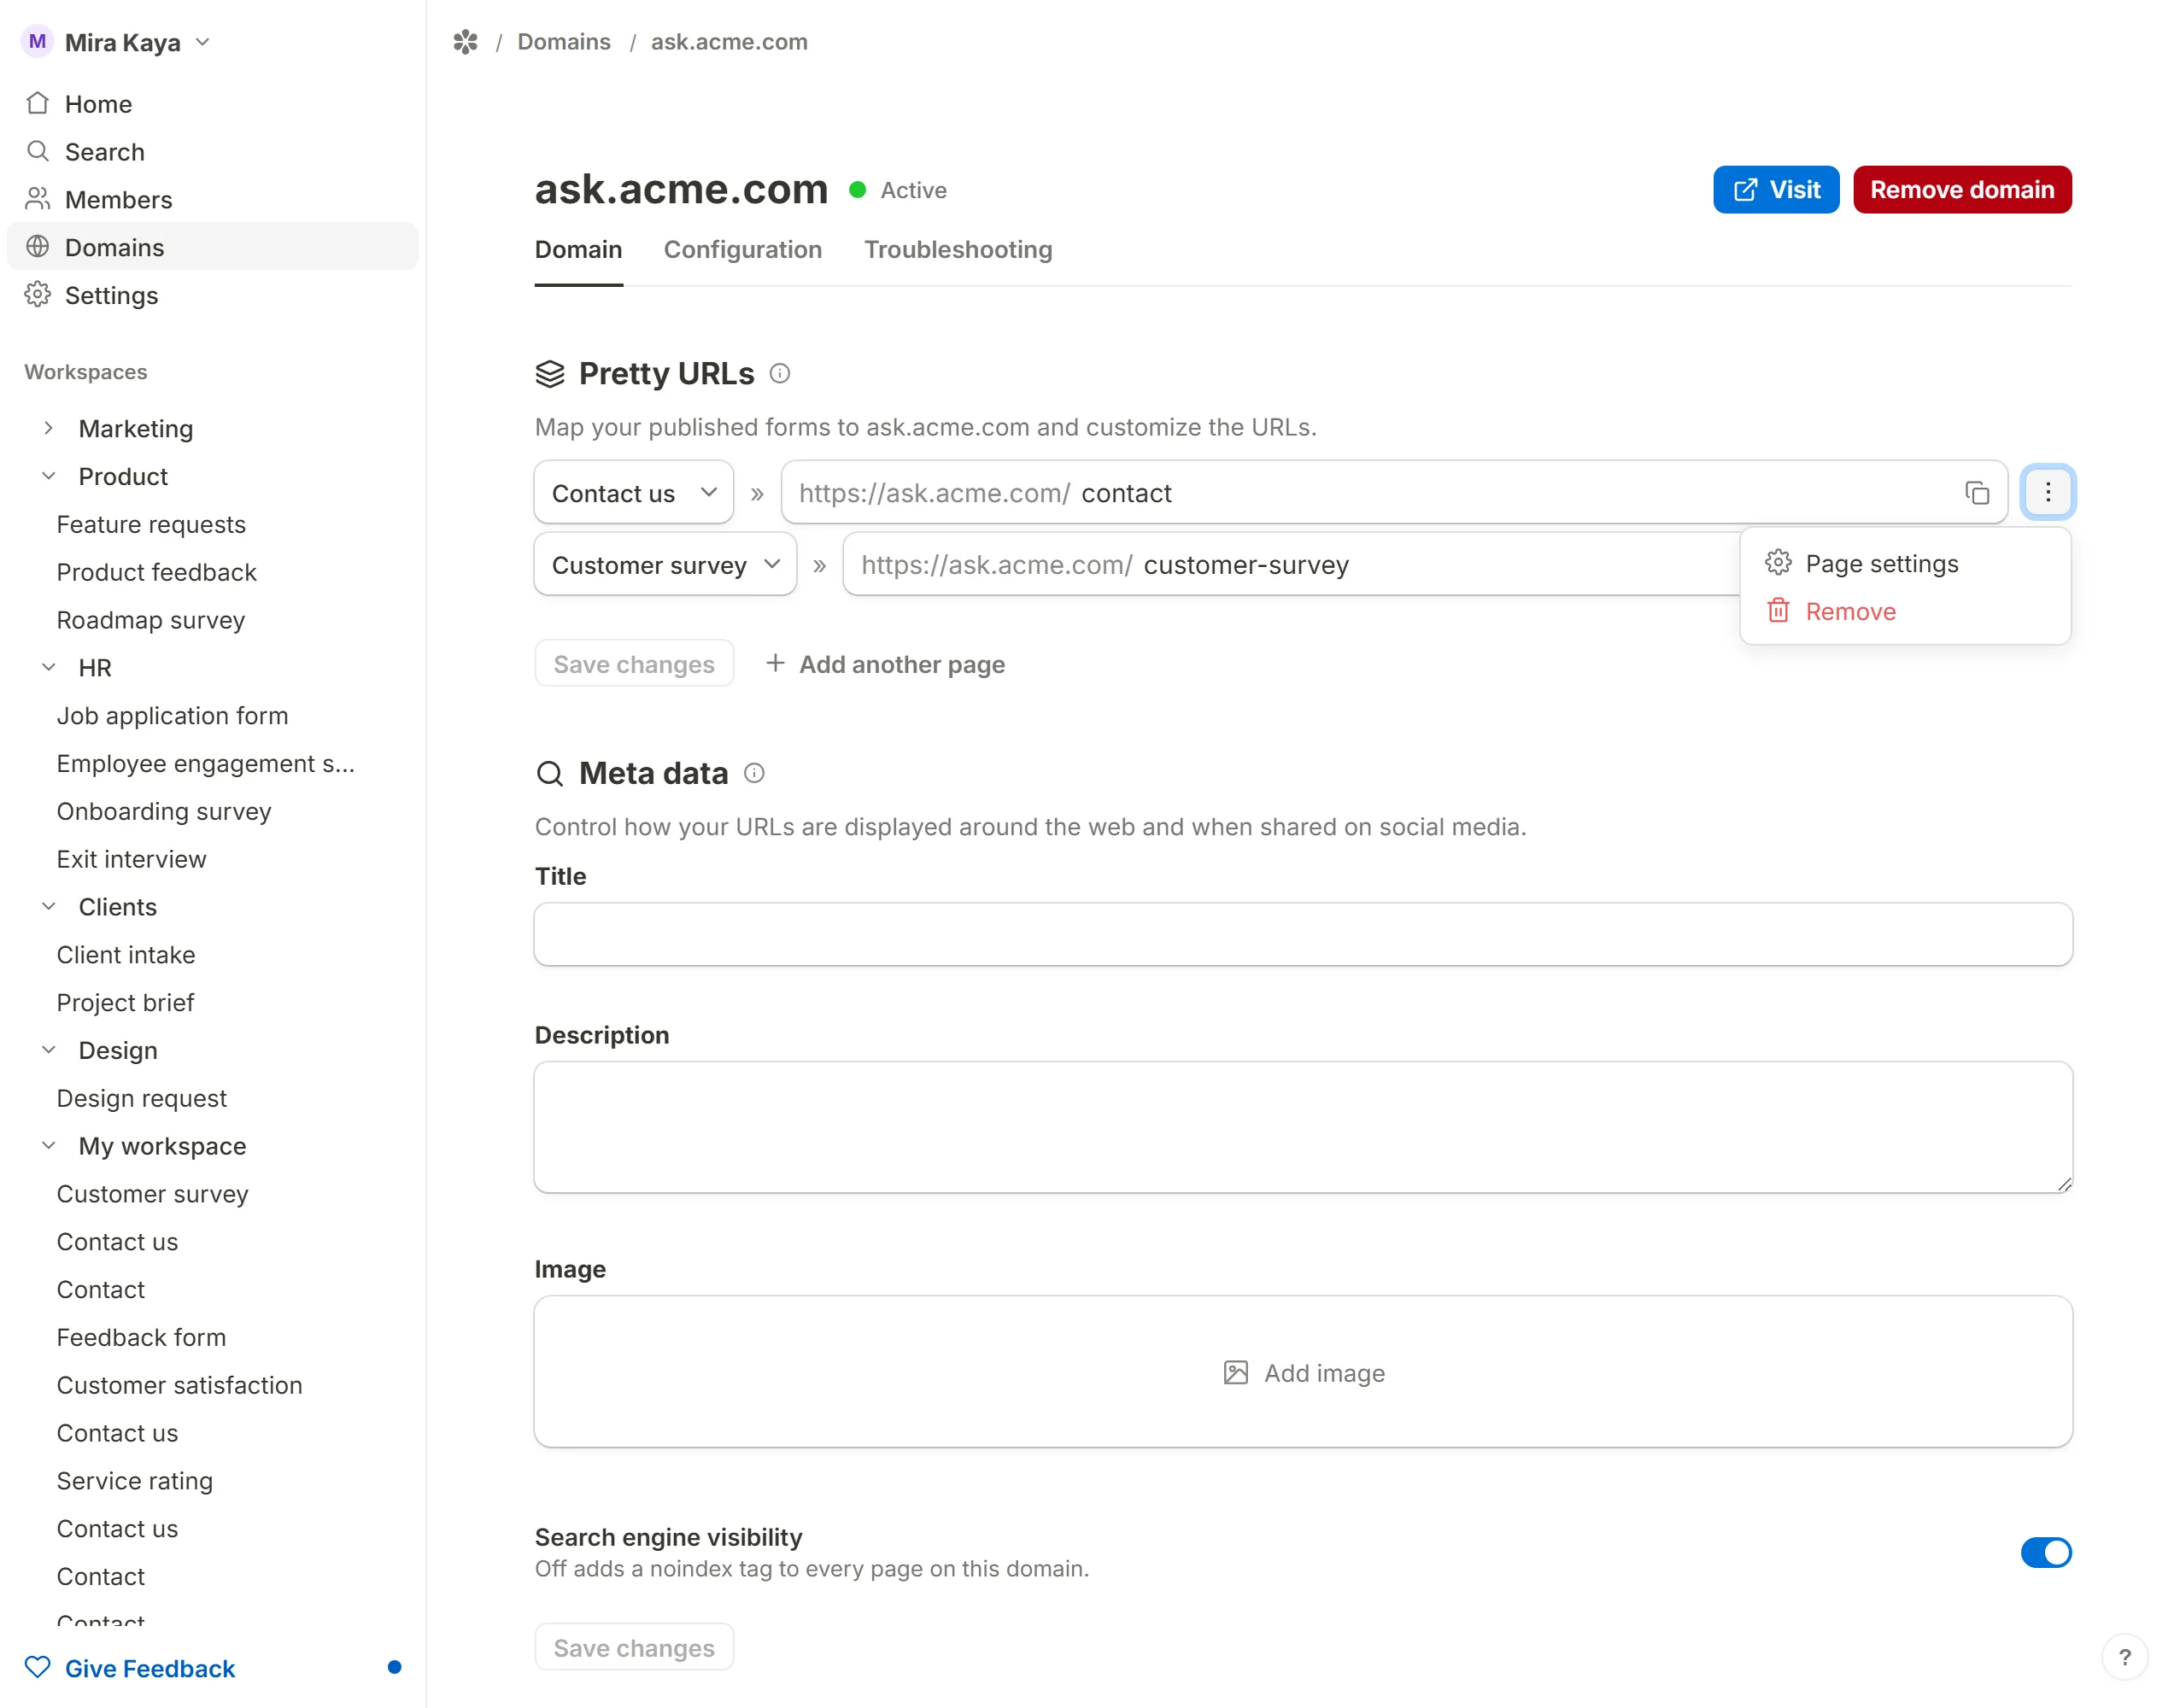
The three-dot menu at the end of a row holds Page settings, which opens that URL's own metadata, and Remove.
A form keeps answering at its ordinary /r/<id> link as well. The domain adds an address; it does not take one away.
Metadata
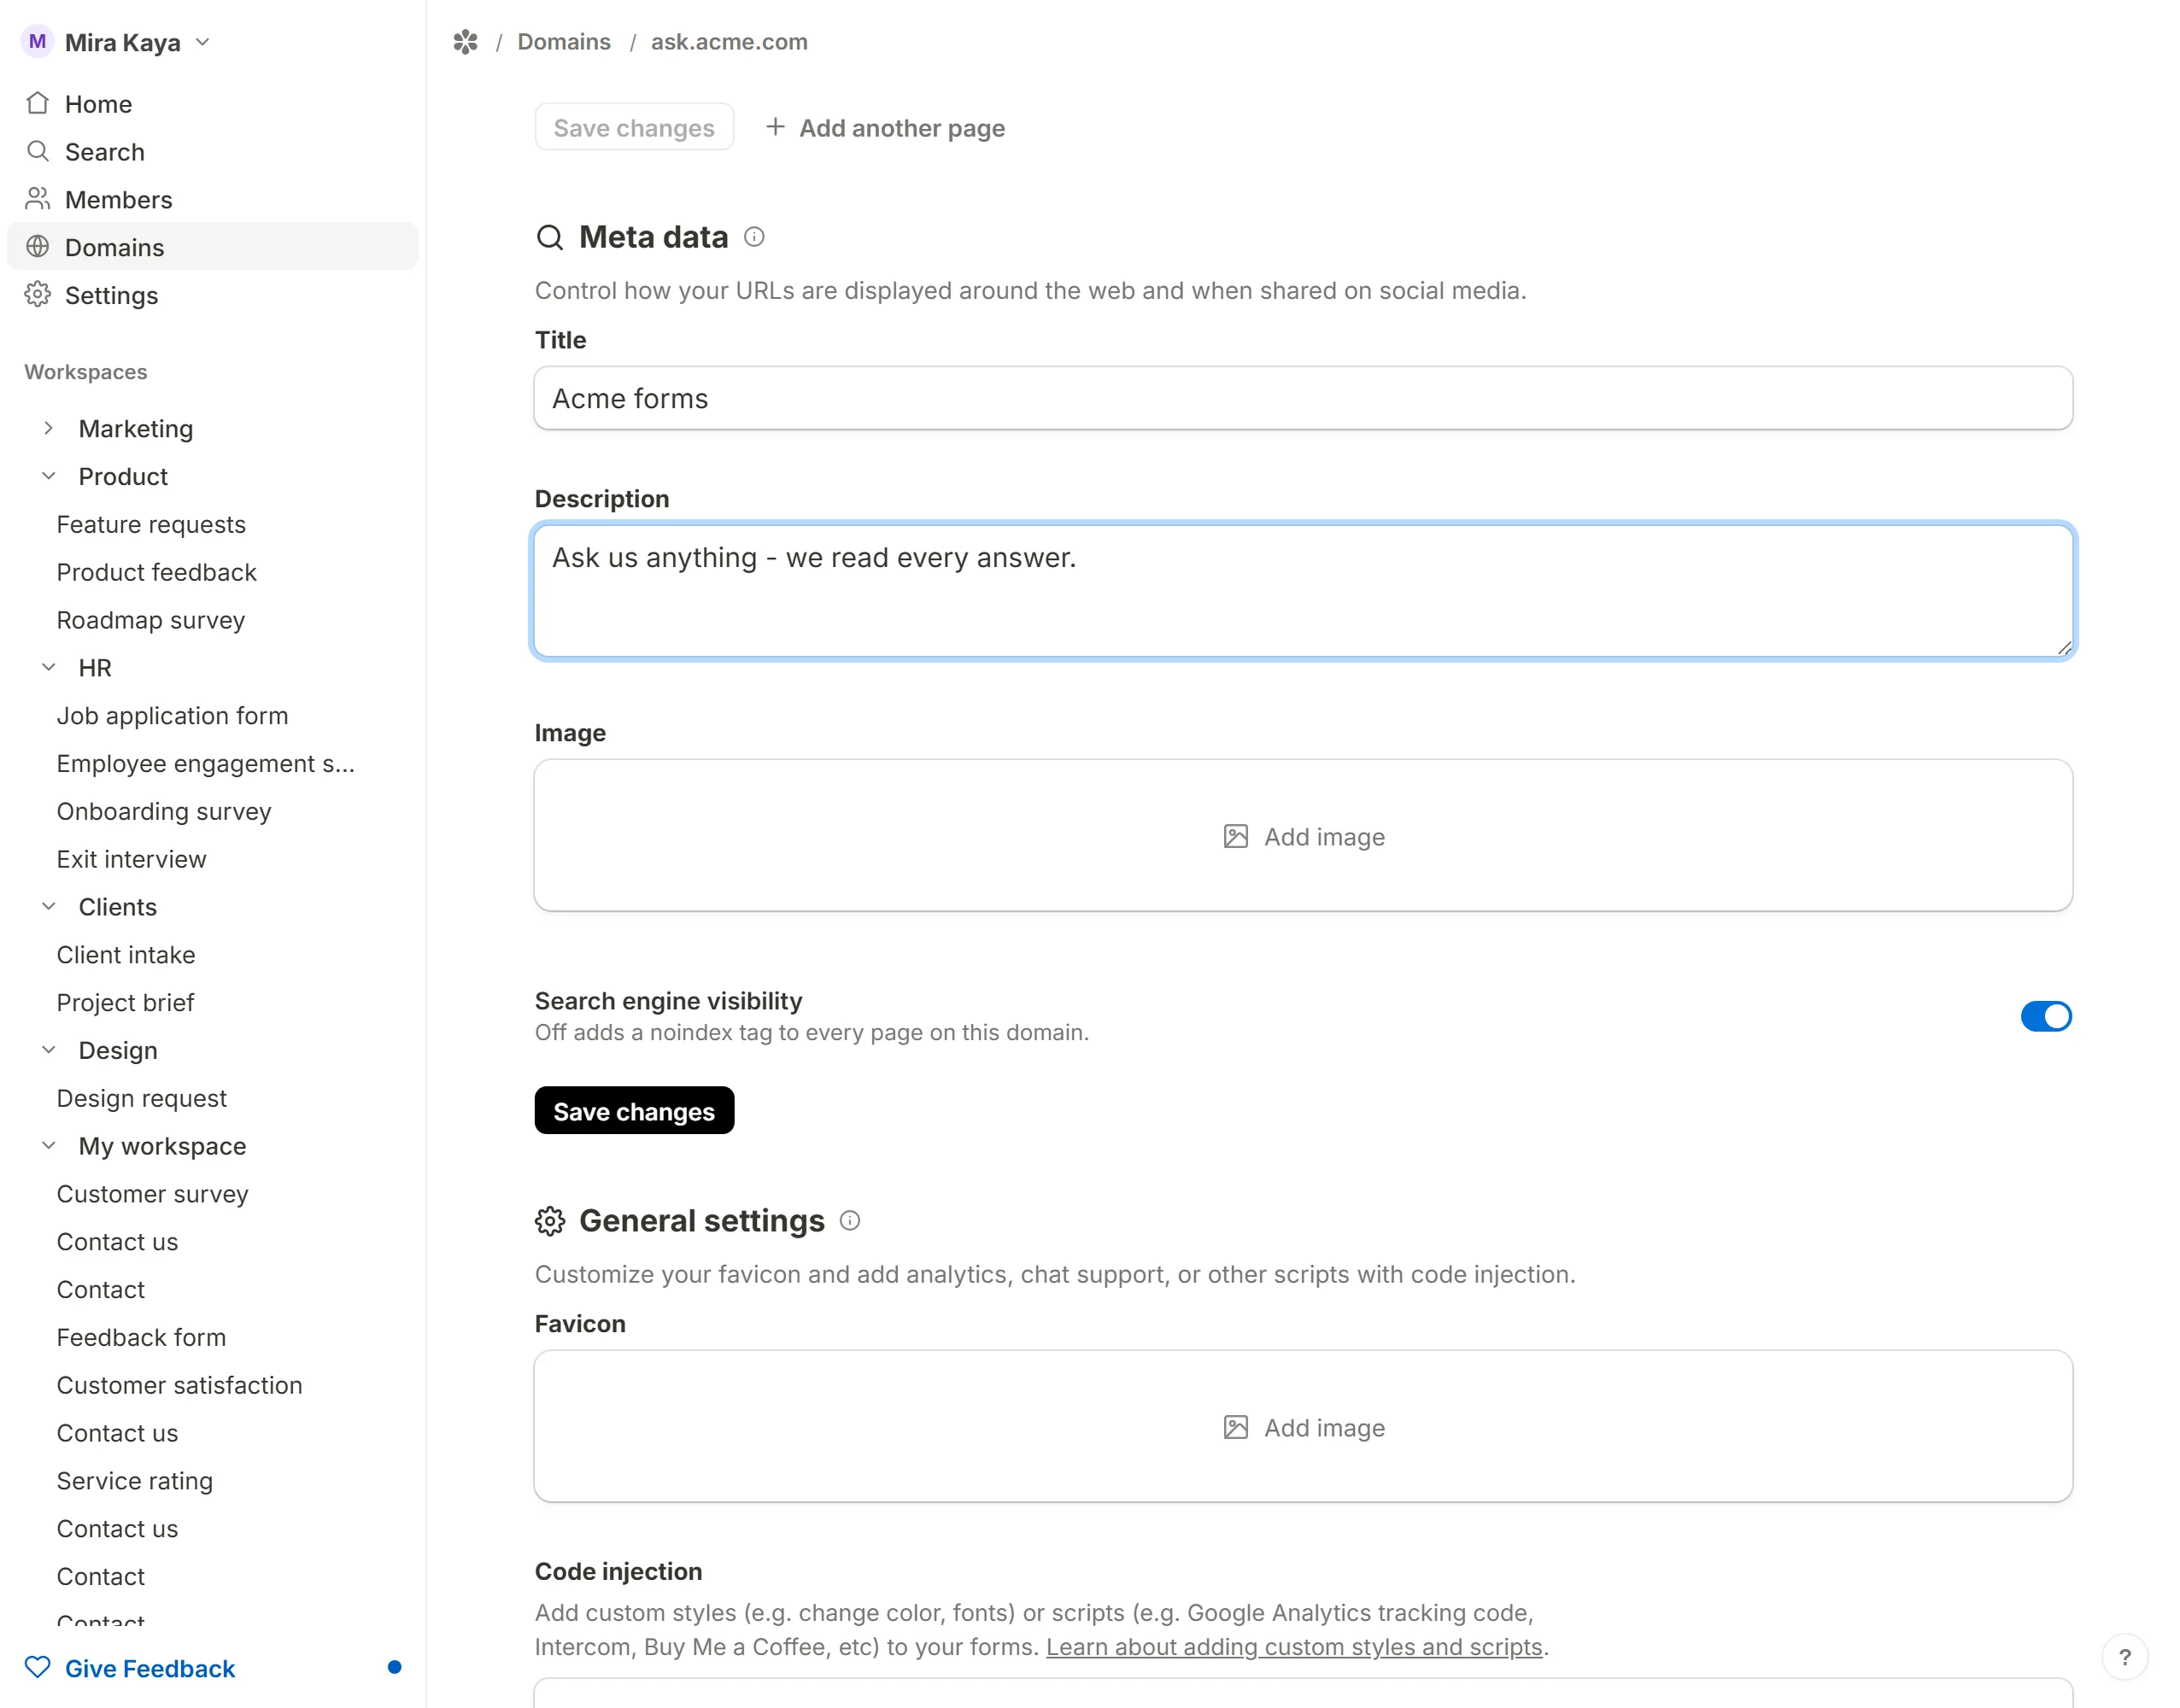
When somebody pastes a link into a chat or a social post, the receiving app draws a card from the page's title, description and image. You can set those once for the whole domain and override them per URL.
Domain metadata
On the Domain tab, scroll to Meta data. It has a Title, a Description and an Image, and they apply to every page served on this domain. Press Save changes when you are done.
Form metadata
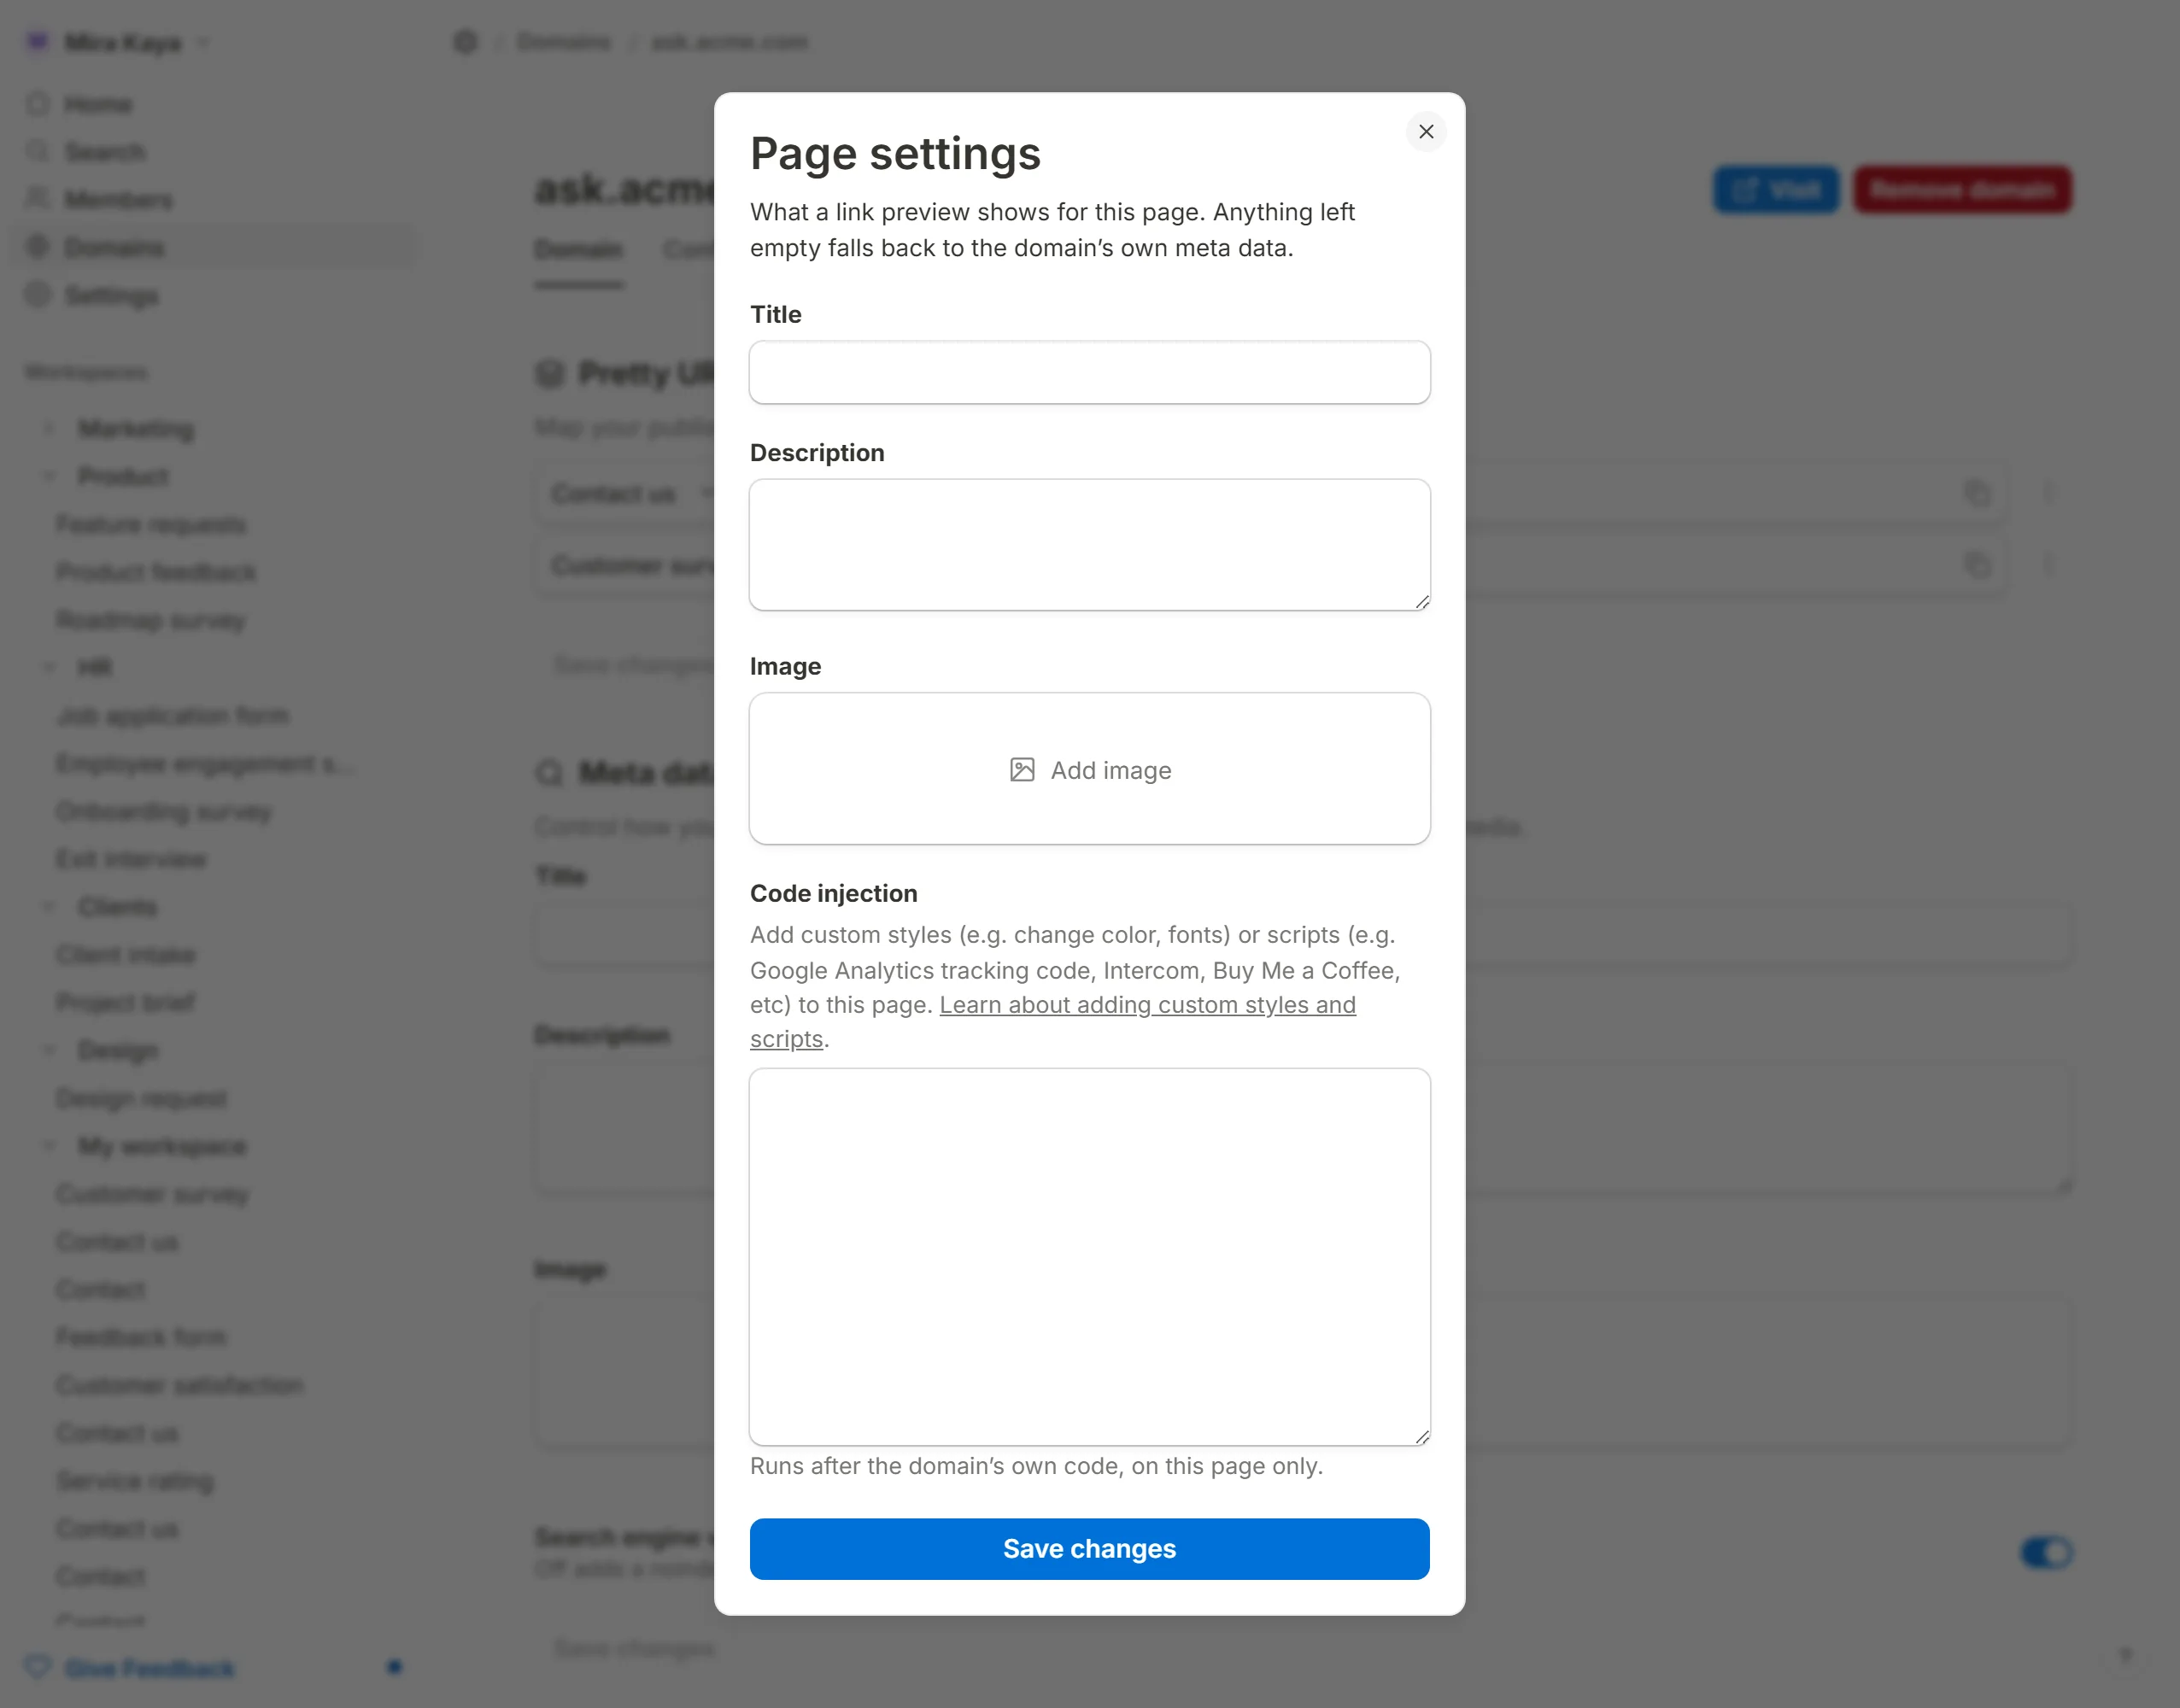
To give a single URL its own card, open the three-dot menu on its row and choose Page settings. The dialog has the same three fields plus a code injection box for that page alone. Anything you leave empty falls back to the domain's values, and anything the domain leaves empty falls back to the form's own link preview from its Share tab, so a form never loses the card it already had when it moves onto your domain.
Indexing
Pages on a connected domain are visible to search engines by default. To keep them out of search results:
Open the domain
Go toDomainsand click the domain's name.Find the switch
On theDomaintab, scroll toMeta data.Turn it off
Switch
Search engine visibilityoff. Every page on the domain then carries anoindextag. The switch saves on its own.
Hosting and HTTPS
Nothing moves: your forms are served from where they are served today, and the domain is a second front door to them. HTTPS is arranged for you — the certificate is issued on the domain's first visit and renewed before it expires, with nothing for you to buy, upload or renew.
4. Sending email from a custom domain
A connected domain can also send this workspace's notifications. Open the domain's Configuration tab and find Email sending domain: turning it on gives you four more records to create beside the ones above, and once the mail relay reports them as resolved, notifications@yourdomain becomes an option under From in any form's Settings → Email notifications.
It hangs off a domain you have already connected rather than being a setting of its own, because serving your forms on that domain already proved you control it. The two states are separate, and that is deliberate: a domain's own status is about serving forms, the email status is about sending mail, and DKIM records propagate on their own clock — a domain happily serving forms does not read as broken because its mail records are ten minutes behind. The status shown is what the relay itself reports, not what your DNS looks like from here.
A form whose sender was set individually keeps what it has; it does not switch to the new address on its own. And where sending from your own domain is not offered, the section is not drawn at all.
Separately from the address, a form sets the display name its notifications arrive under: open the form's Settings tab, turn on a notification under Email notifications, and fill in From name:. The address beside that field is the one this section is about. See Email notifications.
General settings
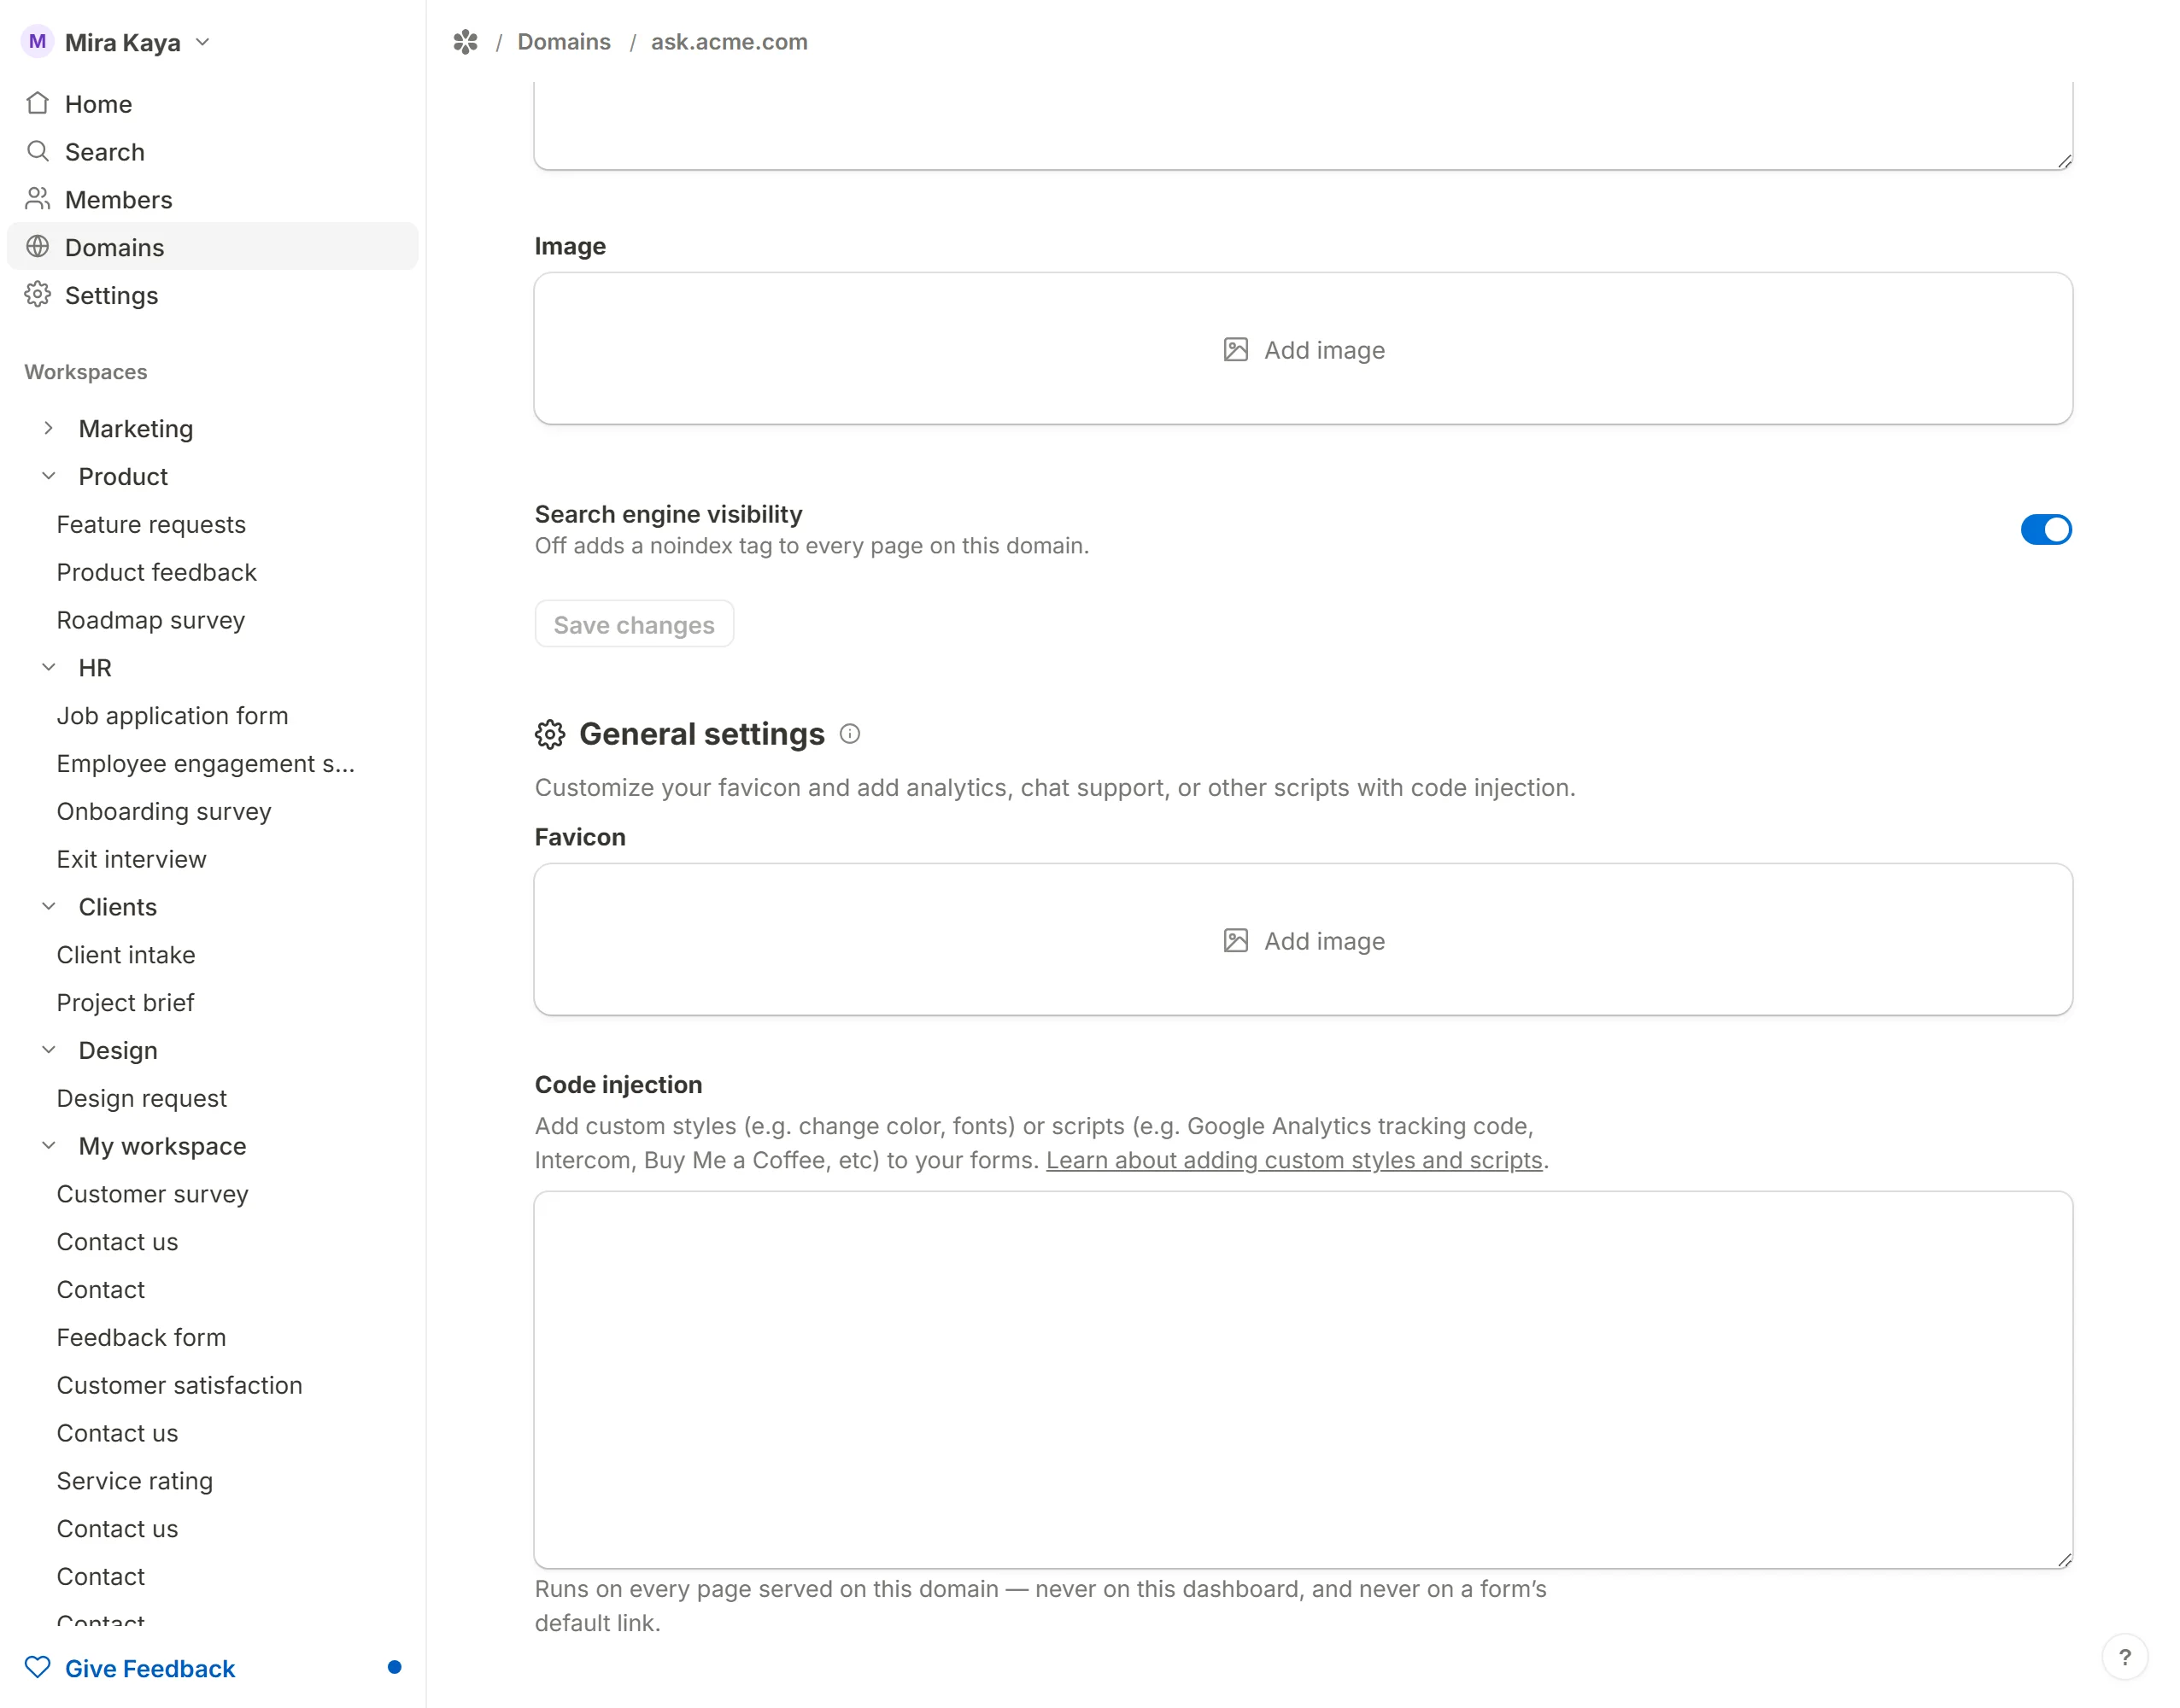
Below the metadata, the Domain tab has a General settings section for the two things that are not link-preview data.
Favicon
Upload a small square image and it becomes the icon in the browser tab for every page on the domain. A crisp square of at least 60 by 60 pixels works well.
Code injection
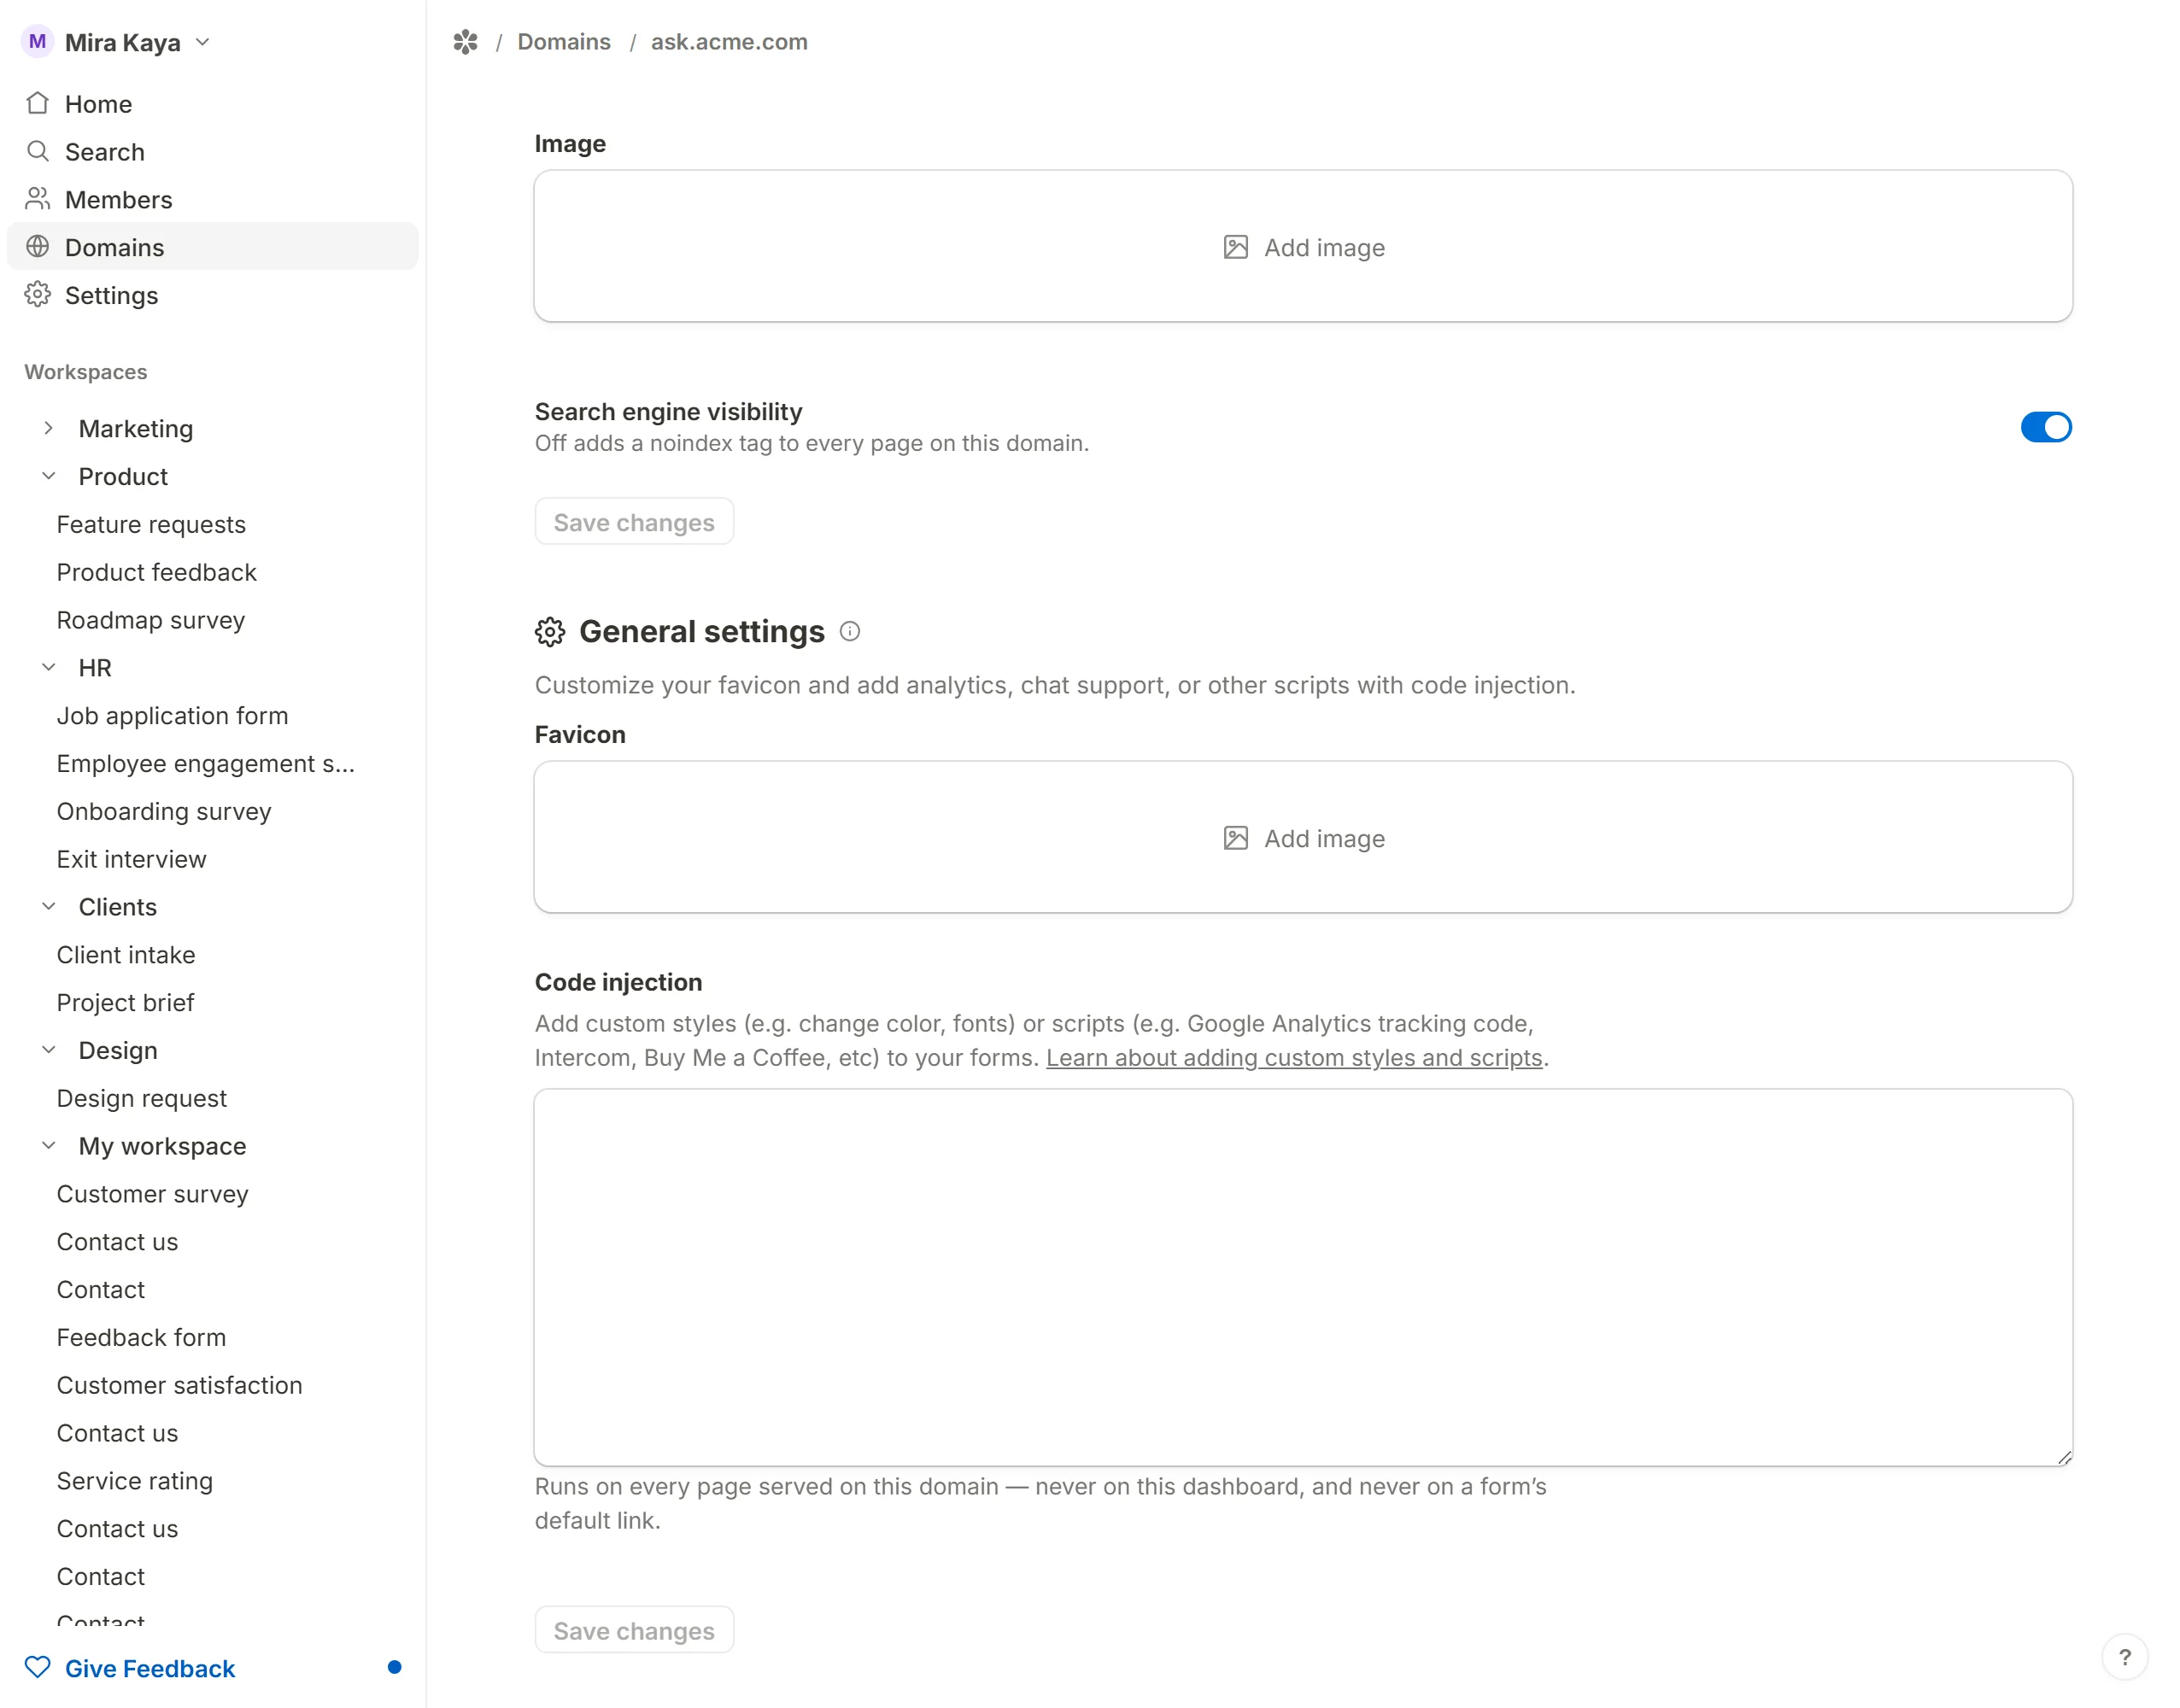
The Code injection box takes markup, styles or scripts that should run on every page served on this domain: an analytics tag, a chat widget, a stylesheet that adjusts a colour or a font. It never runs on the dashboard, and never on a form's default /r/<id> link. The Page settings dialog has a box of its own that runs after the domain's code, on that one page only. Read Code injection for what goes in it and how the scripts are loaded.
Frequently asked questions
Can I use my main domain if it already hosts a website?
No. A hostname resolves to one place. If mysite.com already serves your website, pointing it at Tinyform would take that site offline, and the check would report a mismatch as long as the old record stays.
Connect a subdomain instead: forms.mysite.com or survey.mysite.com, with a CNAME record pointing at the hostname the Configuration tab shows. A subdomain is independent of the root, so nothing about your existing site changes.
Why can't I reuse a path from a form I deleted?
Deleting a form does not free the path it was mapped to. Open Domains, click the domain, find the row with that slug, open its three-dot menu and choose Remove. The slug is free the moment the row is gone.
Can two workspaces share one domain?
No. A hostname is connected to one workspace at a time, and adding one that is already connected answers "That domain is already connected." If a subdomain you expected to be free is refused, check whether another workspace on the same install already holds it.
In this section
Code injection has a page of its own: Code injection covers what the box accepts, where the code runs, and the difference between the domain's box and a page's.