Code injection
Add scripts and styles to every form served on a connected custom domain, or to one page on it, from the domain's settings.
A form served on a custom domain can carry code of your own. The domain's settings have a Code injection box, and whatever you put there, a stylesheet or a script, is added to every page Tinyform serves on that domain. A second box on each pretty URL does the same for one page only. For example:
- Analytics tracking snippets
- Custom events of your own
- Styles beyond what the Custom CSS box offers
- A font hosted elsewhere
- Widgets such as a chat bubble or a tip jar
Where the code runs
Injected code runs on every page served on that domain and nowhere else: never on the dashboard, and never on a form's default /r/<id> link. If a form is reachable both ways, only visitors on the custom domain get the code. An embed or a popup picks it up when its Custom domain switch is on, because the frame is then loaded from that domain.
How to inject code
Set up your custom domain first, then open Domains in the sidebar.
On the domain
Open the domain and scroll down to General settings. Beside the domain's default title, description and link-preview image sit Search engine visibility, which adds a noindex tag to every page on the domain when switched off, the domain's Favicon, and the Code injection box.
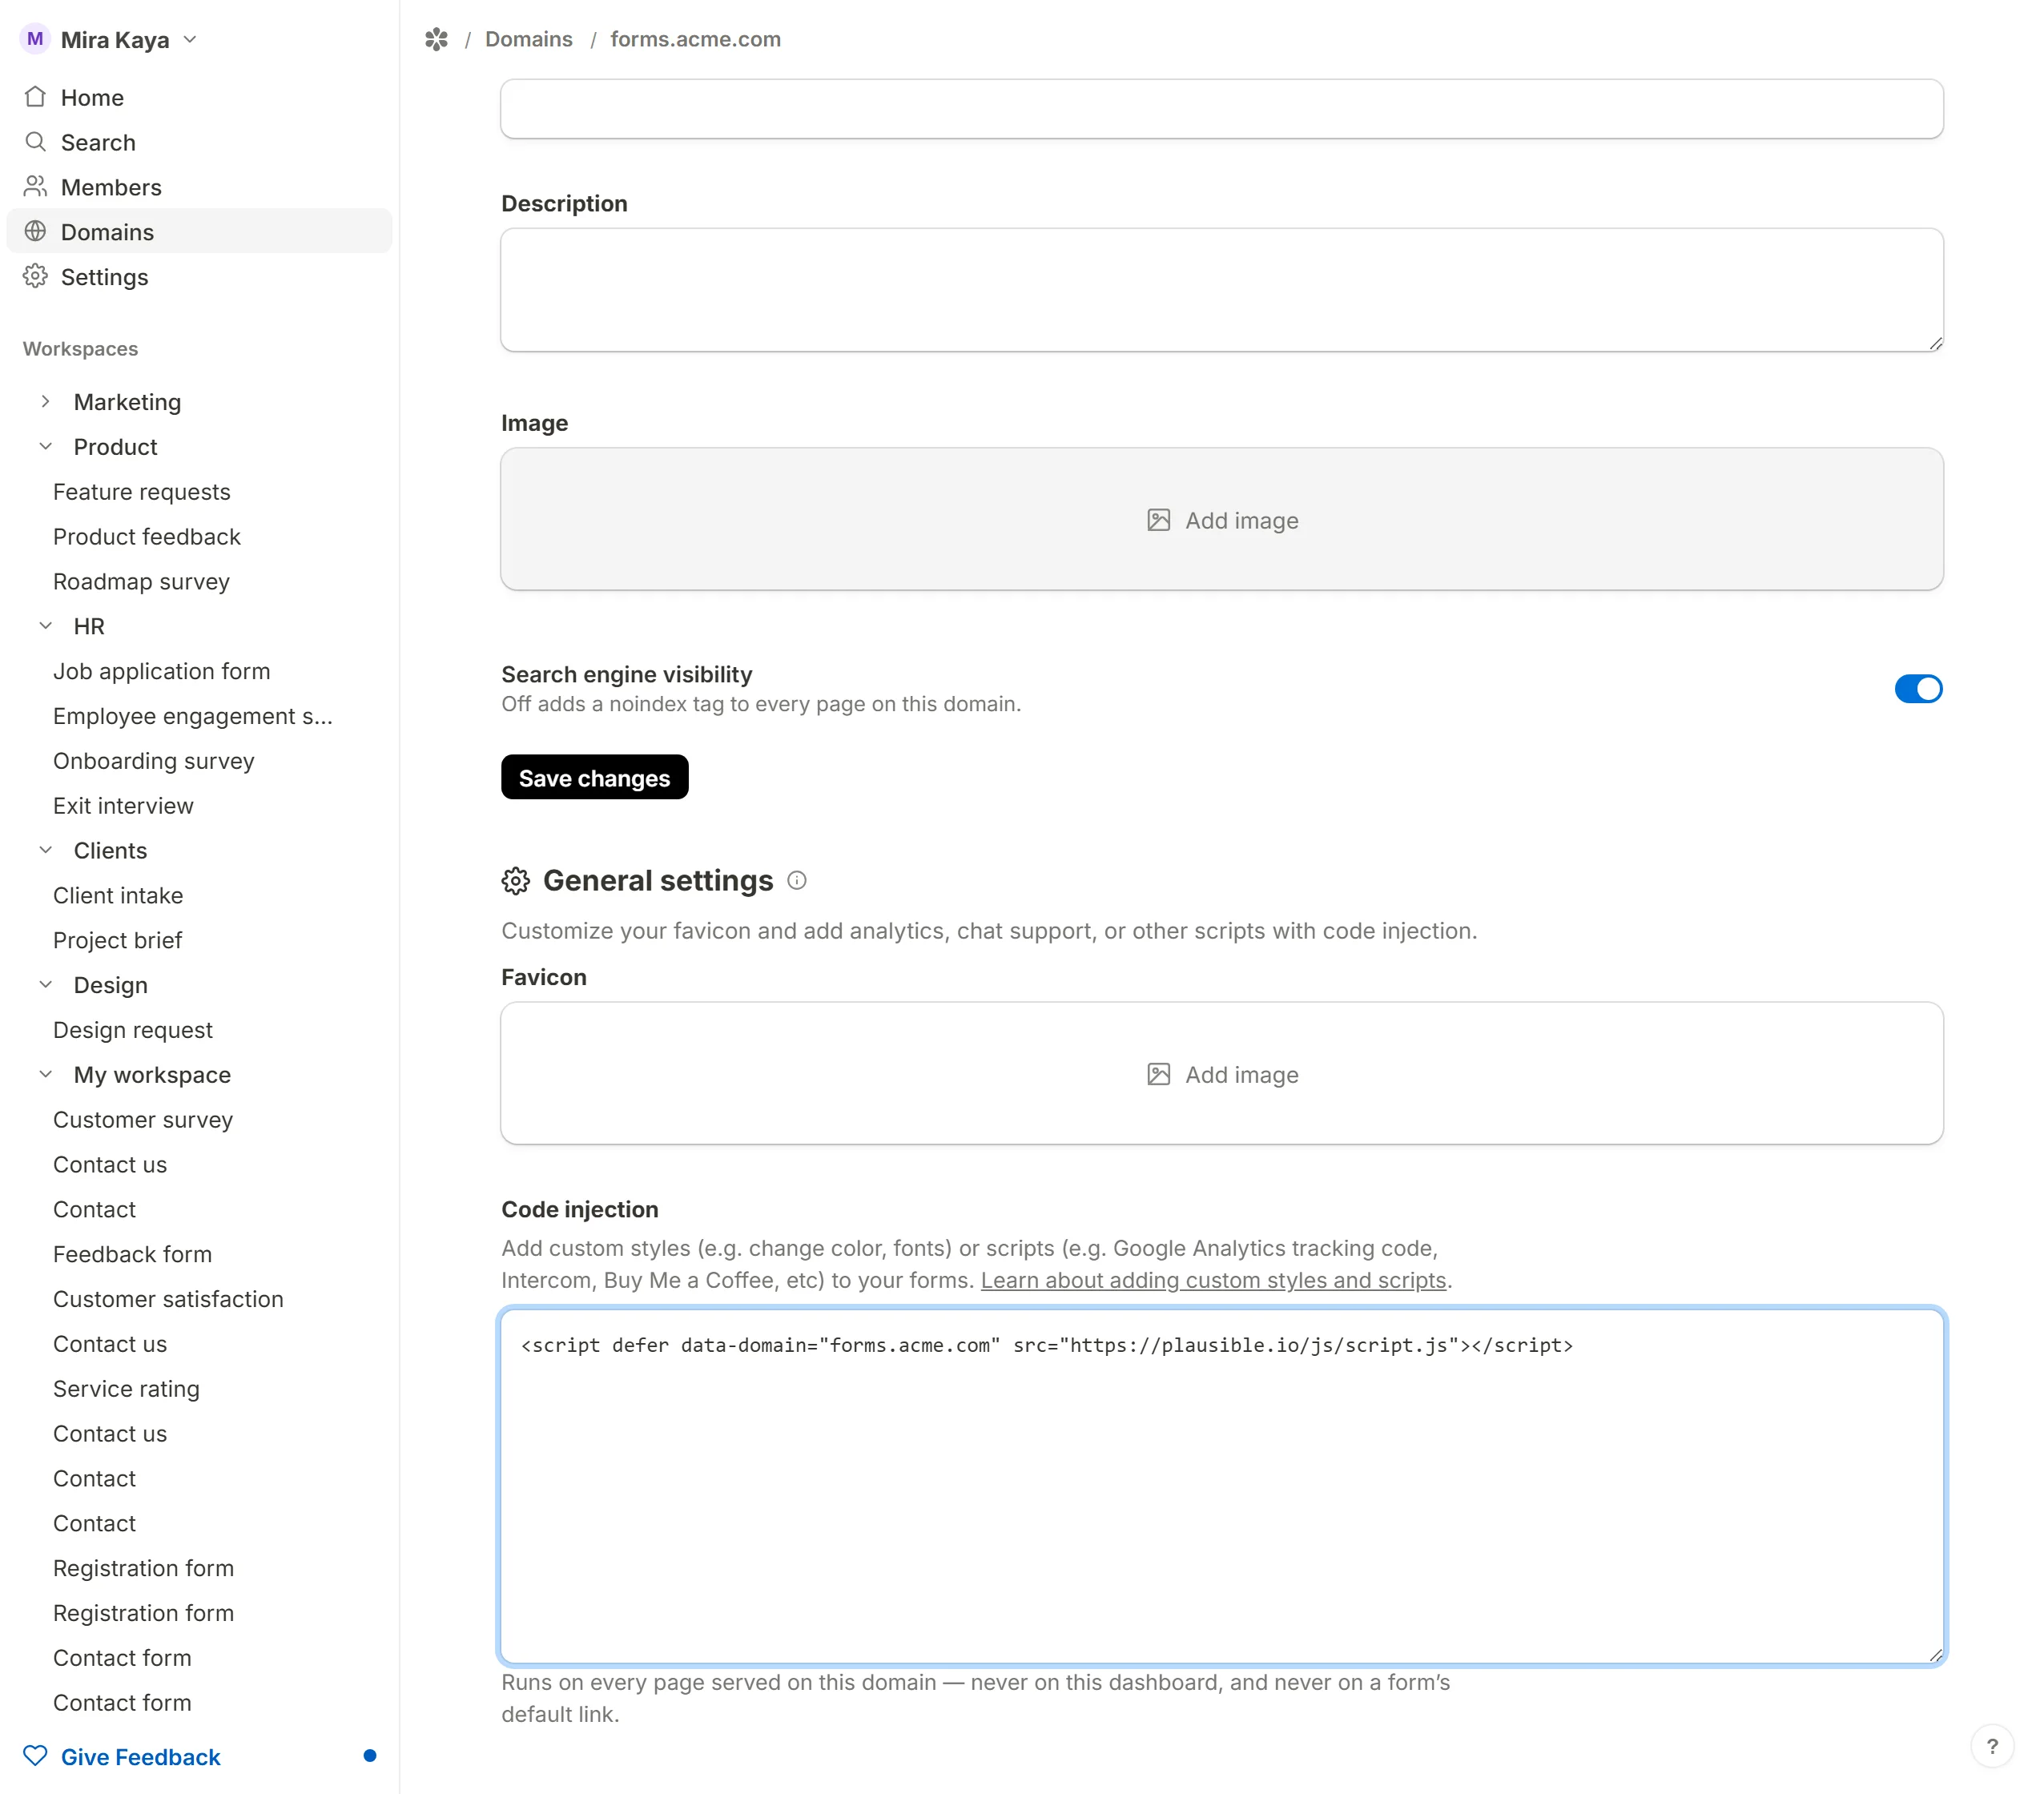
Paste your code and press Save changes.
On one page
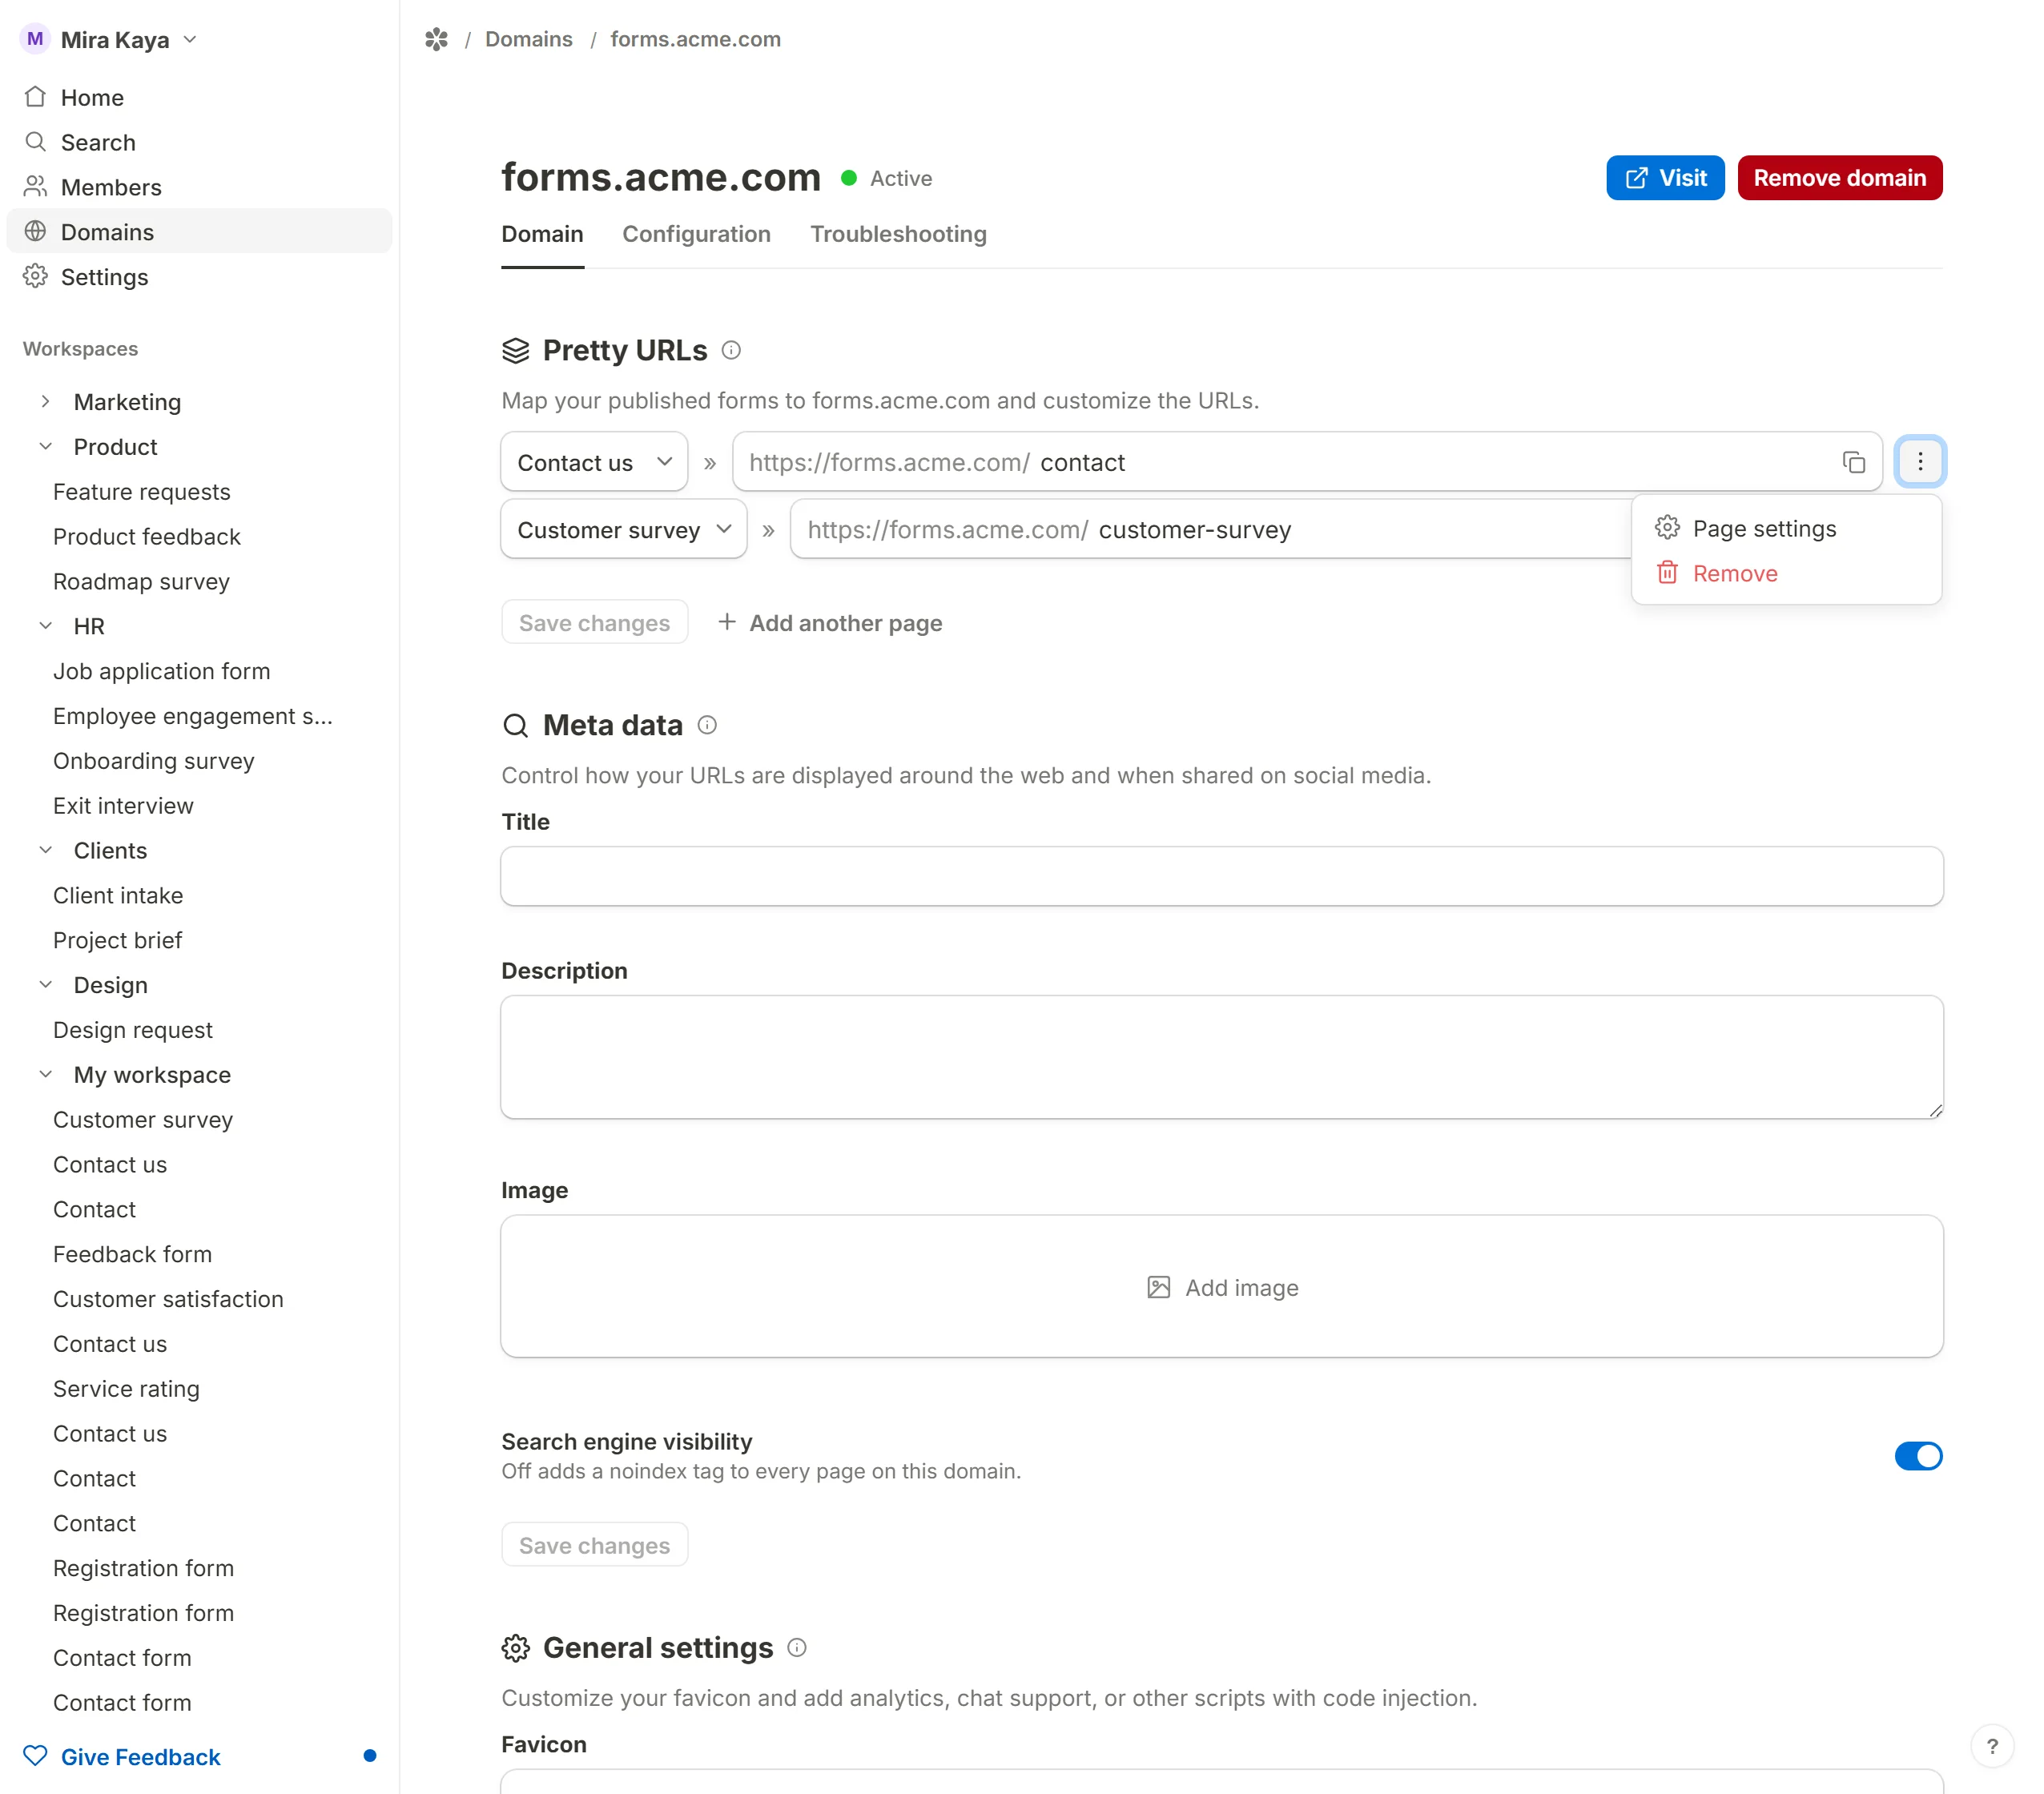
Open the domain, find the form's row in the Pretty URLs section, open the dots menu beside it and choose Page settings.
The Code injection box is at the bottom of the panel. It runs after the domain's own code, on this page only. Paste your code and press Save changes.
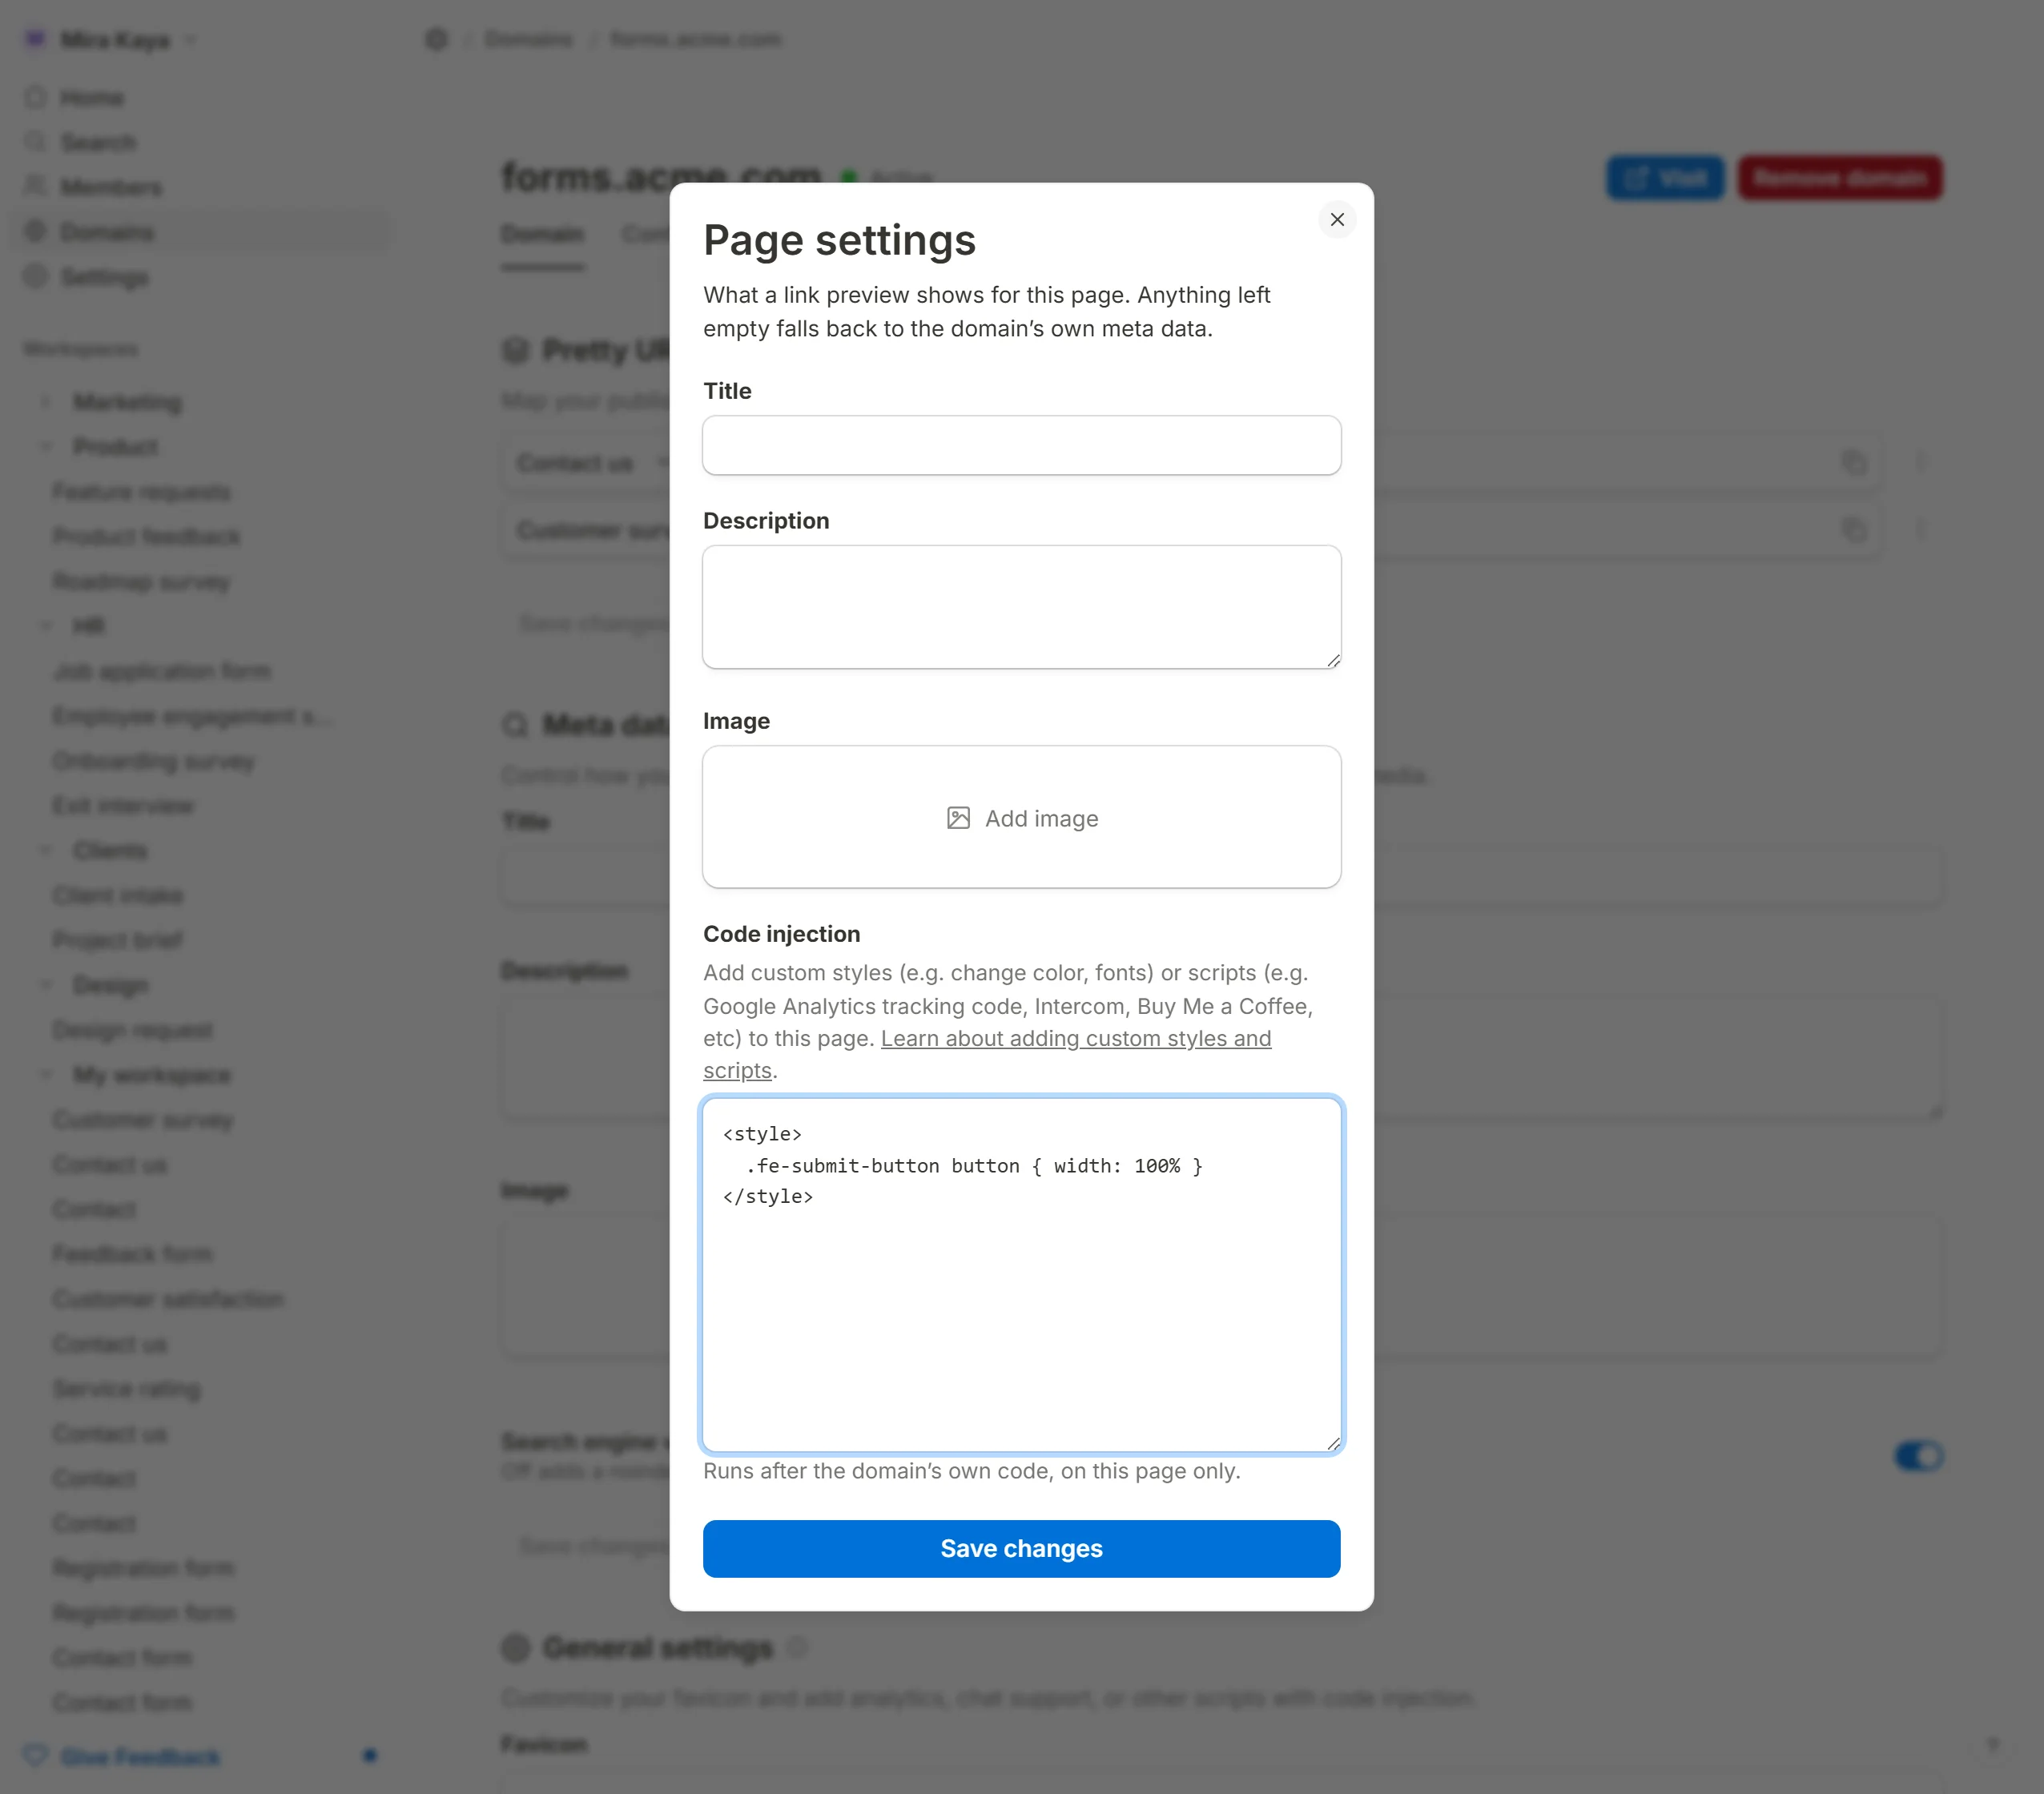
Injecting custom CSS
A <style> block in either box styles the forms on the domain. For one form, the Custom CSS box in the editor's Customize panel is the simpler route, and it works on the default link as well as the domain. Both aim at the same stable class names.
Common use cases
Use your own font
The Customize panel offers Google Fonts. For a font from anywhere else, load it yourself and apply it. Swap the URL and the family name for your own.
<link rel="preconnect" href="https://fonts.gstatic.com" />
<link
  href="https://fonts.googleapis.com/css2?family=Roboto:wght@400;500;700&display=swap"
  rel="stylesheet"
/>
<style>
  body {
    font-family: "Roboto", sans-serif !important;
  }
</style>
Add an analytics tag
The domain-level box is the natural home for a site-wide tag such as Google's, since it reaches every form on the domain with one paste. To count views and submissions rather than page loads, the form's own events are what to listen for; see Track form events with Google Tag Manager or Meta Pixel and Track form conversions with Google Tag Manager.
Add Plausible Analytics
Plausible is a small, privacy-minded alternative to Google Analytics, and its script is one line to paste. How to track your forms with Plausible Analytics has the steps.