Webhooks
Push every completed submission to a URL you own as signed JSON, watch each delivery in an events log, and retry by hand.
A webhook is an address you give a form. Each time somebody completes the form, Tinyform sends an HTTP POST to that address carrying the answers as JSON. Your own server, a low-code automation tool or an internal script can then do whatever it likes with them, the moment they arrive, without polling or exporting anything.
Webhooks are part of every install and every plan, and a form can have as many as you need.
How it works
The event is a completed submission. When a respondent submits the form, the answers are stored first; only then is a delivery queued for every enabled webhook on that form and sent as a POST request with a JSON body. A partial submission never triggers a webhook, and a webhook can never cause a submission to fail: if your endpoint is down, the response is still in the Submissions tab and the delivery retries on its own.
Add a webhook
Open the form and go to its Integrations tab. The Webhooks card sits above the list of other services. Click Connect.
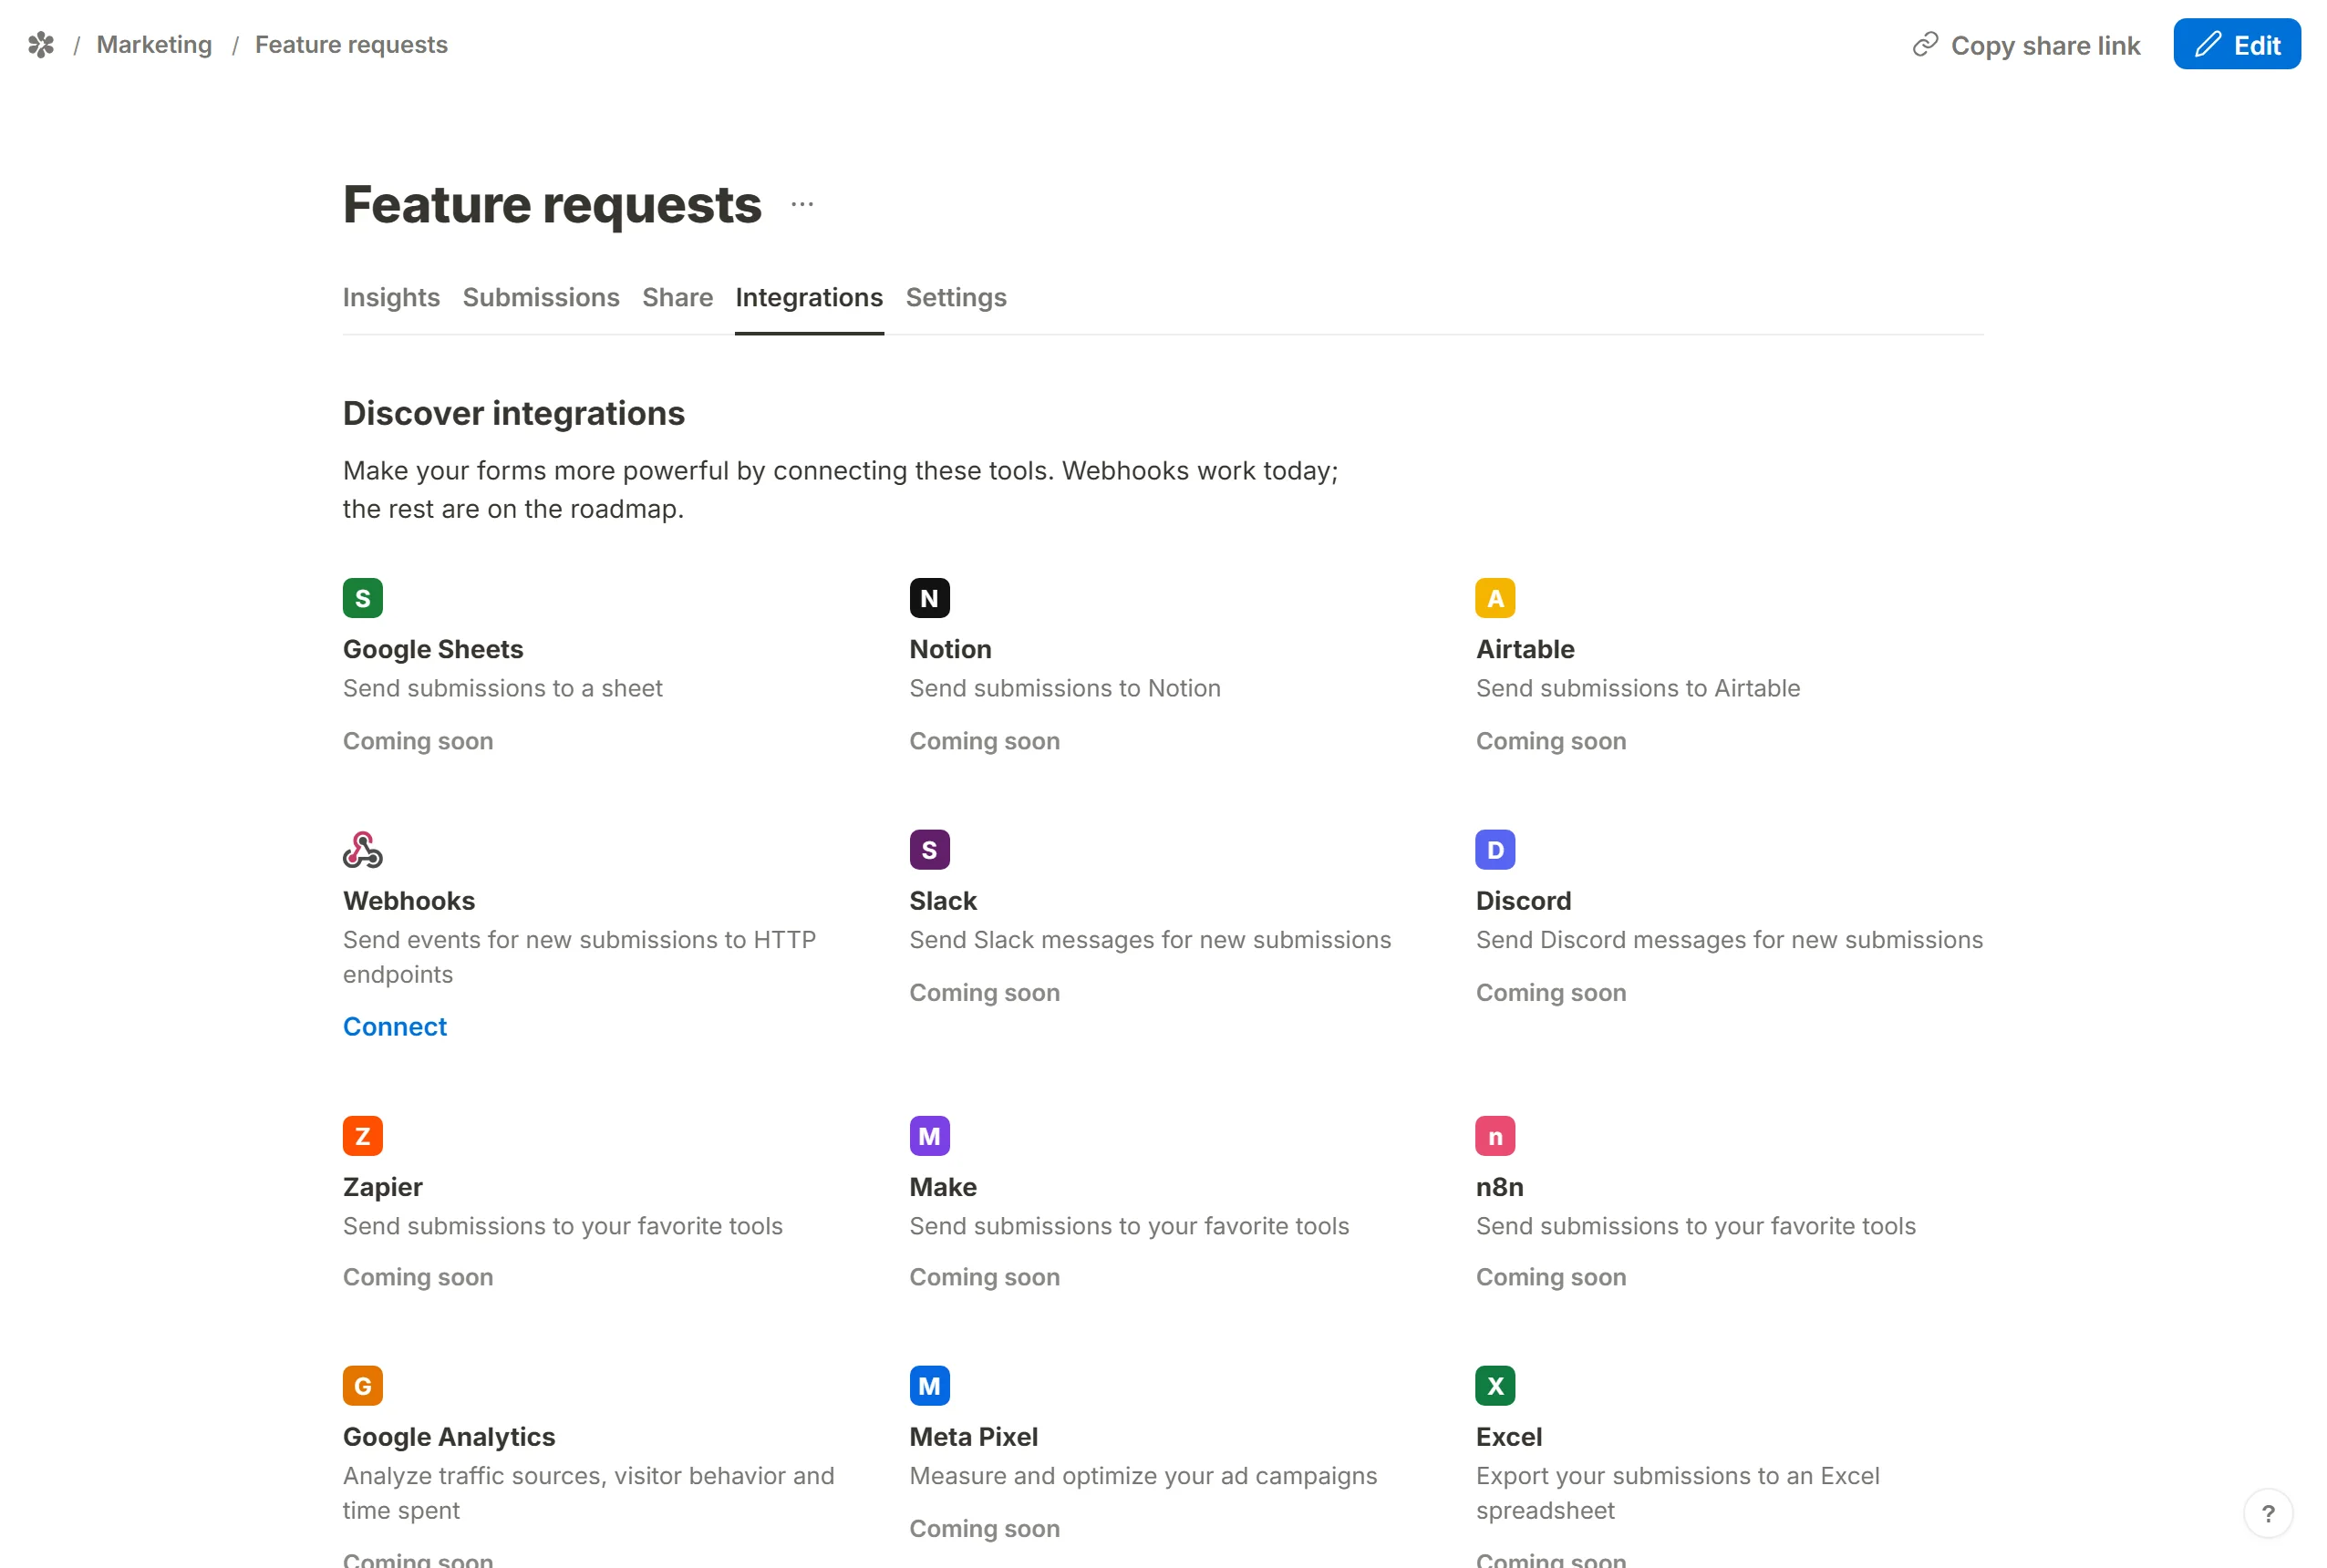
A dialog titled Add a webhook endpoint asks for the endpoint and, behind two links, a signing secret and custom headers.
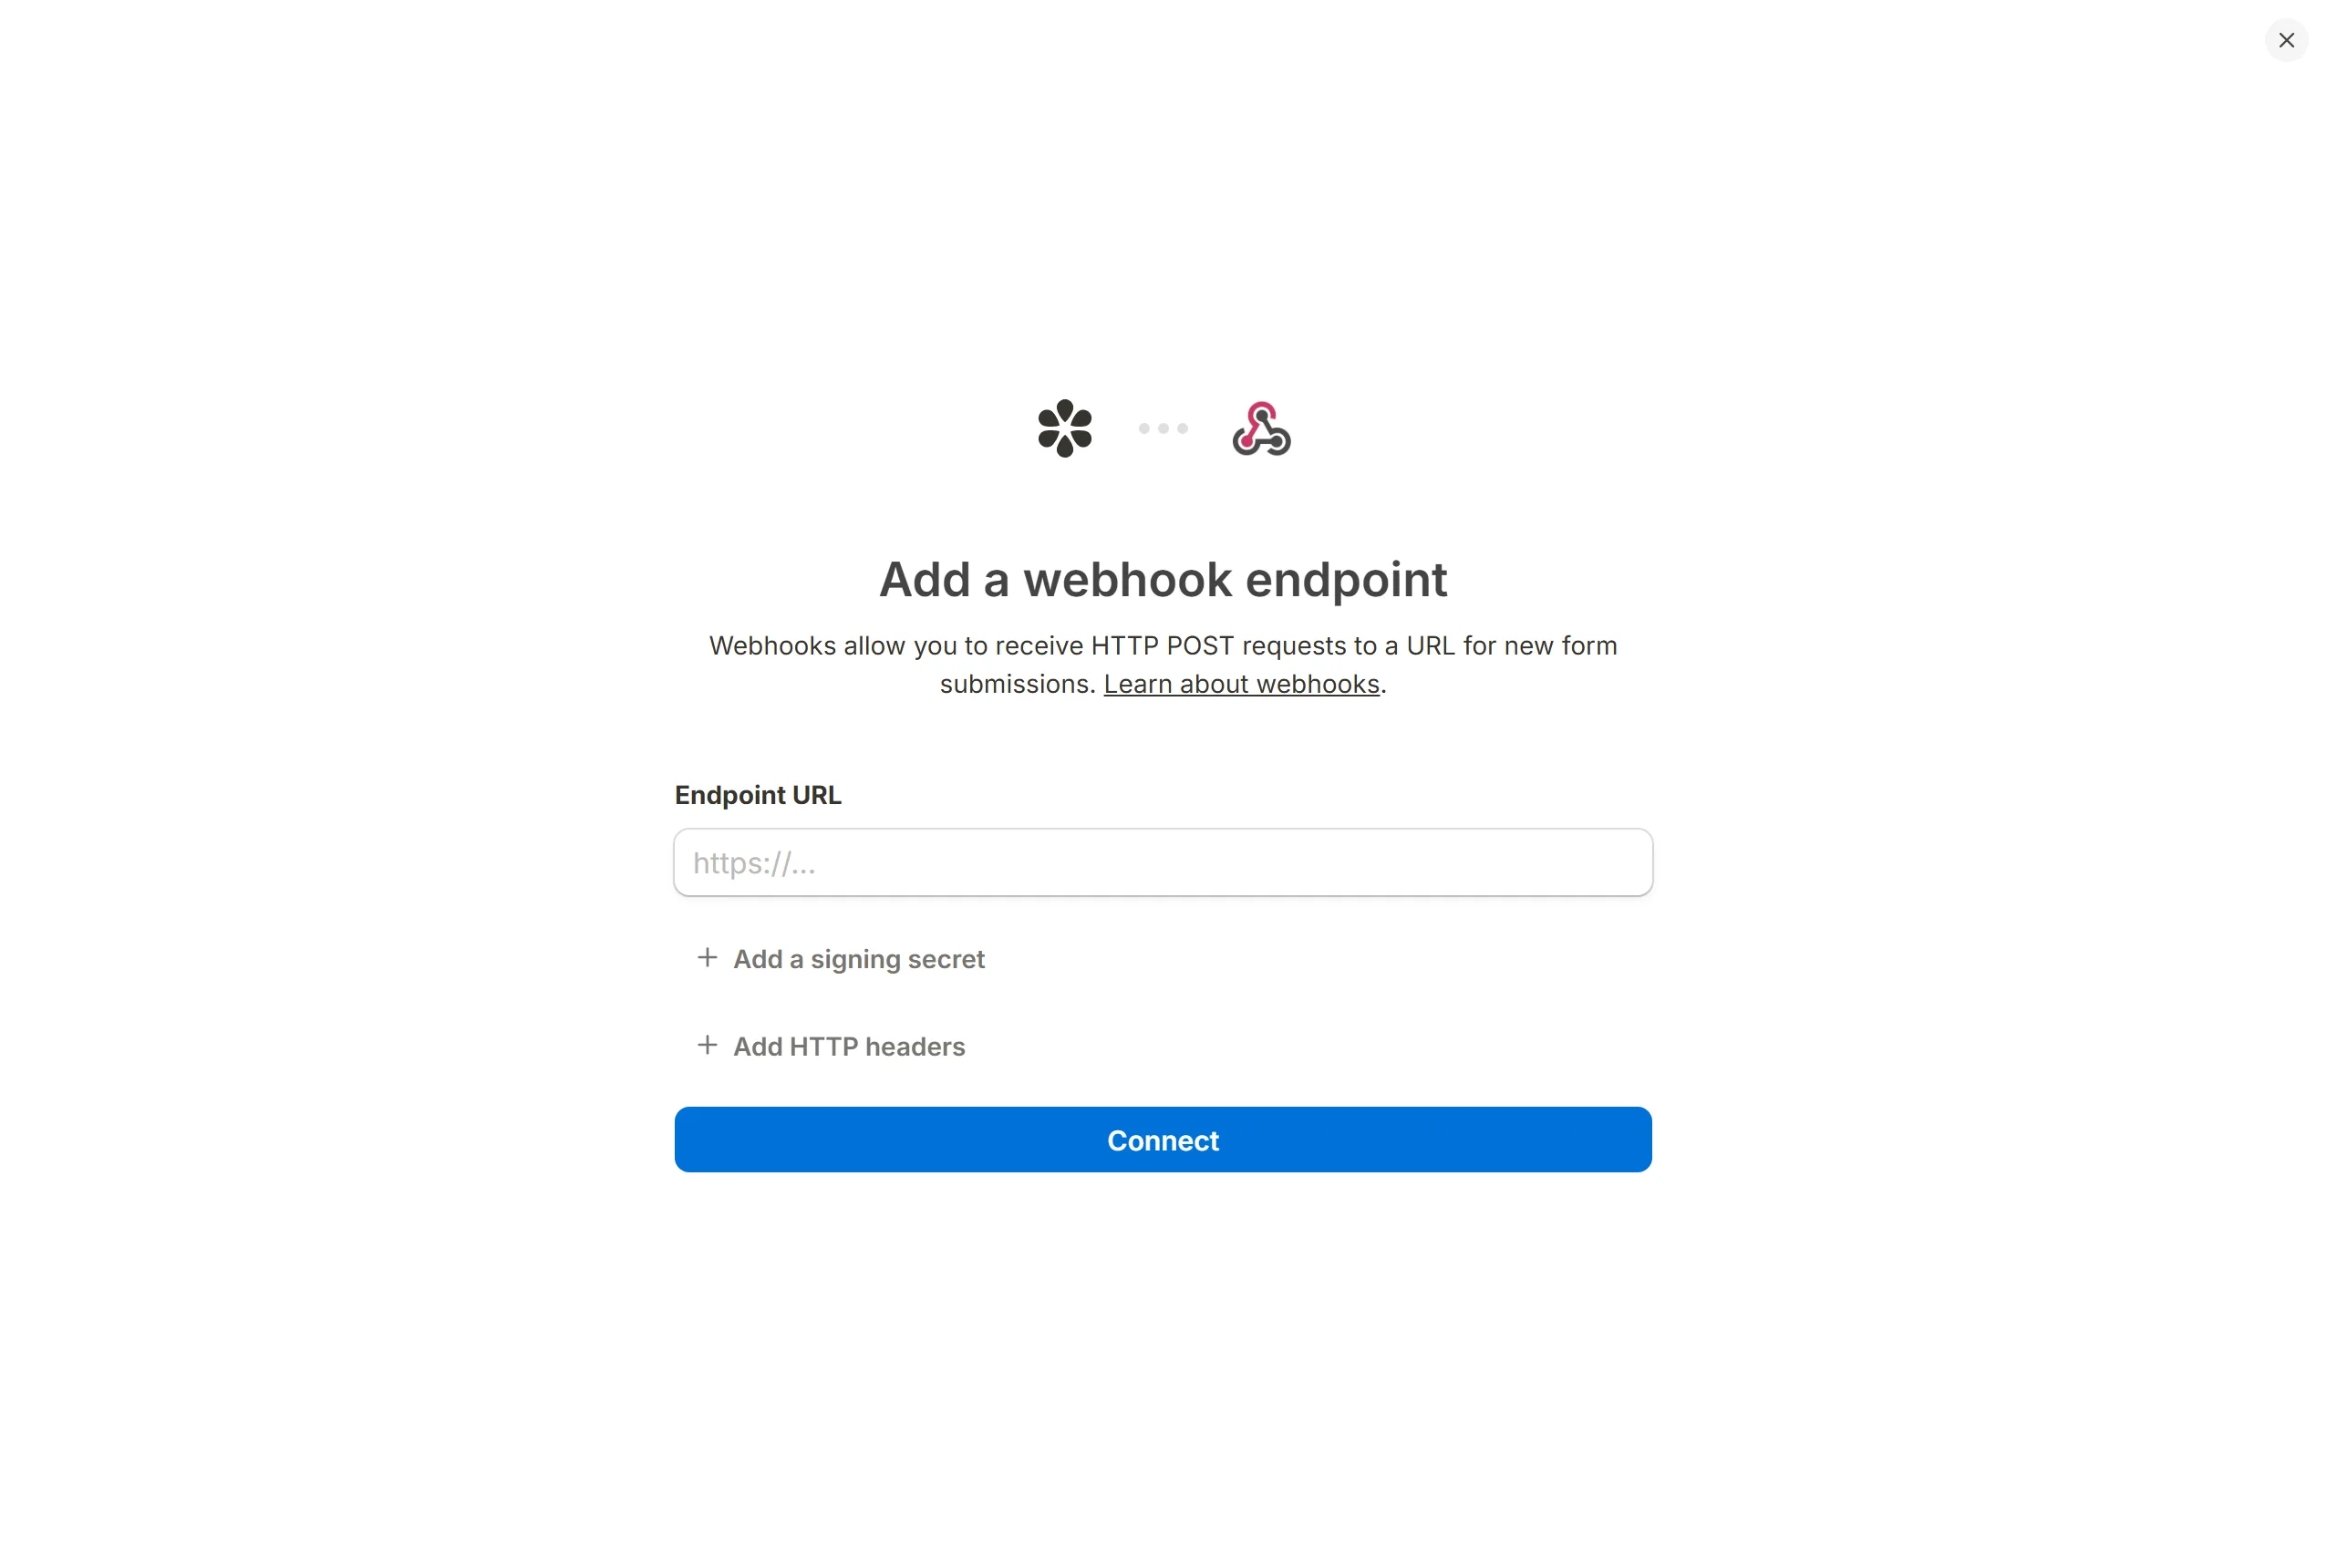
Endpoint URL
The Endpoint URL is where the request is sent. It has to be a public http or https address that:
- accepts a
POSTwith a JSON body, and - answers with a
2xxstatus within 10 seconds.
An address that points inside Tinyform's own network is refused when you save it and again at send time, so a webhook cannot be used to probe the machine it runs on.
Add a signing secret
Click Add a signing secret to fill the field with a random secret, or type your own. If you leave it alone, one is generated for you and shown once on the Webhook connected screen: copy it there, because it is stored write-only and never displayed again. Editing the webhook later offers Replace the signing secret, which overwrites it; nothing reads the old one back.
Every request is signed with that secret. The X-TinyForm-Signature header holds base64(HMAC-SHA256(rawBody, secret)), computed over the exact string that was sent. Verify it against the raw request bytes before parsing the JSON: re-serialising a parsed object produces a different string and a signature that never matches.
Express example
import { createHmac, timingSafeEqual } from "node:crypto";
import express from "express";

const app = express();
const secret = process.env.WEBHOOK_SECRET;

// Keep the raw body: the signature is over these exact bytes.
app.post("/webhook", express.raw({ type: "application/json" }), (req, res) => {
  const received = req.header("x-tinyform-signature") ?? "";
  const expected = createHmac("sha256", secret).update(req.body).digest("base64");

  const ok =
    received.length === expected.length &&
    timingSafeEqual(Buffer.from(received), Buffer.from(expected));
  if (!ok) return res.status(401).send("Invalid signature.");

  const event = JSON.parse(req.body.toString("utf8"));
  // ...store or queue the event, then answer quickly
  res.status(200).send("ok");
});

app.listen(3000);
Add HTTP headers
Click Add HTTP headers to send extra headers with every request: an Authorization token your endpoint expects, a routing tag, and so on. Each row is a Name and a Value; Add header adds another and the bin beside a row removes it.
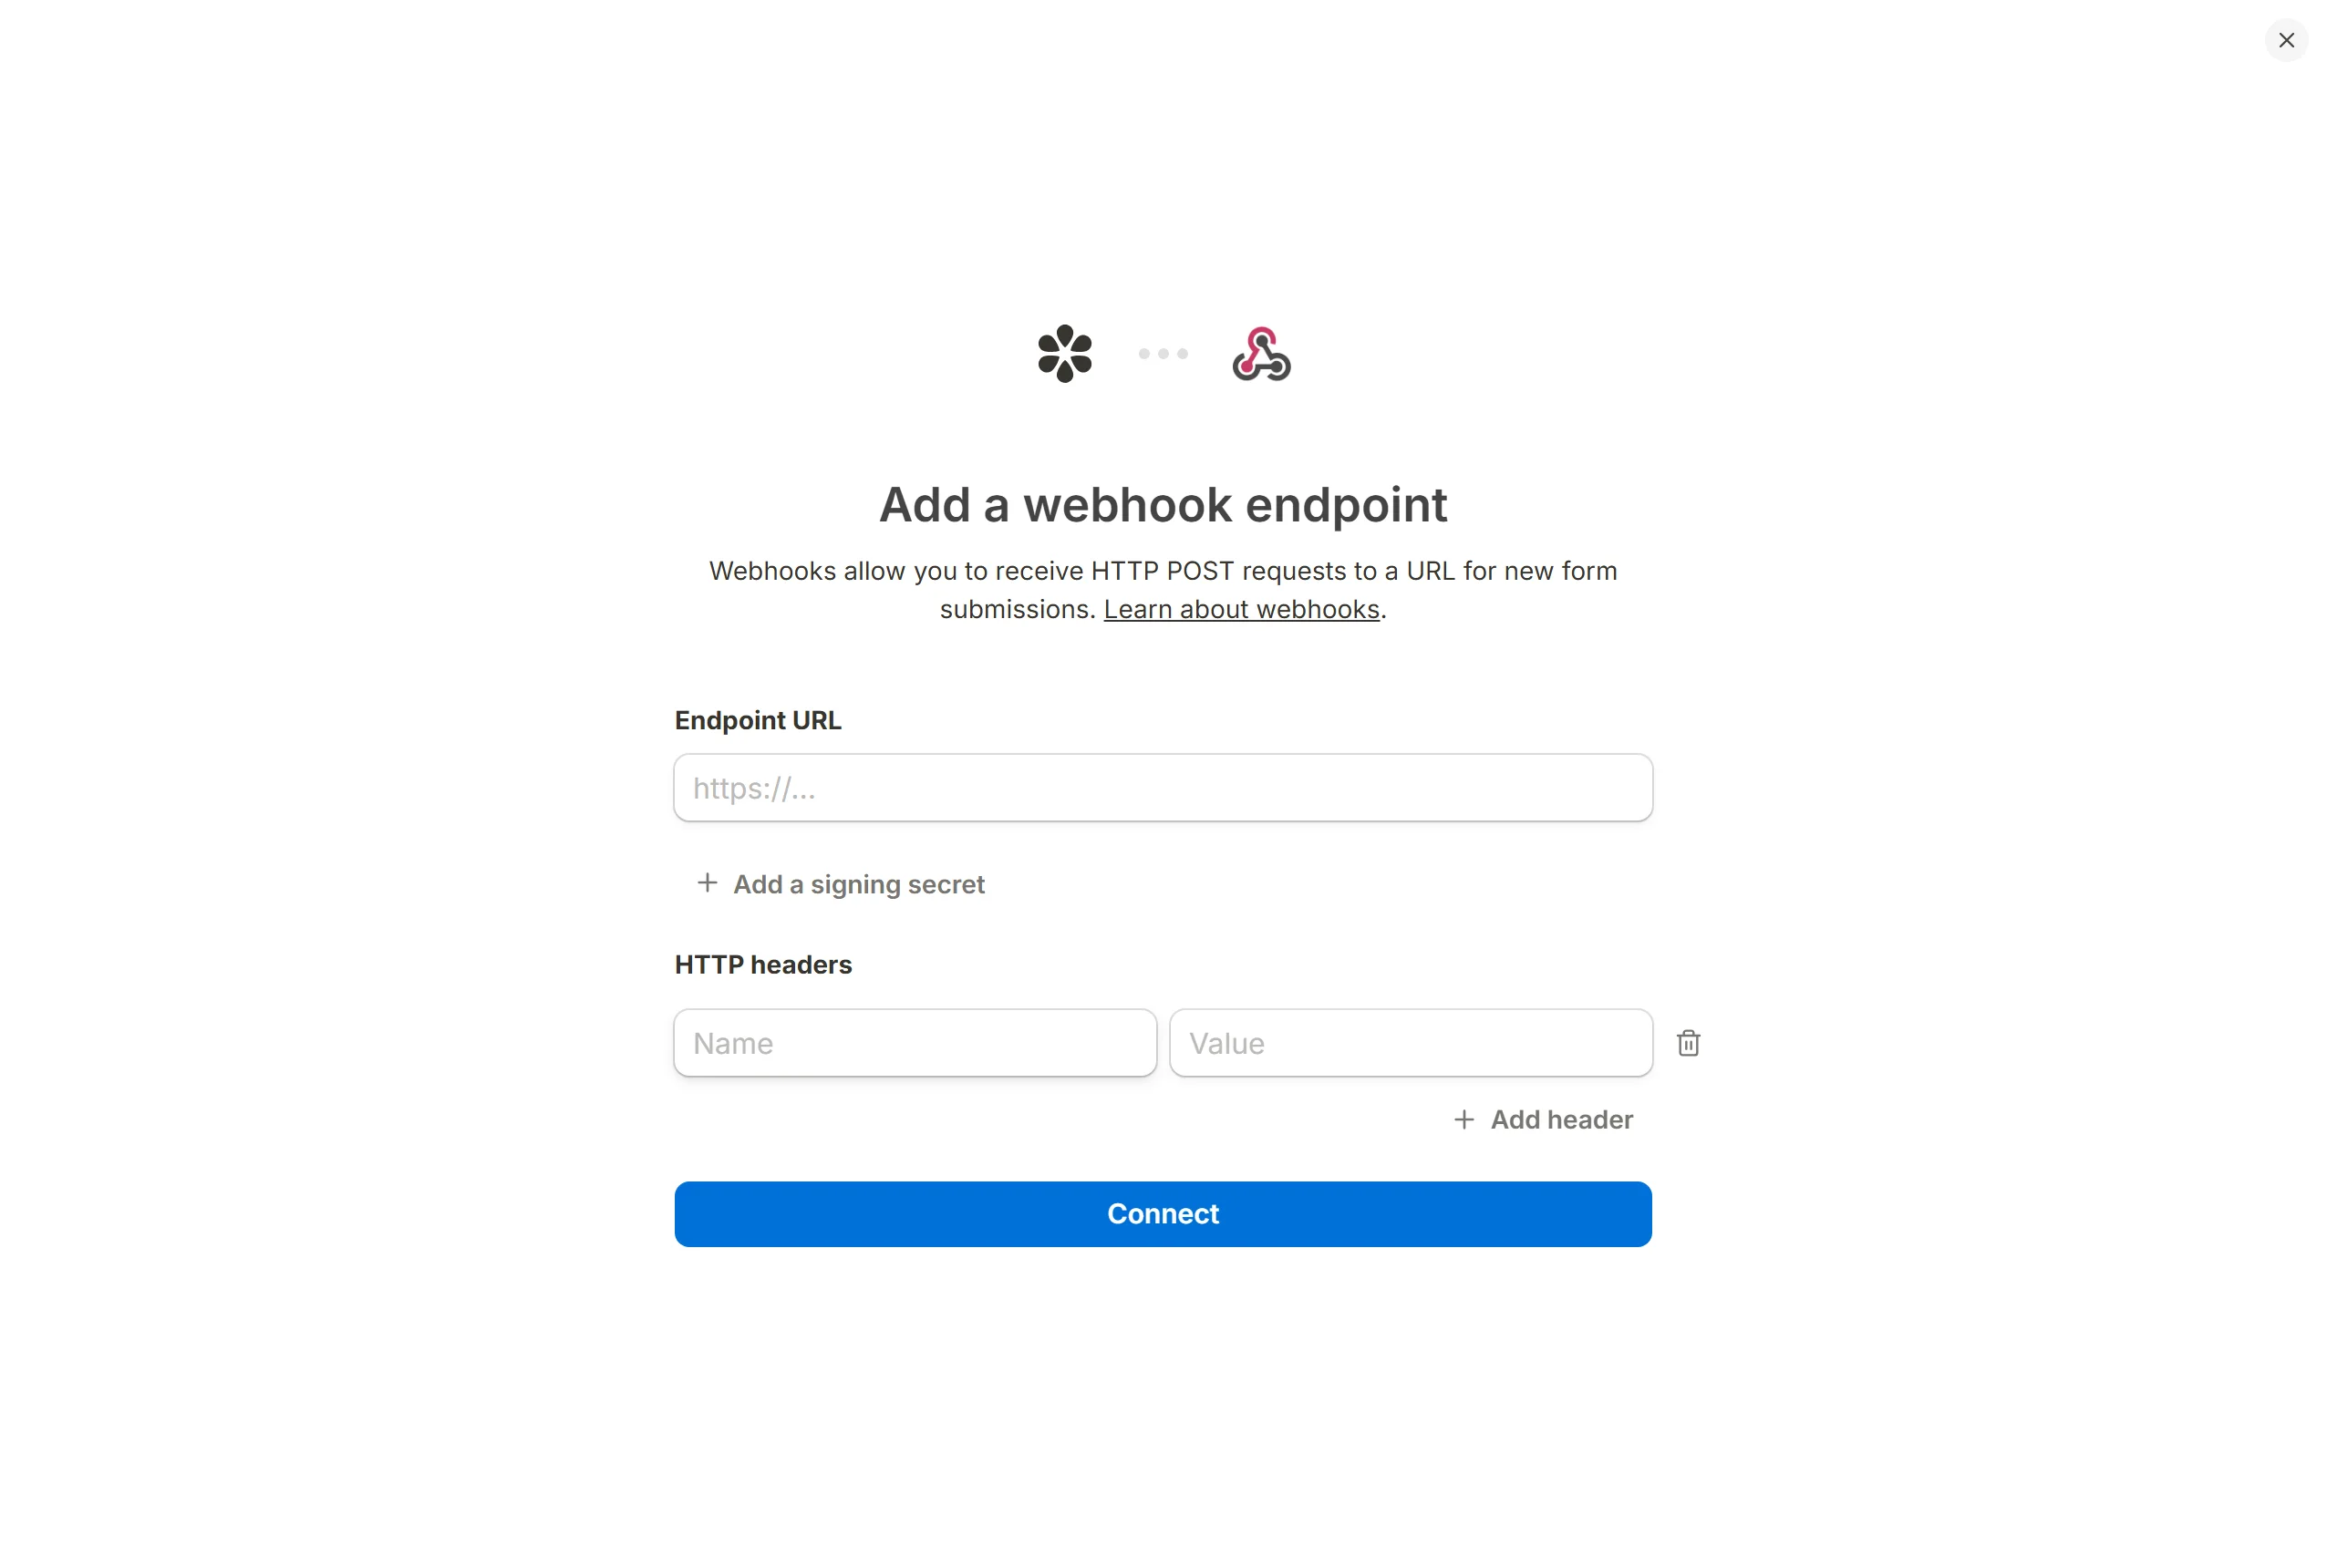
A webhook may carry up to 20 headers, each value up to 1024 characters, and a value may not contain control characters. Content-Type, Content-Length, Host and X-TinyForm-Signature are set by the sender and cannot be overridden.
Request failure and retries
How your endpoint answers decides what happens next:
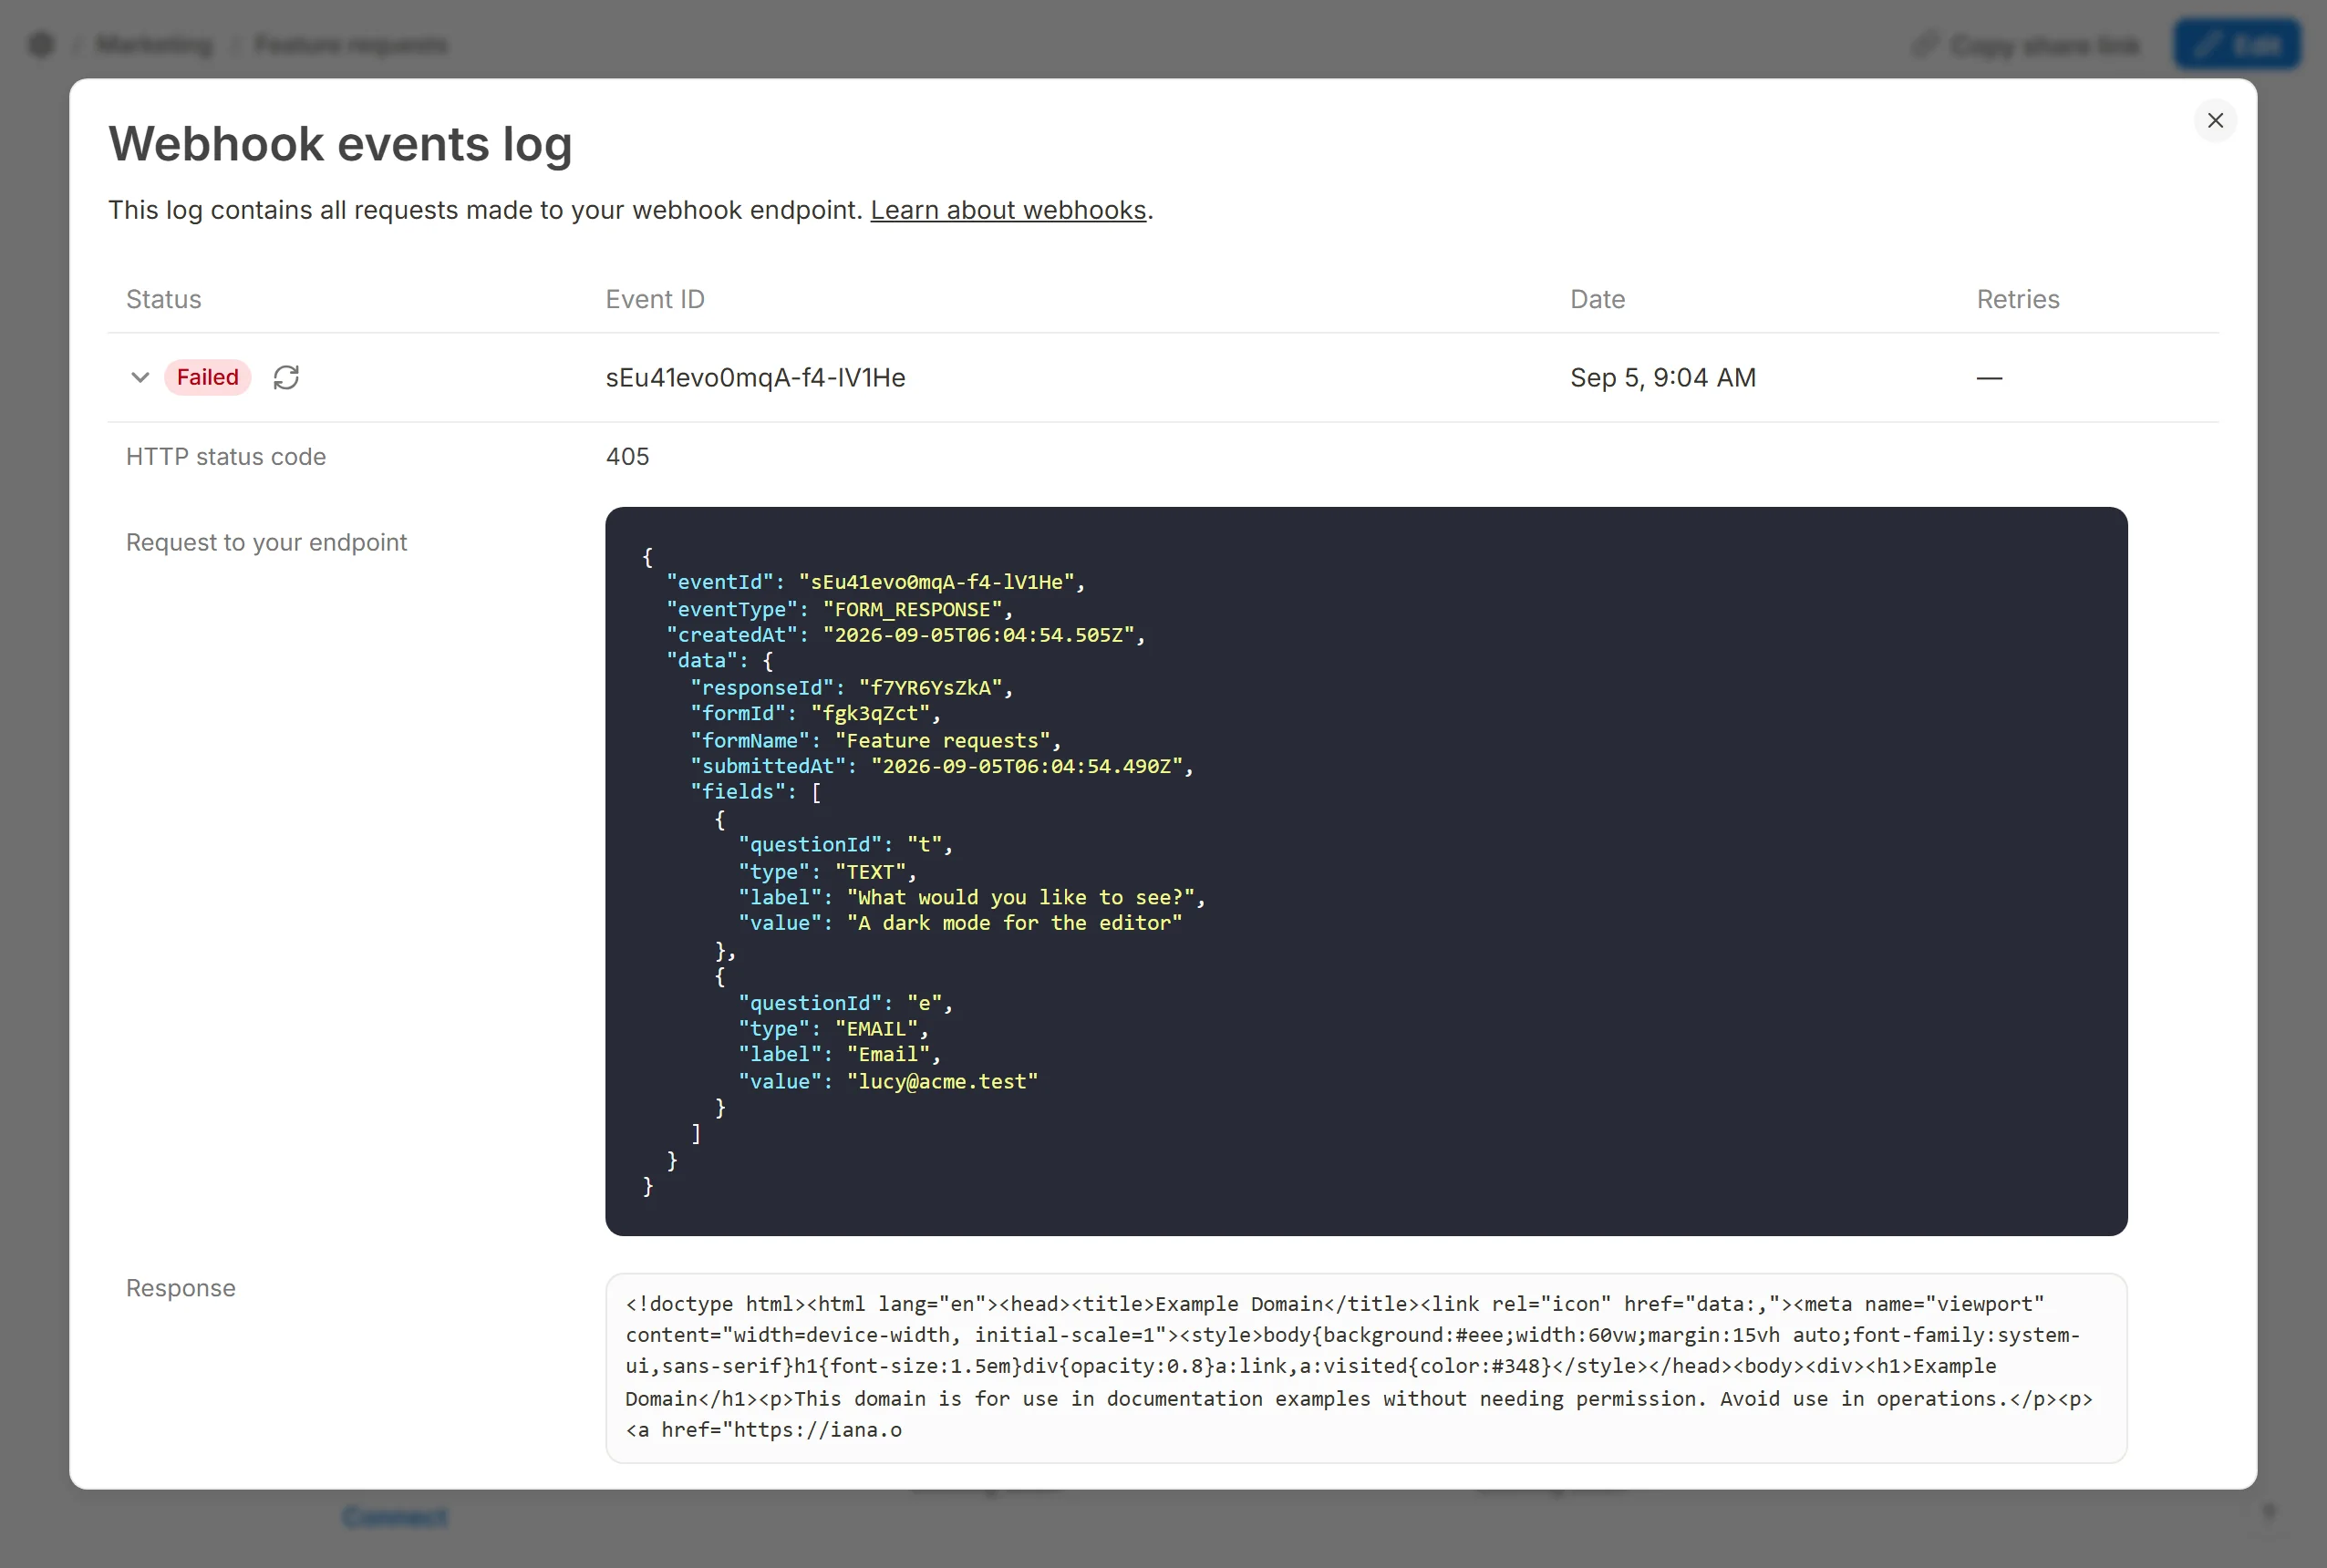
2xx: the delivery is done and logged asDelivered.4xx: treated as a verdict that retrying cannot change. The delivery is logged asFailedand not sent again.- Anything else, a
5xx, a refused connection, or the 10-second window running out: the attempt is recorded and the delivery is queued again.
A delivery is attempted up to five times in all, with a gap that starts at a couple of minutes and doubles after each failure. Once the last attempt fails, the delivery is marked Failed and stays in the events log, where you can resend it by hand at any time.
Every attempt of the same delivery carries the same eventId. Use it to make your handler idempotent: receiving one event twice is the normal outcome of at-least-once delivery, not a fault.
No email is sent when a delivery fails. The events log on the Integrations tab is the place to look.
Manage webhooks
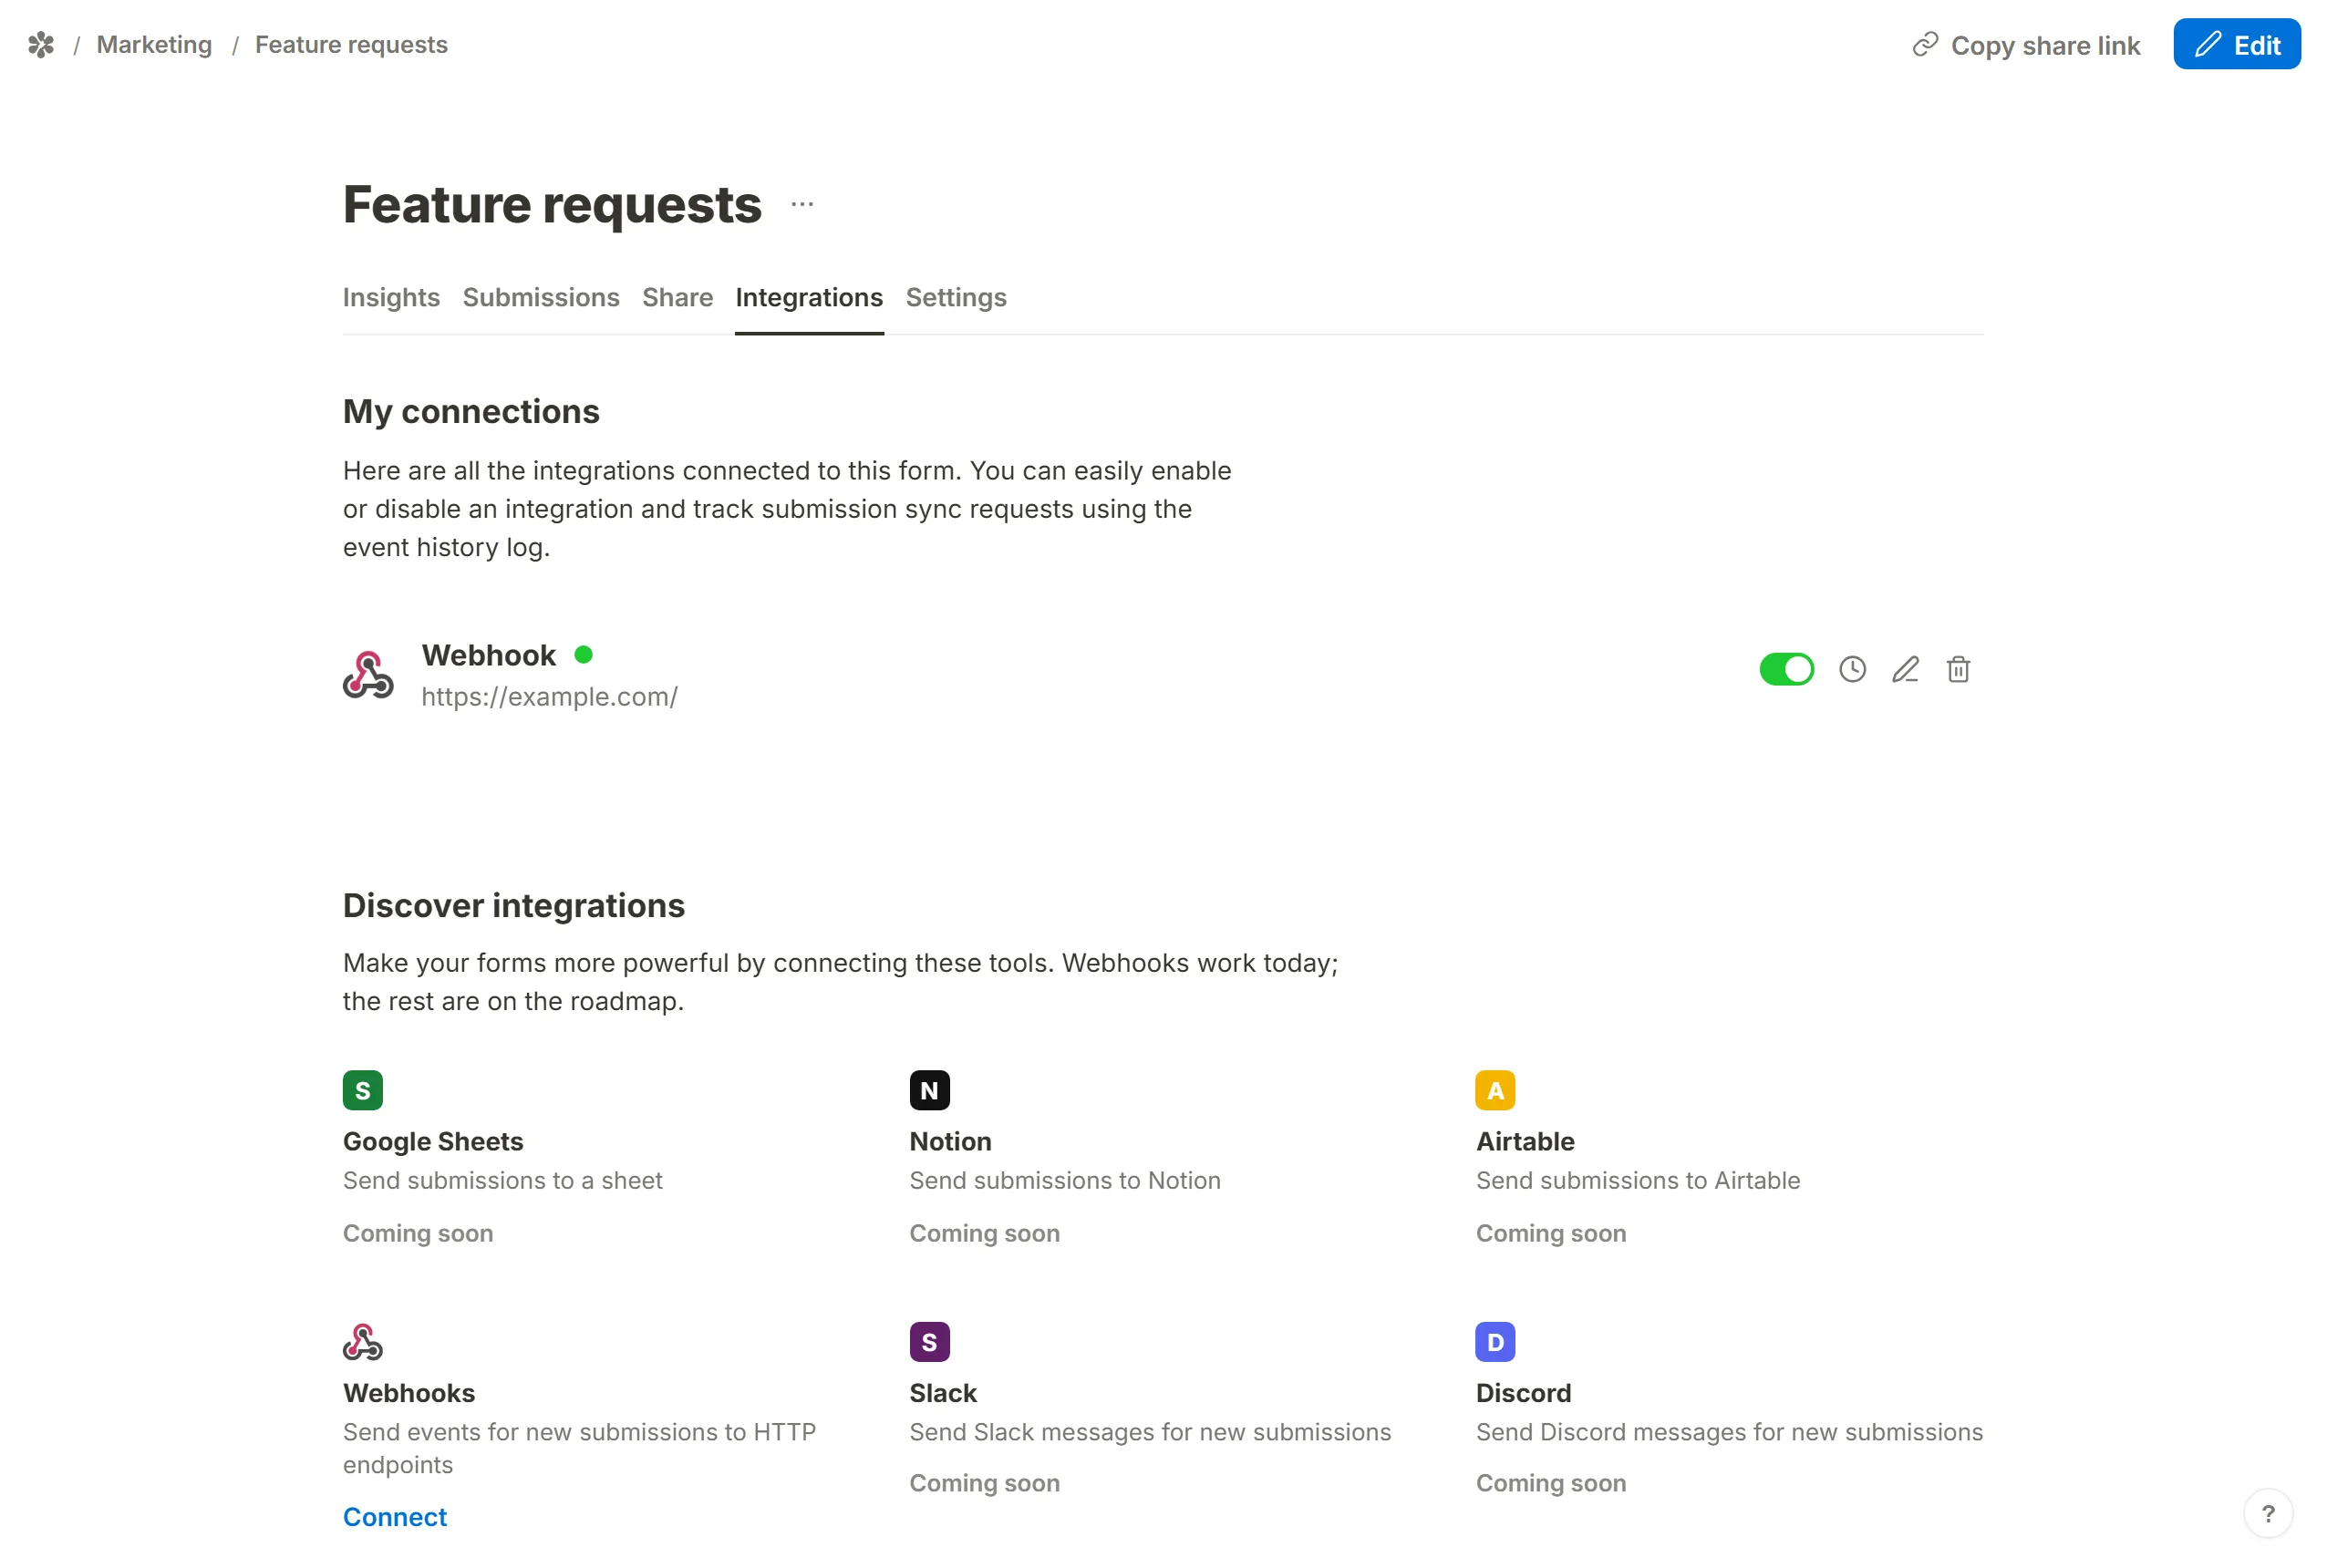
Every webhook the form has appears under My connections at the top of the Integrations tab. The switch on a row pauses it: a disabled webhook receives nothing, and a delivery that was queued before the switch is closed as failed rather than sent later.
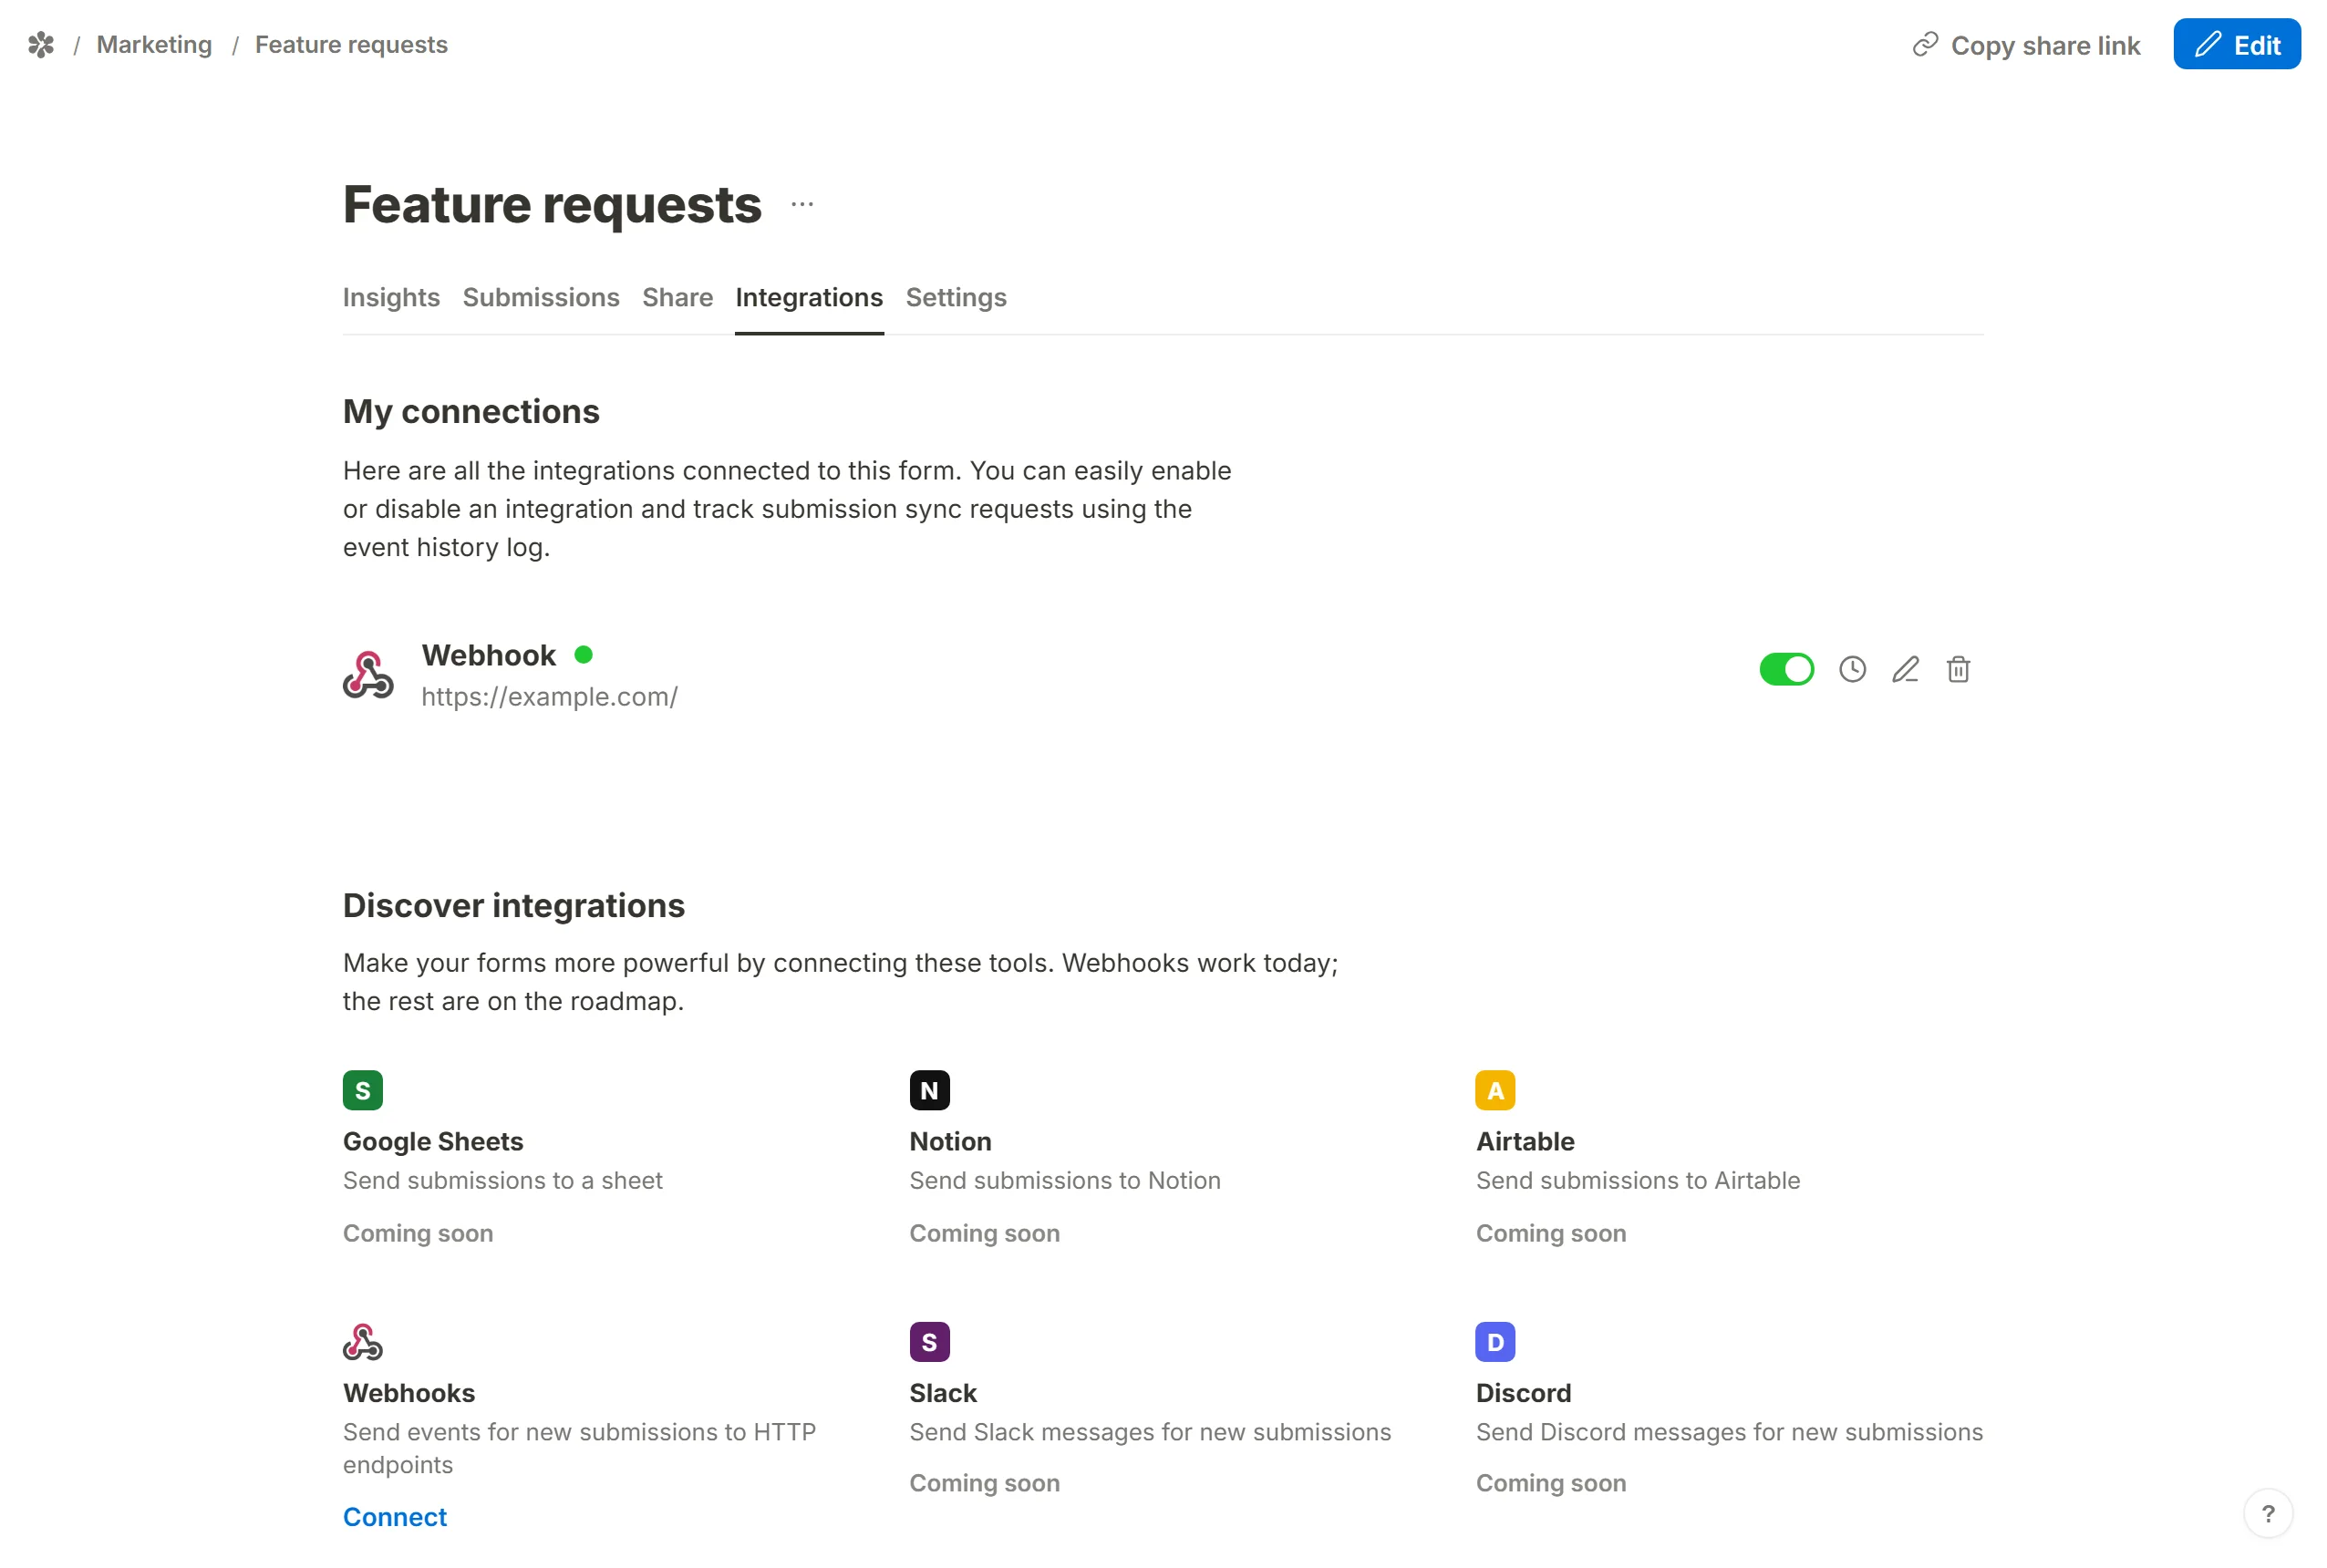
The clock icon opens the Webhook events log: one row per delivery with its Status (Delivered, Failed or Pending), Event ID, Date and Retries. Expanding a row shows the HTTP status code your endpoint returned, the Request to your endpoint as it was sent, and the first part of the Response. Resend sends that delivery again. A log with nothing in it yet offers Send test event, which posts a payload shaped exactly like a real one, with a sample answer for every question, so you can check an endpoint before anyone has filled the form in.
The pencil opens the same dialog with the values filled in and Save changes on the button. The bin removes the webhook after a confirmation; its deliveries go with it.
Example webhook event
Each request is a POST with Content-Type: application/json, the X-TinyForm-Signature header, and any custom headers you added. The body:
{
  "eventId": "V1StGXR8_Z5jdHi6B-myT",
  "eventType": "FORM_RESPONSE",
  "createdAt": "2026-01-01T12:00:00.000Z",
  "data": {
    "responseId": "k3Jd8sPq2",
    "formId": "aB3dE4fG",
    "formName": "Lead generation form",
    "submittedAt": "2026-01-01T12:00:00.000Z",
    "fields": [
      { "questionId": "b1", "type": "TEXT", "label": "Your name", "value": "Ada Lovelace" },
      { "questionId": "b2", "type": "EMAIL", "label": "Your email", "value": "ada@example.com" },
      { "questionId": "b3", "type": "NUMBER", "label": "Team size", "value": 12 },
      { "questionId": "b4", "type": "CHECKBOX", "label": "Subscribe to updates", "value": true },
      {
        "questionId": "b5",
        "type": "FILE",
        "label": "Attach a brief",
        "value": [{ "name": "brief.pdf", "url": "https://forms.example.com/api/files/..." }]
      }
    ]
  }
}
What the fields are:
eventIdidentifies the delivery and is stable across retries; a test event'sresponseIdis the wordsample.data.fieldsis one entry per input block of the form version the respondent filled in, in the form's order:questionIdis the block's id,typeits question type as/api/v1/forms/:id/questionsreports it,labelthe question text, andvaluethe answer ornullwhen the question was left empty. A block whose label is blank has no key to answer under and is not included.- Hidden fields, calculated fields and the respondent's country are not in
fields. Read those from/api/v1/forms/:id/submissions, which returns every column the Submissions table draws.
The payload is rebuilt from the stored submission at send time, so a retry after you fix an endpoint carries the answers as they are now. If the submission has been deleted in the meantime, the delivery closes as failed with that reason.
Why people reach for webhooks
A webhook is the way to make Tinyform talk to something it has no card for: your own database, an internal admin tool, a message queue, a niche service that matters to your stack. Instead of polling the API or downloading a CSV, the data is pushed the moment it exists.
It is also the first step of most automation setups. A scenario in a low-code tool usually starts with a "catch a webhook" trigger and routes from there into a CRM, a spreadsheet, a chat channel or a billing system. Point the form at that trigger's URL and the rest is built on the other side.
For the people who run the receiving end, the details are what make it usable in production: a signature to prove who sent the request, a log of every attempt with the exact bytes and the exact answer, a stable event id to deduplicate on, and a retry button for the day the endpoint was down.