Payment forms
Take card payments on a form with Stripe: add the block, set a price or point it at a calculated field, connect your account, and see what you have collected.
A payment form is an order form that takes the money too. A Payment block turns a form into a checkout: a respondent fills it in, enters a card, and the money lands in your own Stripe account. Nothing is taken off the top by Tinyform; you pay Stripe's fees and nothing else.
What you need
- A Stripe account. Creating one is free; Stripe charges per successful payment.
- A form to put the block in. One block per form: a form charges once, on submit.
Adding a payment block
Insert the block
In the editor, type
/payment, or open the block picker and choosePayment. It is listed twice, underQuestionsand again underInput blocks; either one inserts the same block.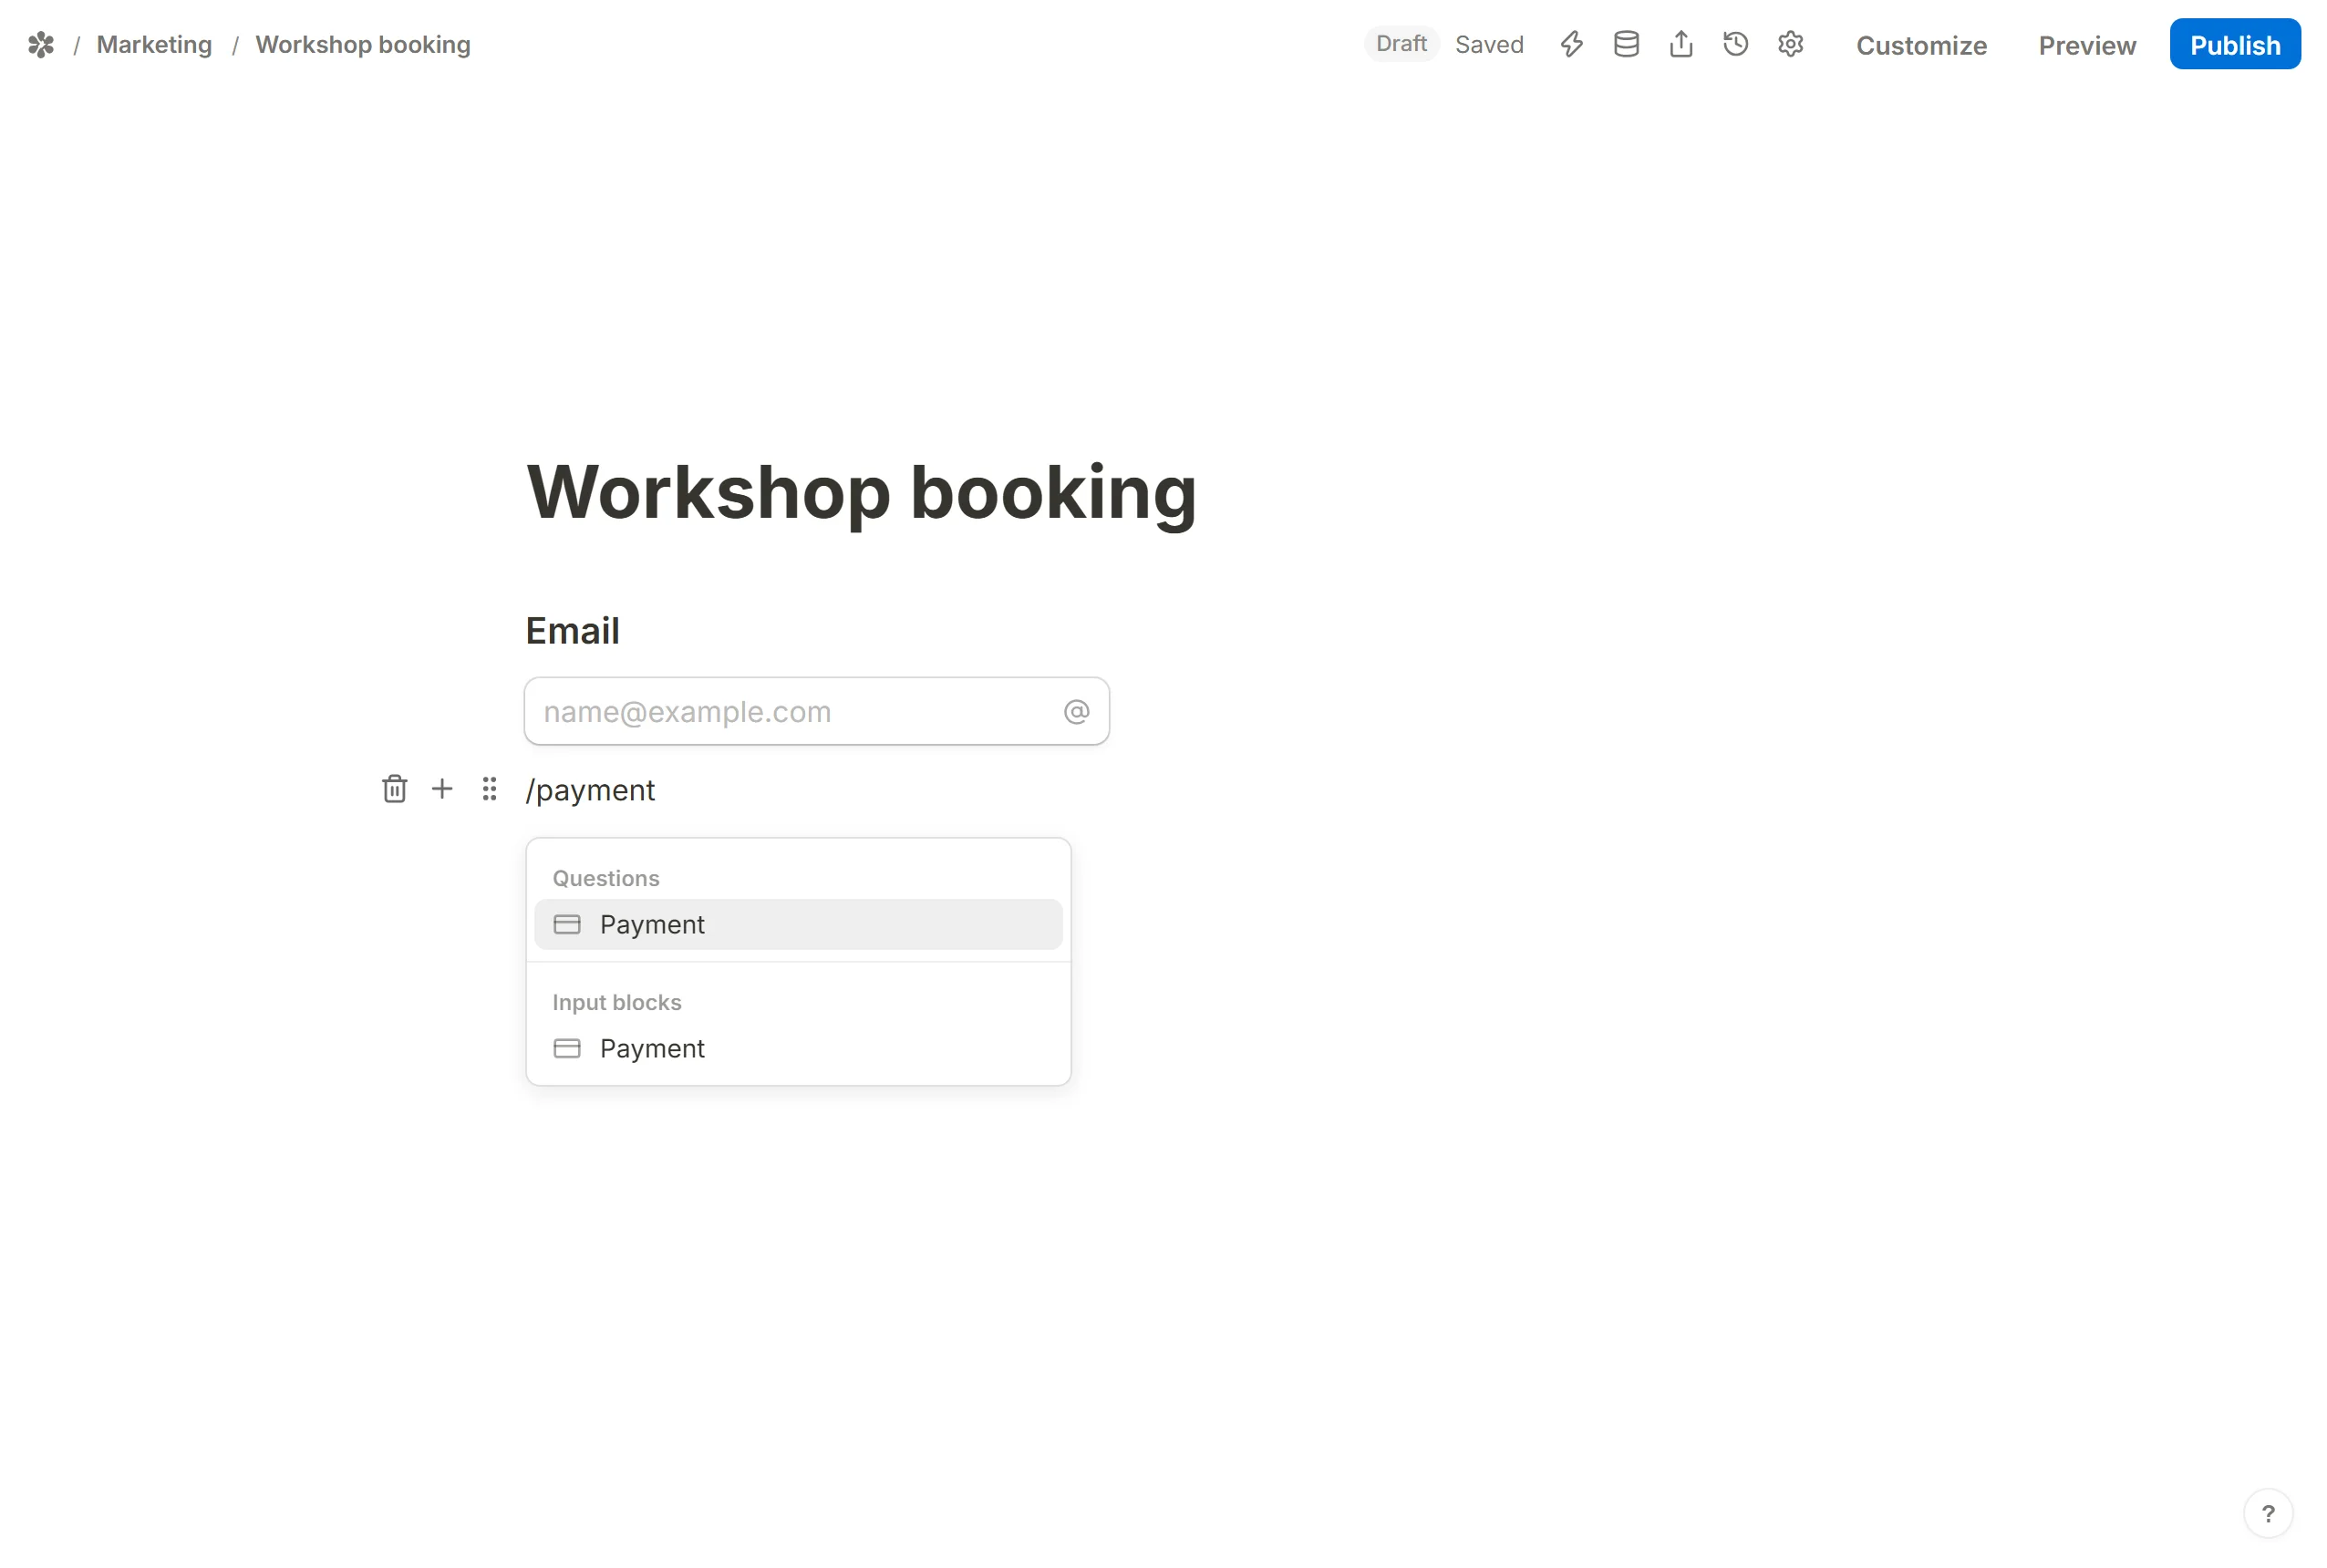
Set the price
Type an amount, or press the chevron on the right of the price to follow another field instead. That is how a basket total, a discount or a shipping charge becomes the price; A price that follows a field below lists the three kinds you can point it at, and How to create a checkout form walks through one.
Choose a currency
A fresh block opens in US dollars. Pick another from the list under the price.
Connect Stripe
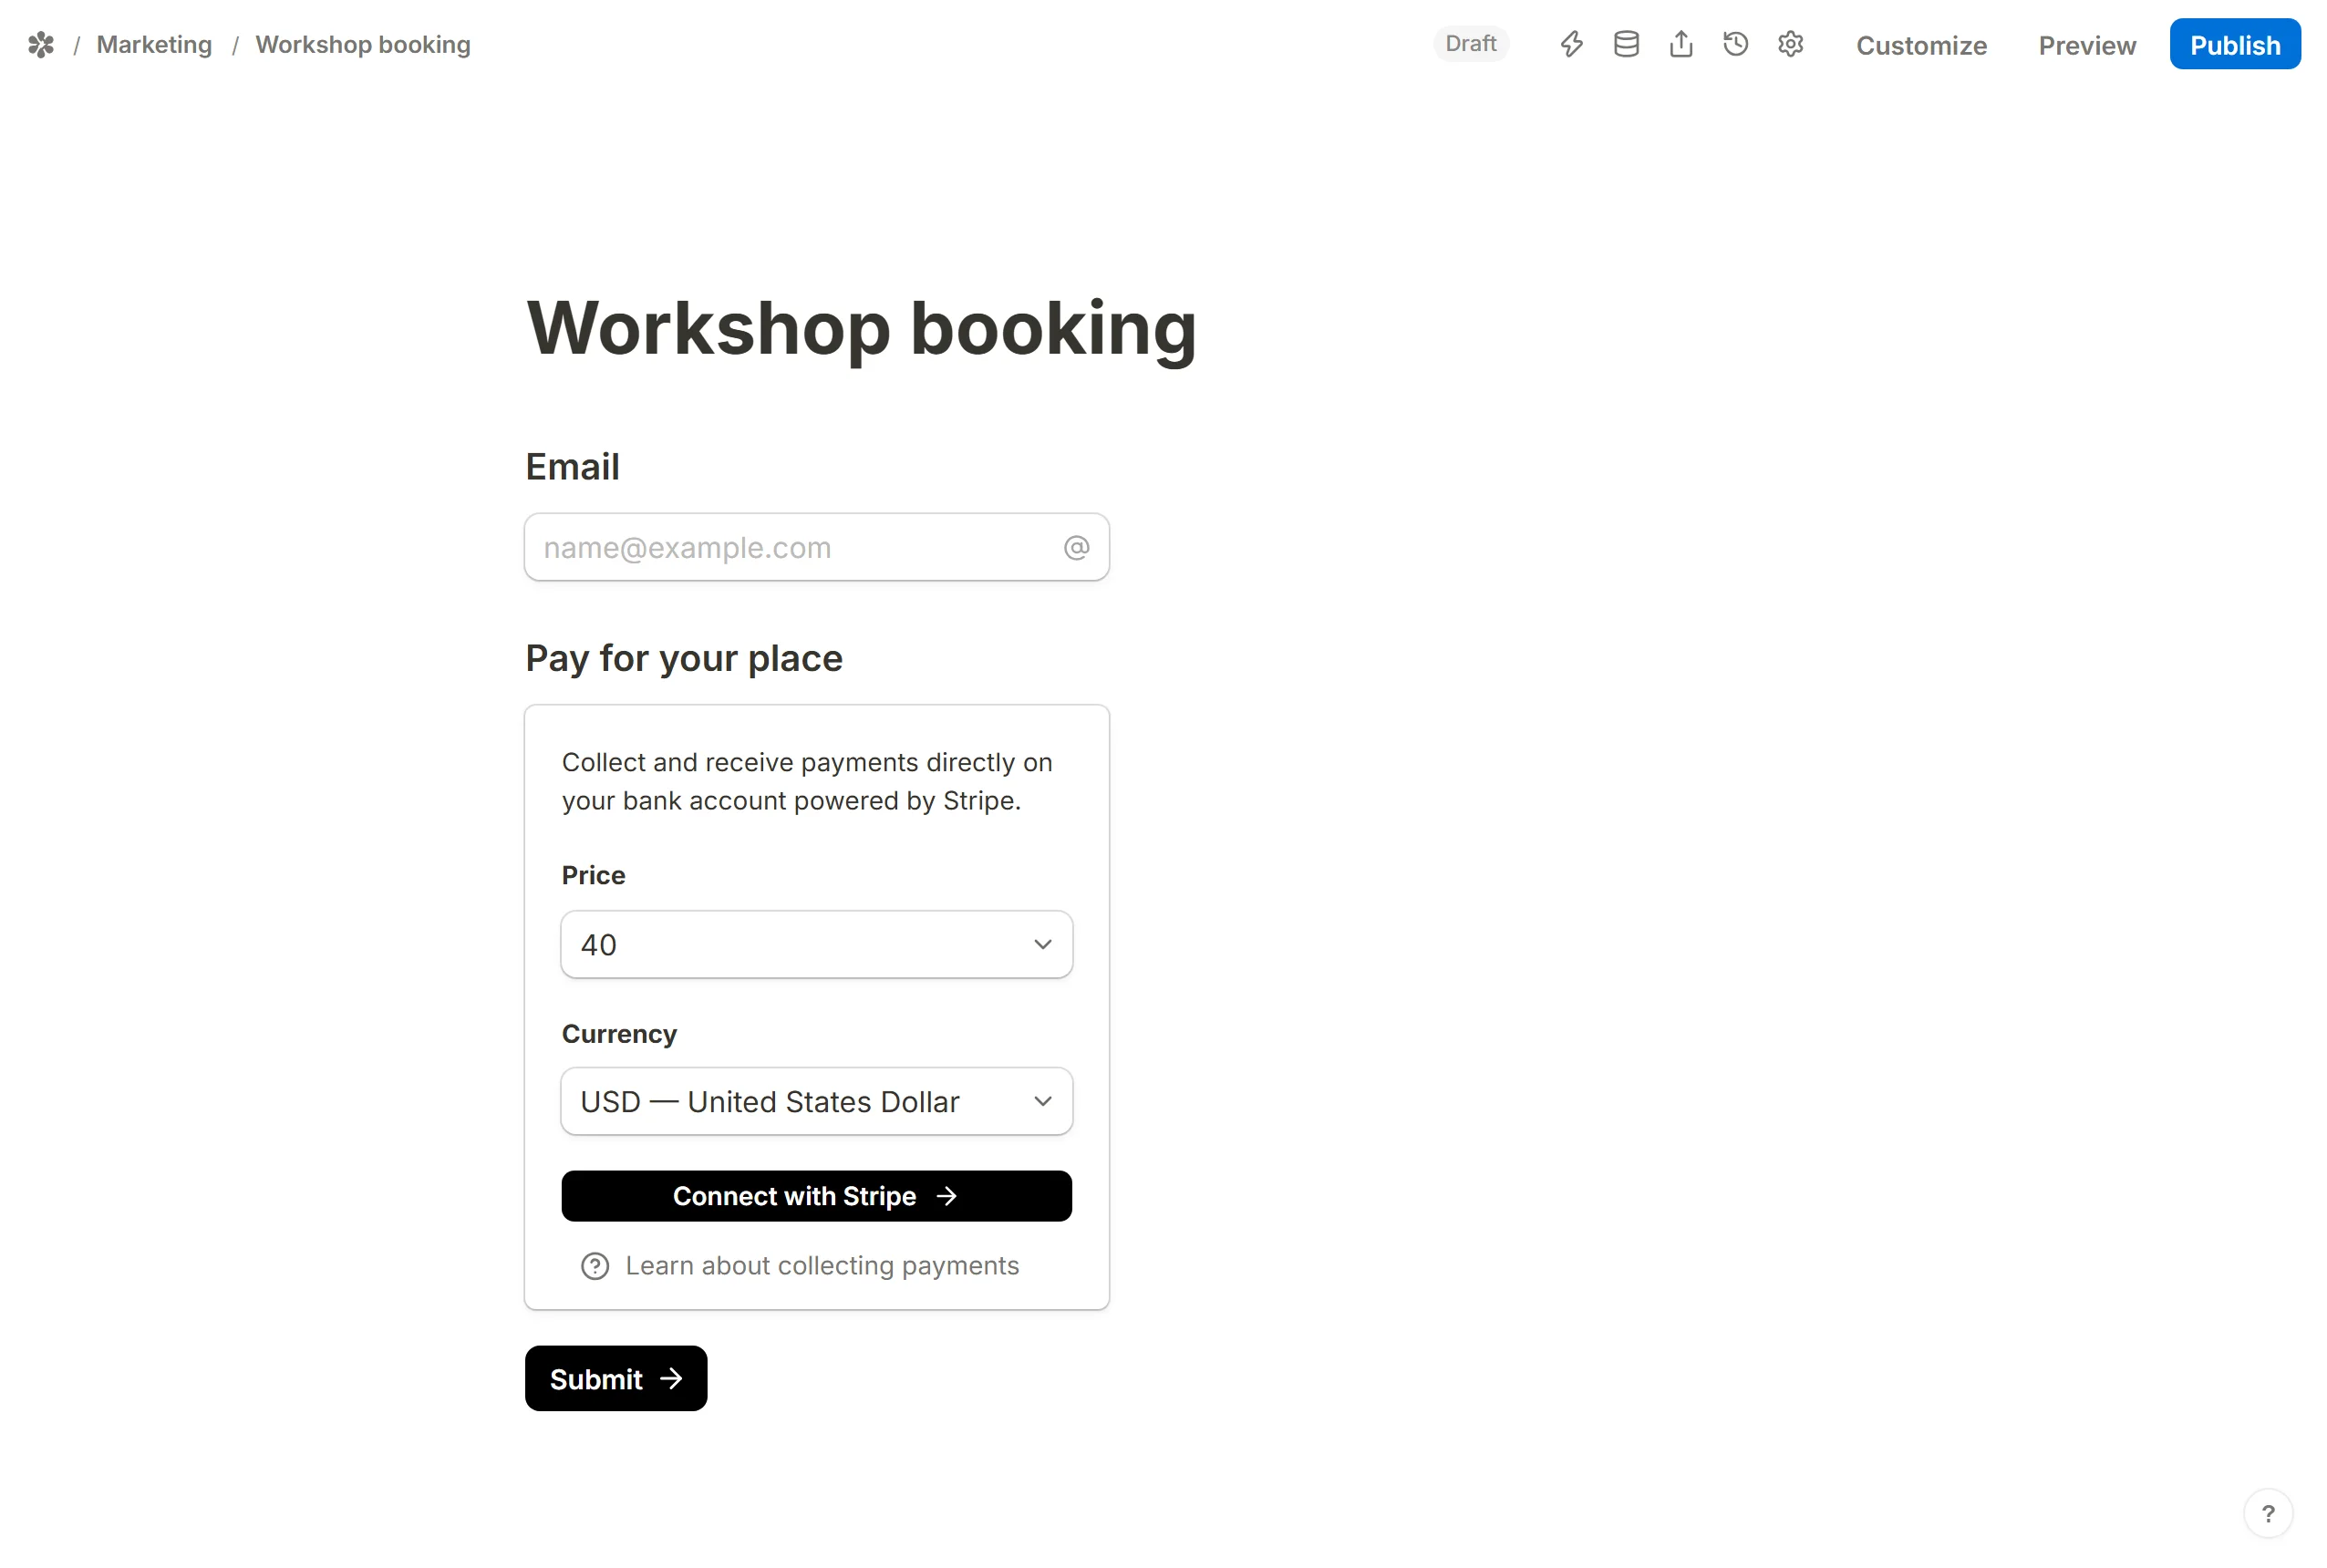
Press
Connect with Stripe. Stripe opens in a small window, asks whether you want to give Tinyform permission, and hands you back. The block then shows the card panel your respondents will see.
The connection belongs to the workspace, not to the form: connect once, and every other form on that shelf can take payments without asking again.
What a respondent sees
The price, a card field, a name and an email address. The card number never reaches Tinyform: the box is Stripe's own, served from Stripe, and what this app receives is a reference to a card Stripe is already holding.
The charge is made when they press Submit. If the card is declined, the message appears under the card box and the response is not recorded. A submission and its payment succeed or fail together. Stripe emails the receipt to the address they typed.
Where the money shows up
- Your dashboard. Each form's row shows what it has collected, beside its submission count.
- Insights. A
Collectedtile beside the visit and submission counts. It is the form's lifetime total, not the selected date range. - Submissions. The amount in the payment column, with a Stripe mark beside it that opens that exact charge in your Stripe dashboard. Receipts, refunds and disputes all live there.
Changing the price
The price and the currency stay editable for as long as the block exists, connected or not — but not on the block as you see it on the canvas. Once Stripe is connected the canvas draws the card panel a respondent will meet and nothing else, so there is nothing on it to type into. Both settings live in the block's own menu: hover the block, press the grip in the gutter to its left, and Price and Currency are the two rows under Required.
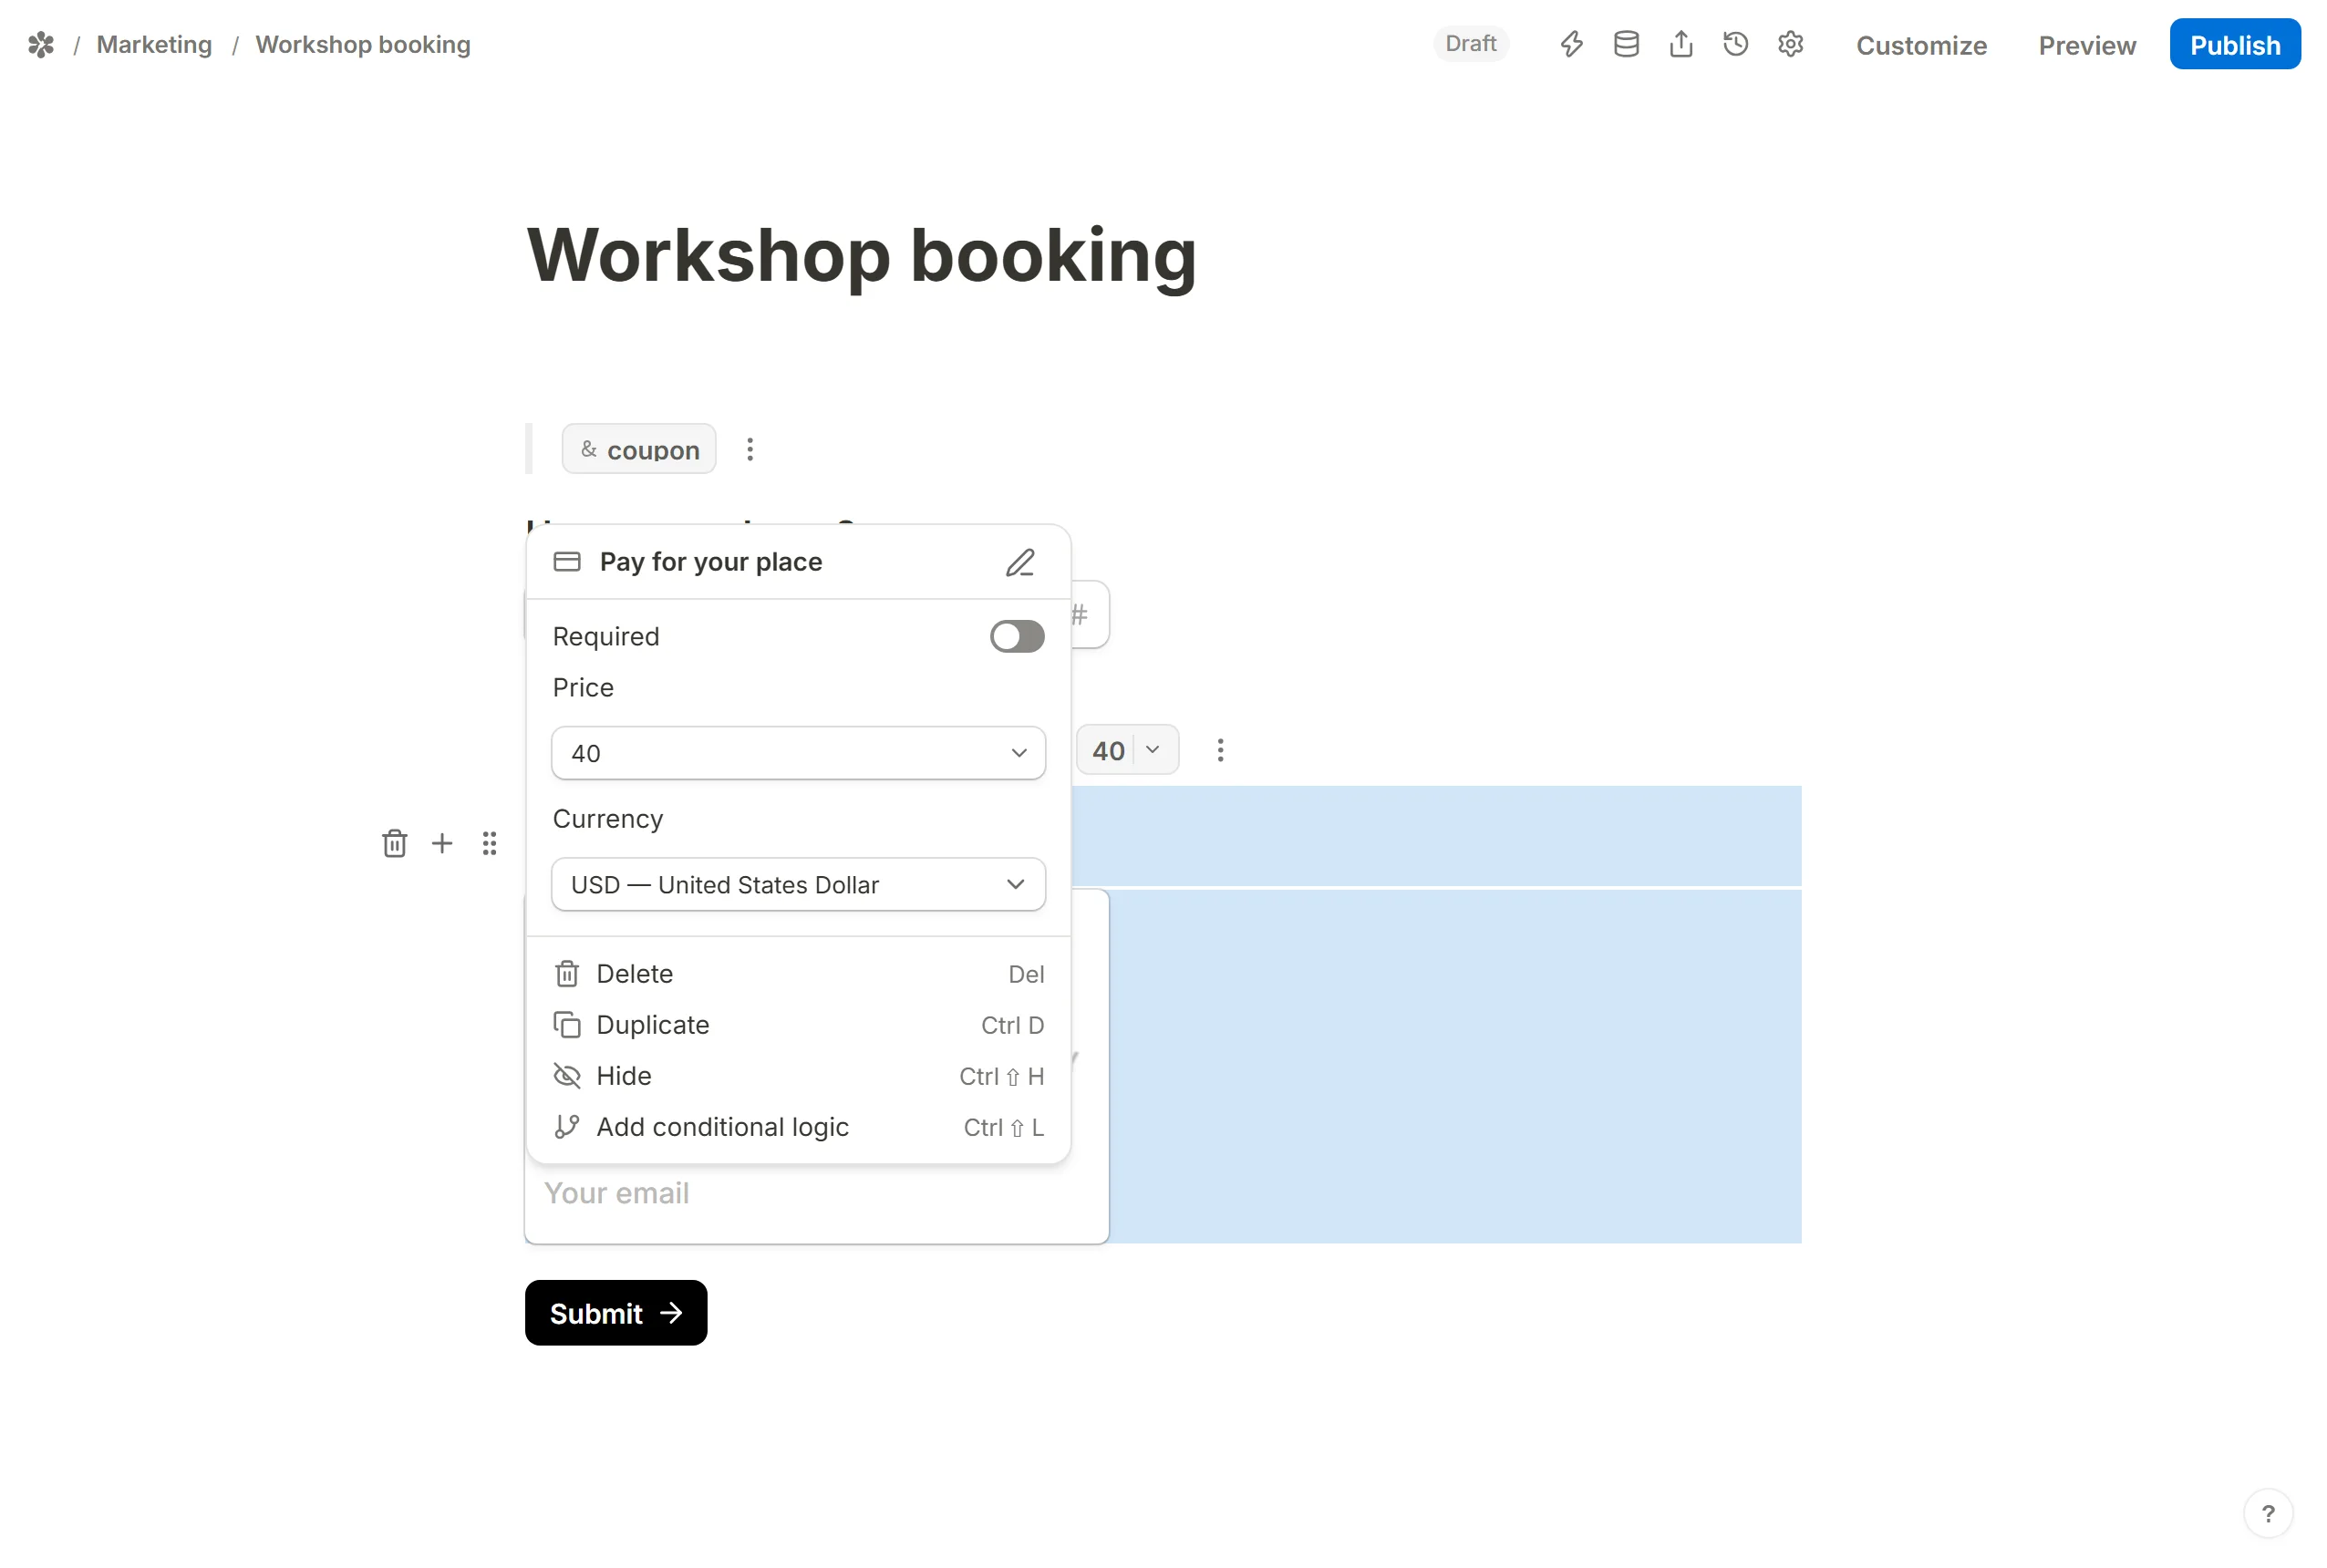
Price is a box you type an amount into. Every fill from then on is charged the new one; the payments already taken are unaffected, and you never reconnect Stripe. Digits and one decimal point are all it takes, and a comma is read as that point — 9,99 lands in the box as 9.99, not as nine hundred and ninety-nine.
Currency is the same list the block opened with, and the amount is charged in whichever you pick.
A price that follows a field
A price that changes with the answers is not typed at all: it points at another field, and the chevron on the right of the Price row is where you point it. Three kinds are offered, and only fields that sit above the payment block, because a price can only follow something the visitor has already reached:
- a calculated field — a basket total, a quantity times a unit price, a discount taken off;
- a hidden field, whose value arrives in the link you send;
- a
Numberquestion, which is how you take a donation or a pay-what-you-like amount: the respondent sets the price themselves, and that question's ownMinandMaxare what bound it.
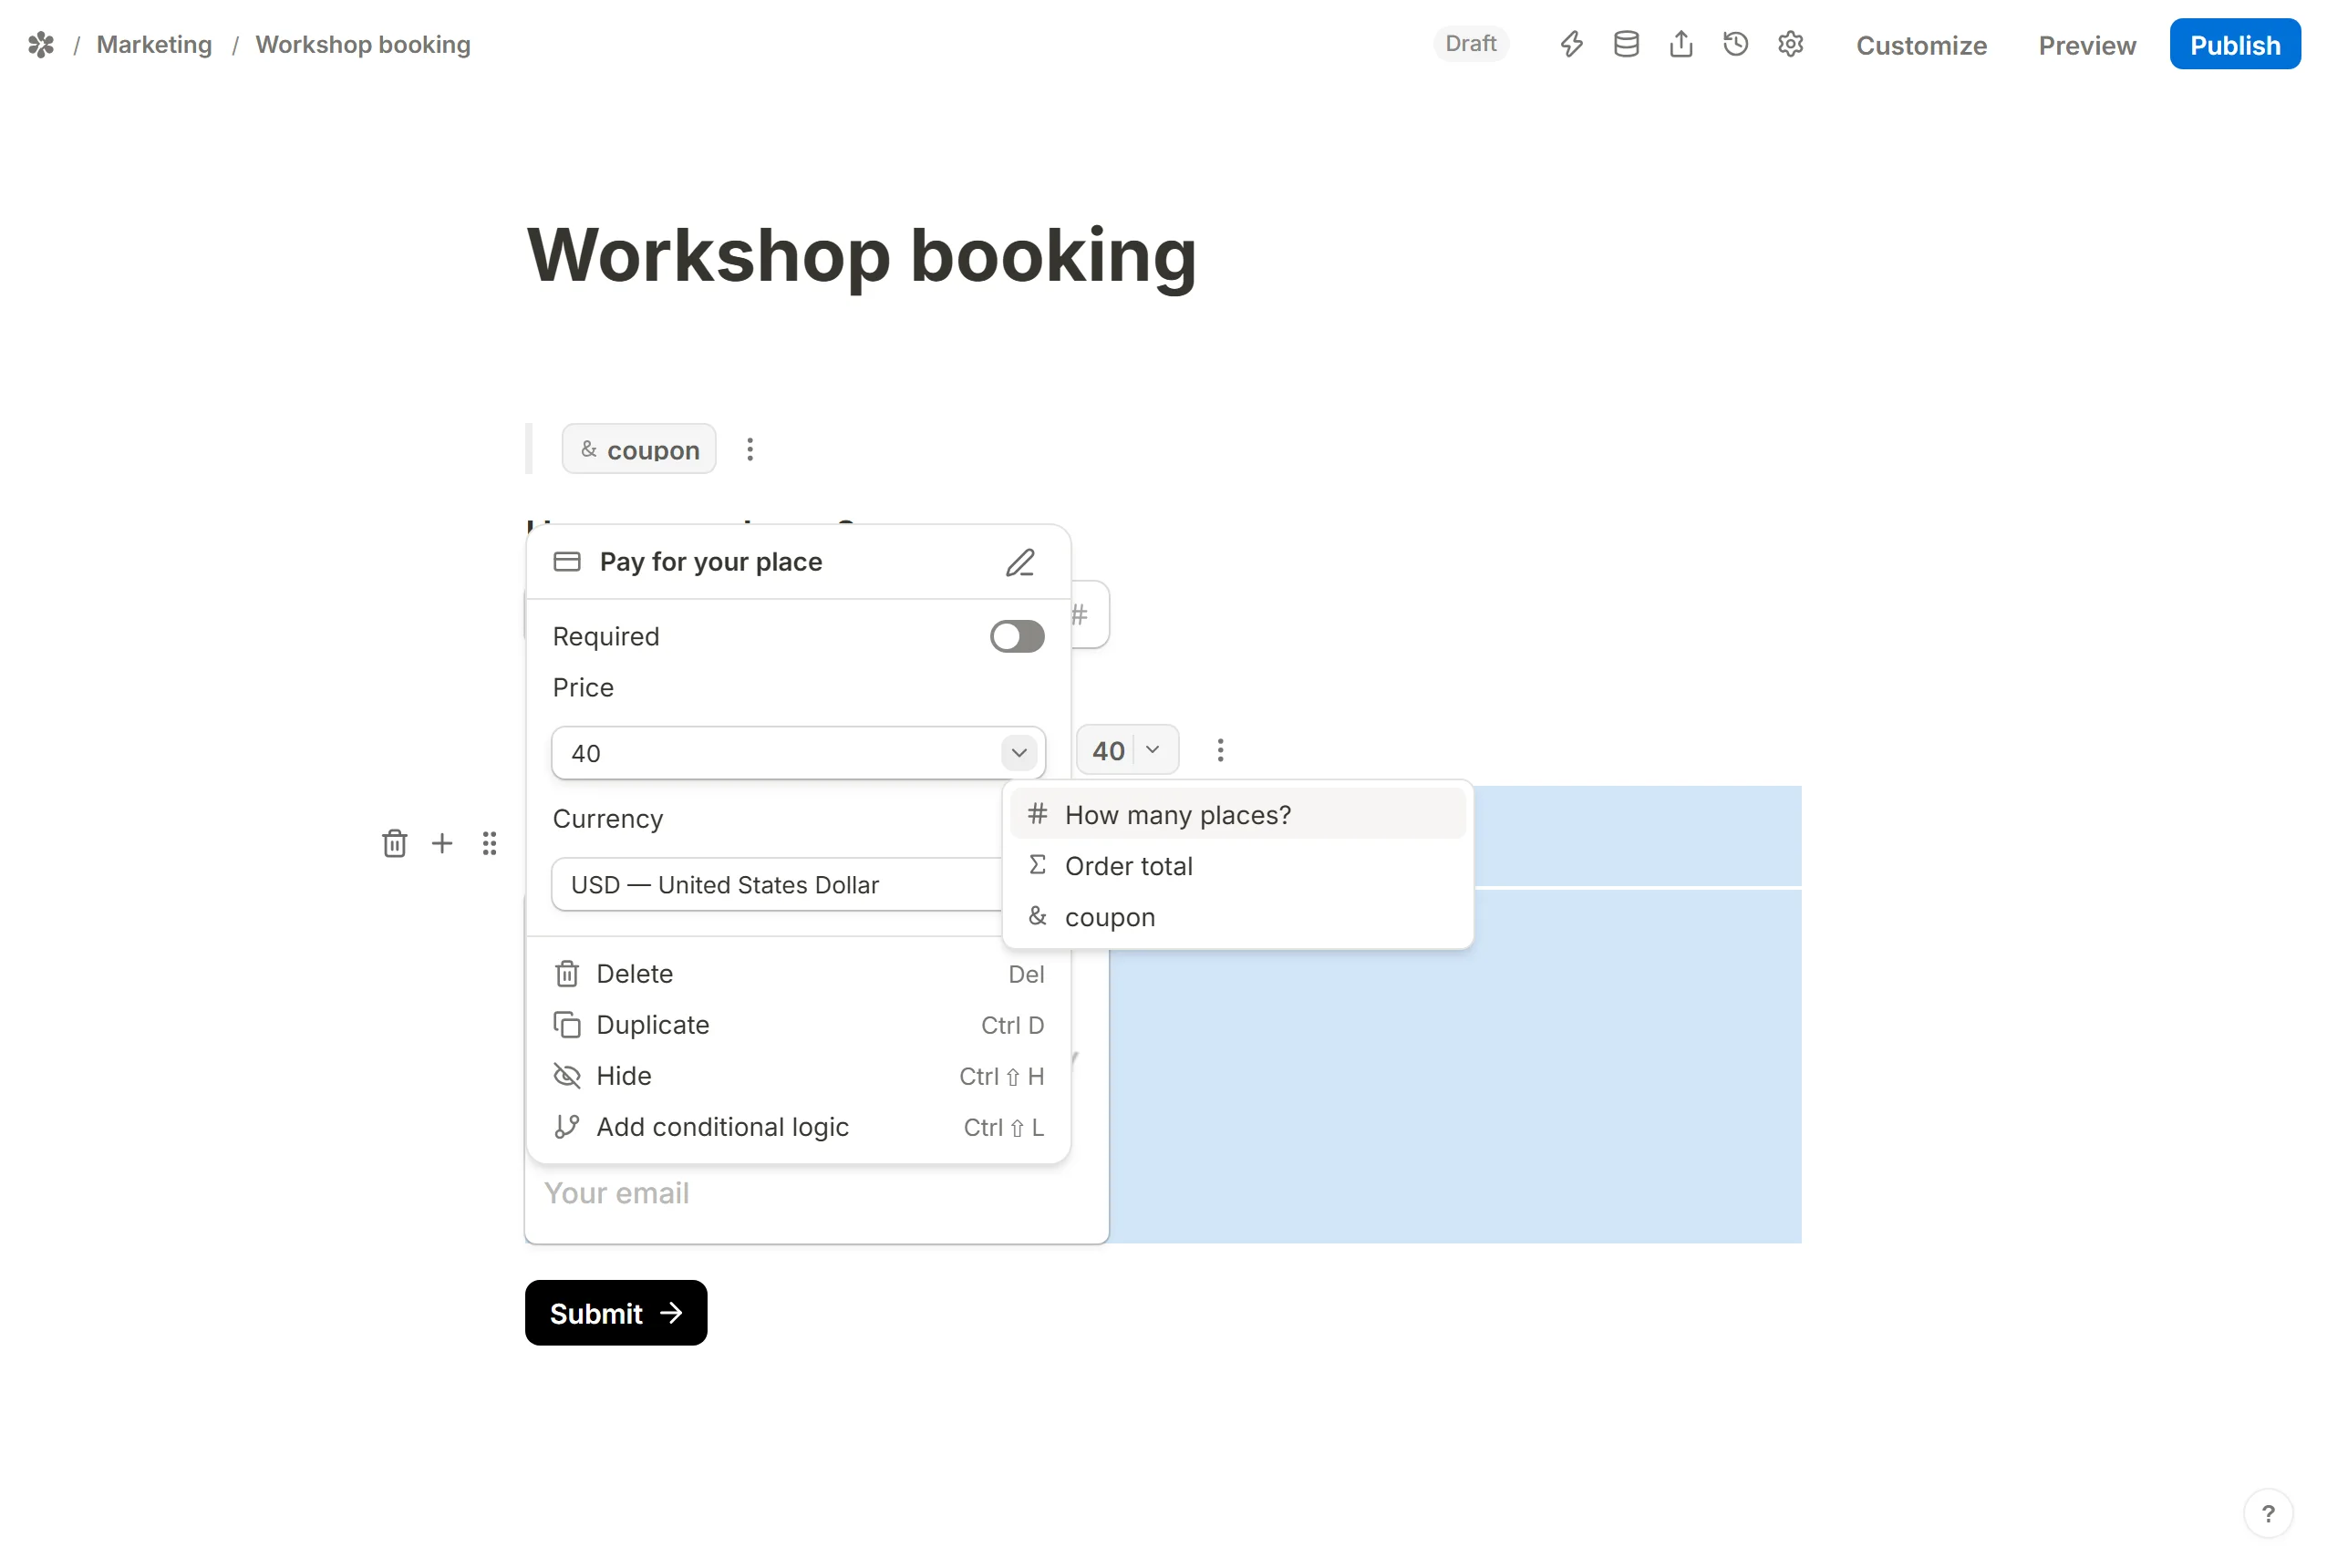
No other question type is on that list. A Number answer is a number and nothing else, which is what makes it safe to charge a card on; a short answer box is not. And on a form with nothing above the block to point at, there is no chevron — the row is a plain box.
Once a price follows a field, the row reads that field's name in place of the digits, and the panel on the canvas shows the amount a visitor meets the moment the form loads — a calculated field's starting value with your rules already run over it — rather than a number anybody will actually pay. The real amount is worked out per fill, from the answers given — and worked out again on the server, from the answers actually sent, before the card is touched. To go back to a typed amount, open the picker again and press the field that is already ticked.
Good to know
- Test cards are not supported. A payment form charges real cards on a live Stripe account.
- Recurring payments are not supported. Each submission is a single charge.
- Cards that need extra verification (3-D Secure) are refused with a note asking for another card. Support for the extra step is not built yet.
- Refunds are Stripe's. Follow the link from the submission row; refunding there does not delete the response here.
- A payment block is never required in the usual sense. It is not a question with an answer; it simply has to go through before the form can be sent.