How to create a checkout form
Build a checkout form from choice blocks, a calculated field and a payment block: price the options, add shipping, apply a discount, and charge the total through Stripe.
A checkout form lists what you sell, works out a price from what the visitor picked, adds shipping or tax, applies a discount code, collects the buyer's details and takes the payment, all on one shareable page.
Tinyform builds it from pieces you already know. A multiple choice, checkbox or dropdown block lists the products; a calculated field holds the running price; conditional logic adds to it when an option is chosen; and a Payment block pointed at that field charges whatever it works out to.
List the products
Insert a
Multiple choice,CheckboxesorDropdownquestion and name one option per product or variant. Checkboxes let a buyer pick several; multiple choice or a dropdown picks one.Add a calculated field for the price
Insert a
Calculated fieldsblock and add a field calledPrice, of type number, starting at0. If everything you sell shares a base price, start it there instead.Price the options
Insert a
Conditional logicblock, or pressAdd conditional logicin the product question's settings, and add one rule per option: when the product questionContains(orIs) that option,CalculatePriceAddits amount. A buyer who picks two products triggers two rules and the field holds the sum.Add shipping or tax
A flat fee is one more rule with the same shape; make its condition
Price>0so an empty basket is never charged shipping. A percentage is aMultiplyaction, so 20% tax isPriceMultiply1.2, and it should sit last so it applies to the whole total.Take a discount code
Add a
Short answerquestion for the code and leave it optional, so a buyer without one is never blocked. One rule per code: when the answerIsthat code,MultiplyPriceby0.9for ten percent off, orSubtracta fixed amount.Collect the buyer's details
Add the name, email, phone and address questions you need for fulfilment, then a
New pageblock so the checkout sits on its own page and the total is settled before anyone reaches it.Add the payment block
Type
/payment. Press the chevron on the right of the price and choose thePricecalculated field, pick the currency, and pressConnect with Stripeif this workspace has not connected before.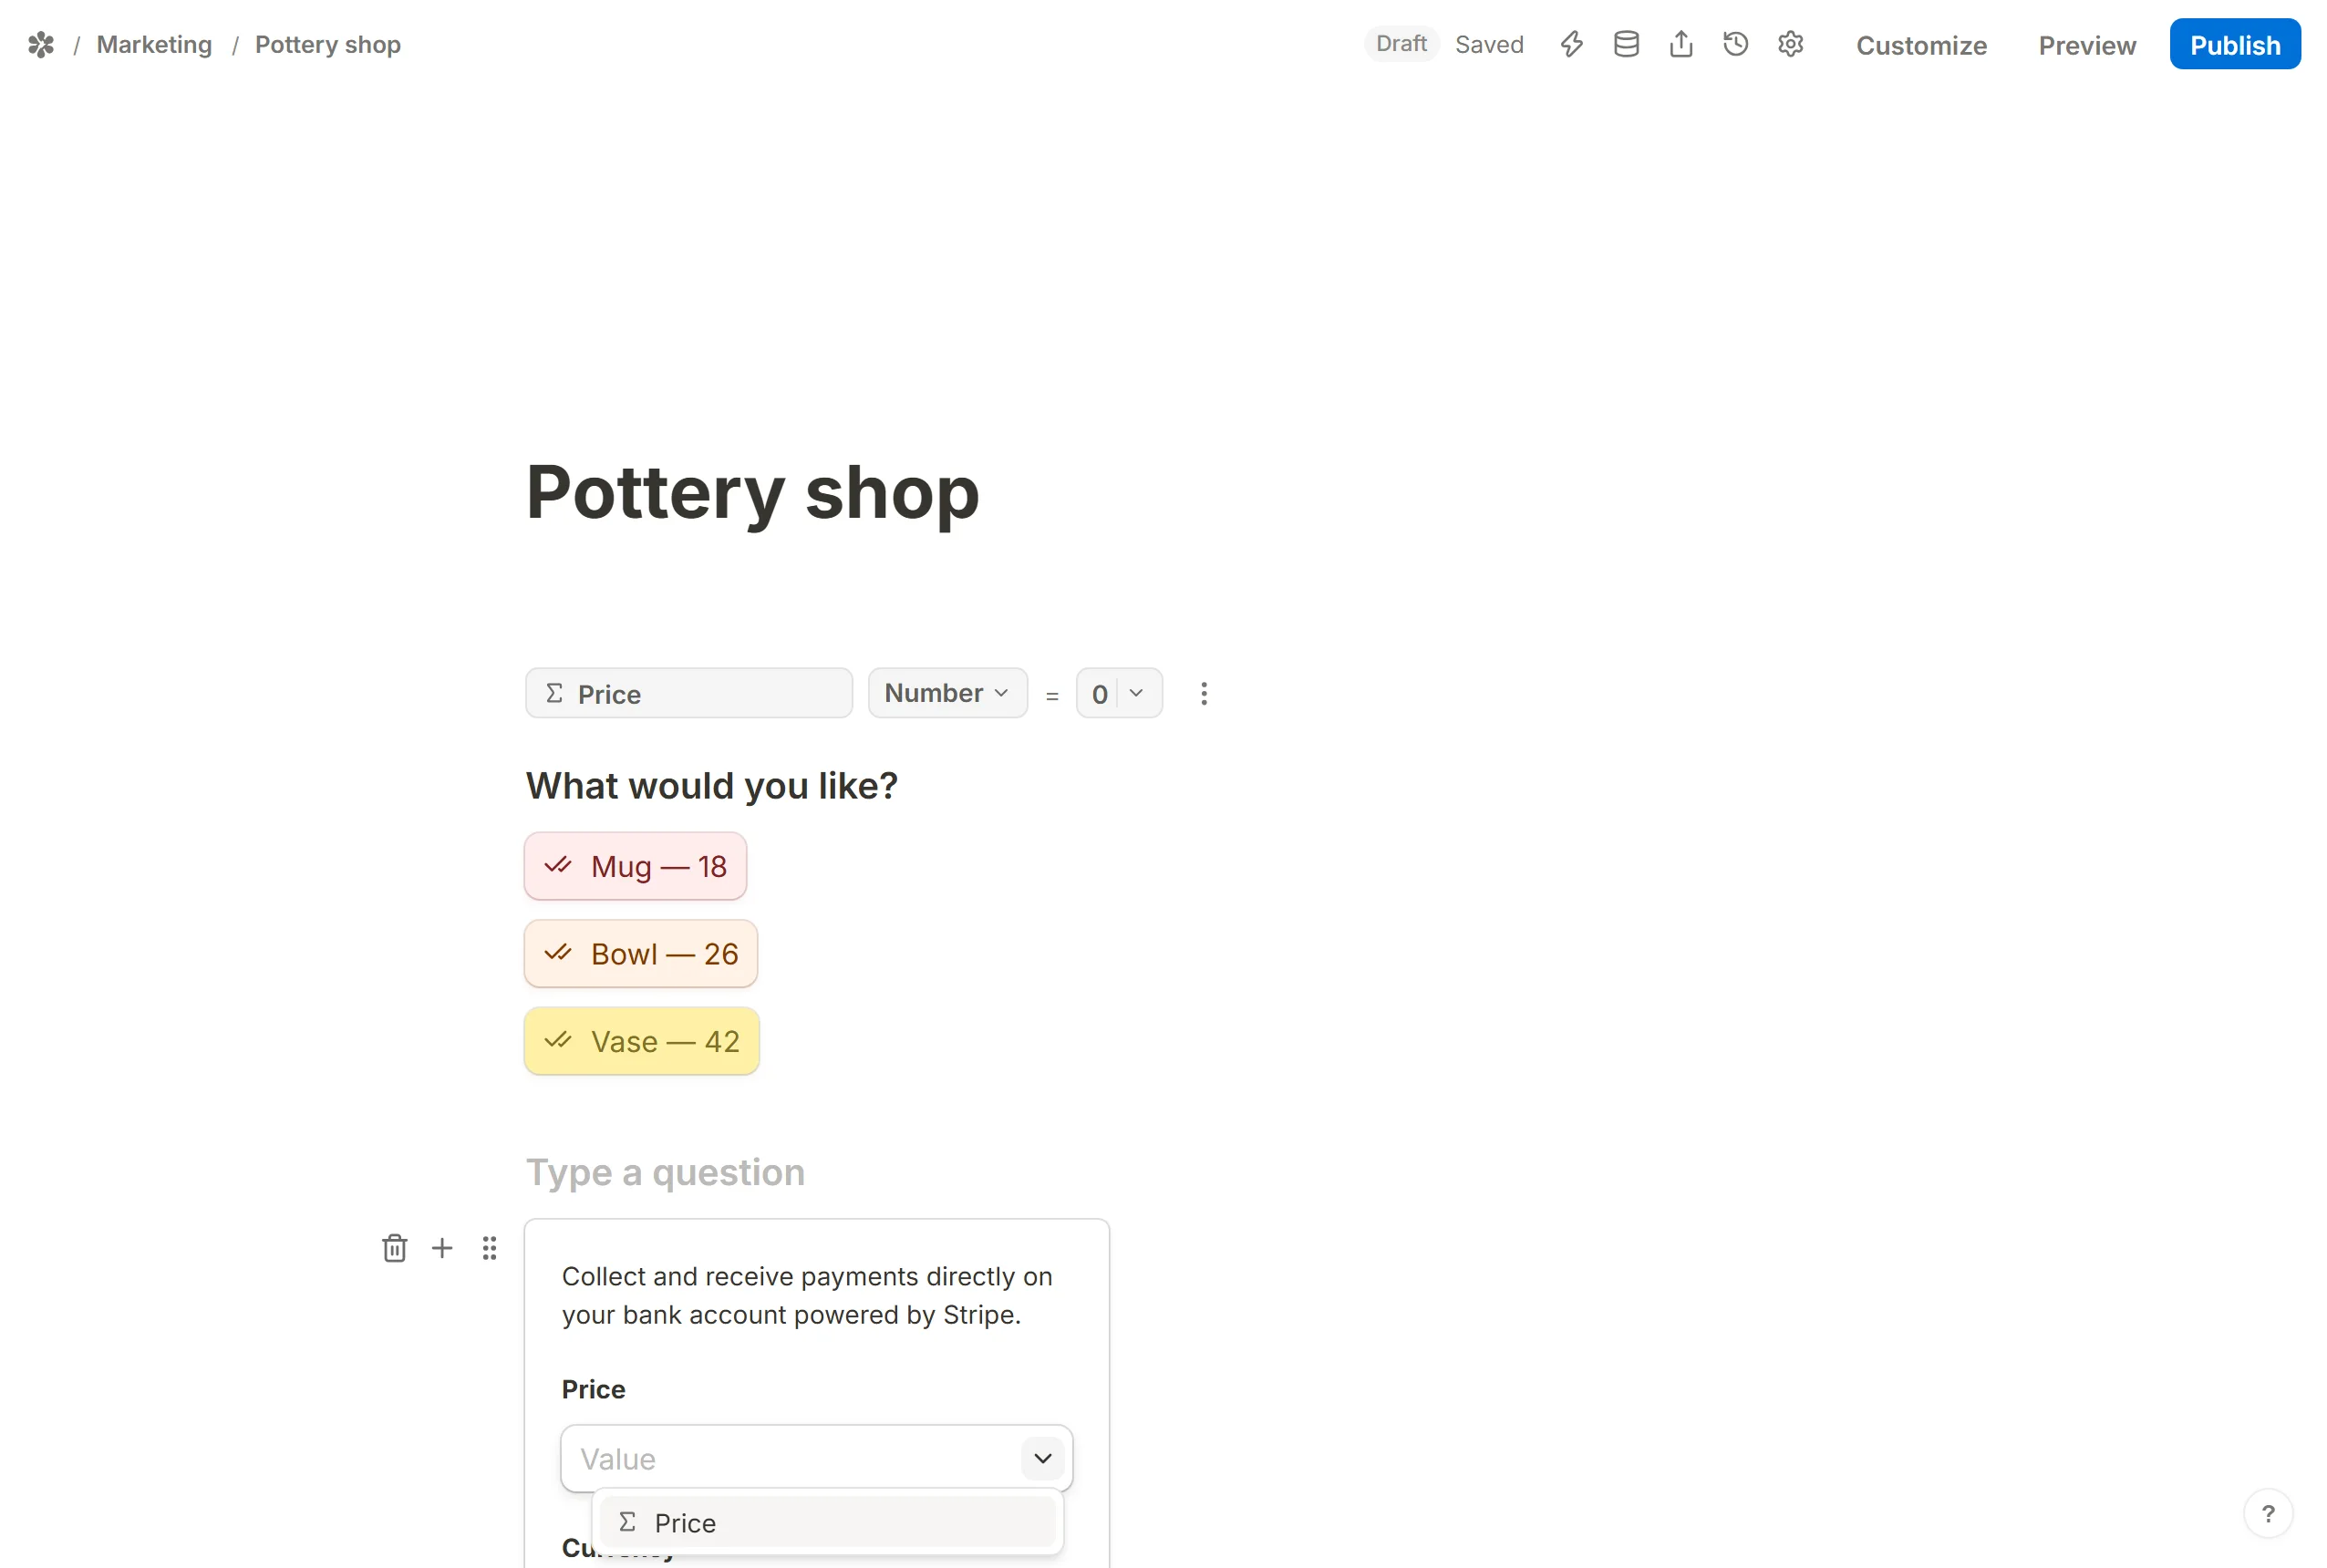
The published page shows the buyer the amount their choices came to, and that is what their card is charged when they press
Submit.Confirm the order
Finish with a Thank you page. It can mention the products and the
Pricefield, so the confirmation repeats what was bought and what was paid.
Share the finished form from the Share tab, or embed it on your own site. Each paid order appears in Submissions with its amount and a Stripe mark that opens the charge, and the form's row on your dashboard keeps a running total of what it has collected.