How to create a free quiz
Build a scored quiz: award points per answer with calculated fields and logic, show the score on a Thank you page, and email it to each respondent.
A scored quiz asks a run of questions, adds up points as the respondent answers, and shows them a result at the end. Tinyform builds one out of three blocks you already have: a choice question, a calculated field that holds the running score, and a conditional logic block that adds to it. This guide walks through the whole thing, from the first question to the email that carries the result.
What a scored quiz is
A scored quiz, sometimes called a knowledge quiz, attaches a number of points to each answer option. The points accumulate as the respondent moves through the questions, and the total is their score.
There are two common ways to award points:
- Give every option a different number of points, so the score measures how well someone knows the subject rather than whether they got each question right.
- Give points to the correct option only, so each question is a pass or a fail and the score is a count of correct answers.
What kind of quiz to build
Once you have the mechanics, the subject can be anything. Some shapes that come up often:
- A revision quiz for students, with the score shown at the end
- A short icebreaker for a team meeting
- A trivia round to share on social media
- A quiz that gives a result in exchange for an email address
- A knowledge check at the end of an online lesson
- A staff training quiz with a pass mark
- A competition with a leaderboard and a prize
- A pub-quiz style round for friends and family
Building the quiz
The steps below assume an empty form. If you would rather start with the wiring already in place, open the Online Trivia Quiz Template at /templates/online-trivia-quiz-template and press Use this template; it lands in your workspace with the pages, the score field and the logic blocks already there.
1. Create the form and add the questions
Open the editor at /forms/<id>/edit and add one question per quiz item. Type / on an empty line, or press the + beside it, to open the insert menu and pick a question type. Multiple choice is the usual choice for a quiz, since each option can carry its own points.
A quiz that looks good gets answered more often, and there are three quick ways to dress the questions:
- Give each option a colour from the option's own menu (
Color). - Add an image to an option from the same menu (
Image), so a question can be answered by picture. - Drop an
Embed anything, video or audio block between questions to quiz people on a clip.
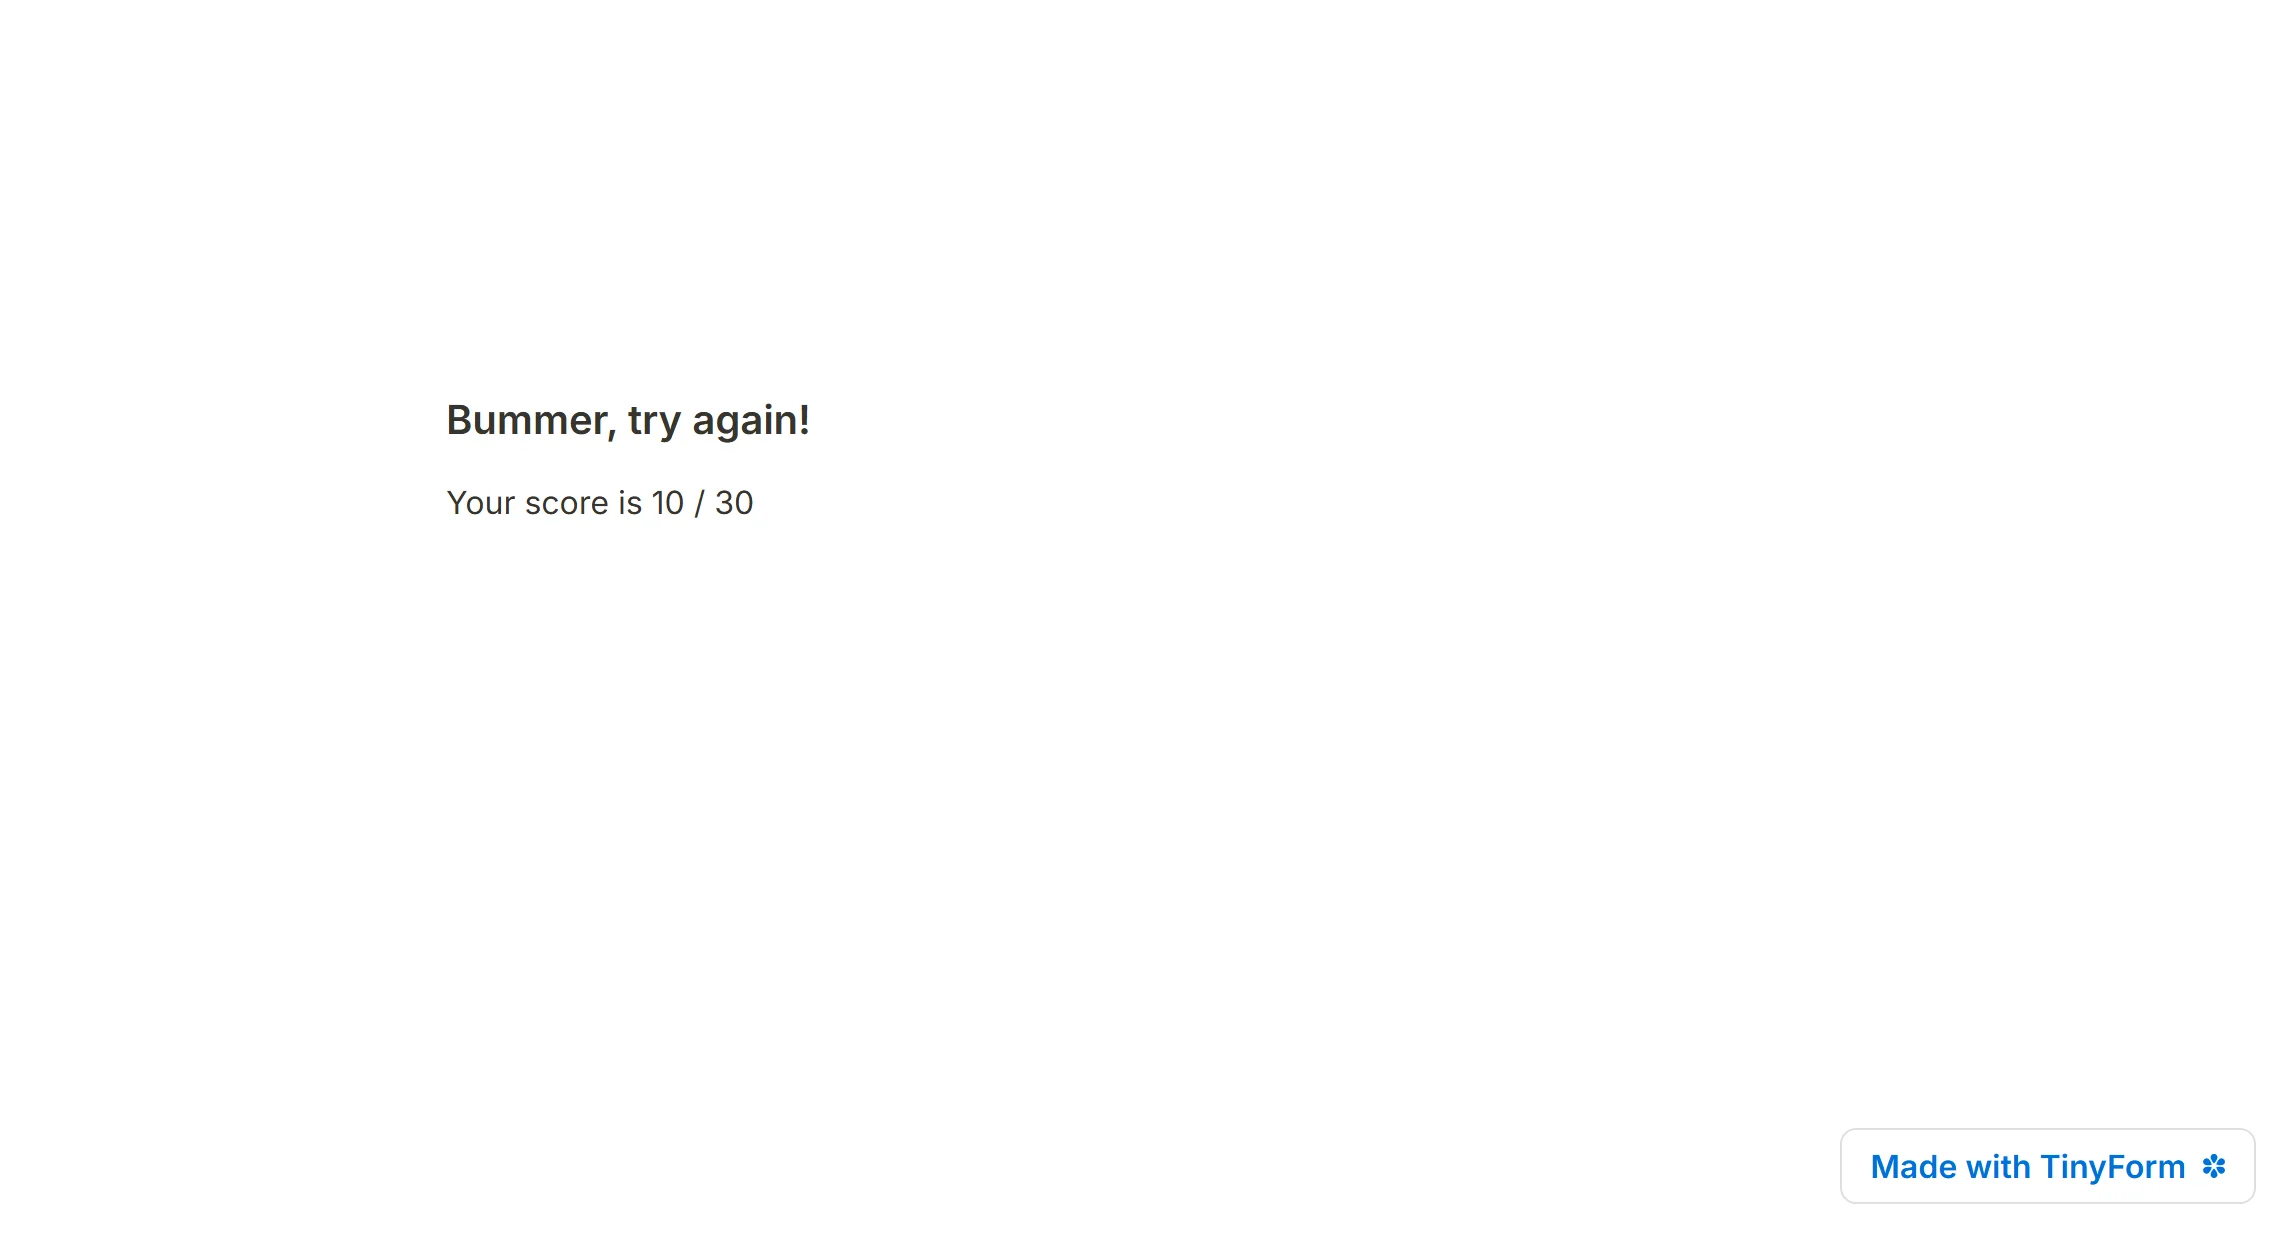
2. Add up the score
The score lives in a calculated field, and each question gets a logic block that adds to it. Put the calculated field right under the first question so it exists before anything tries to write into it.
Insert the calculated field
Type/and chooseCalculated field. Name it in theField namebox; "Score" is the obvious name and is what this guide uses from here on.Set its type and starting value
Leave the result type onNumberand setInitial valueto 0.
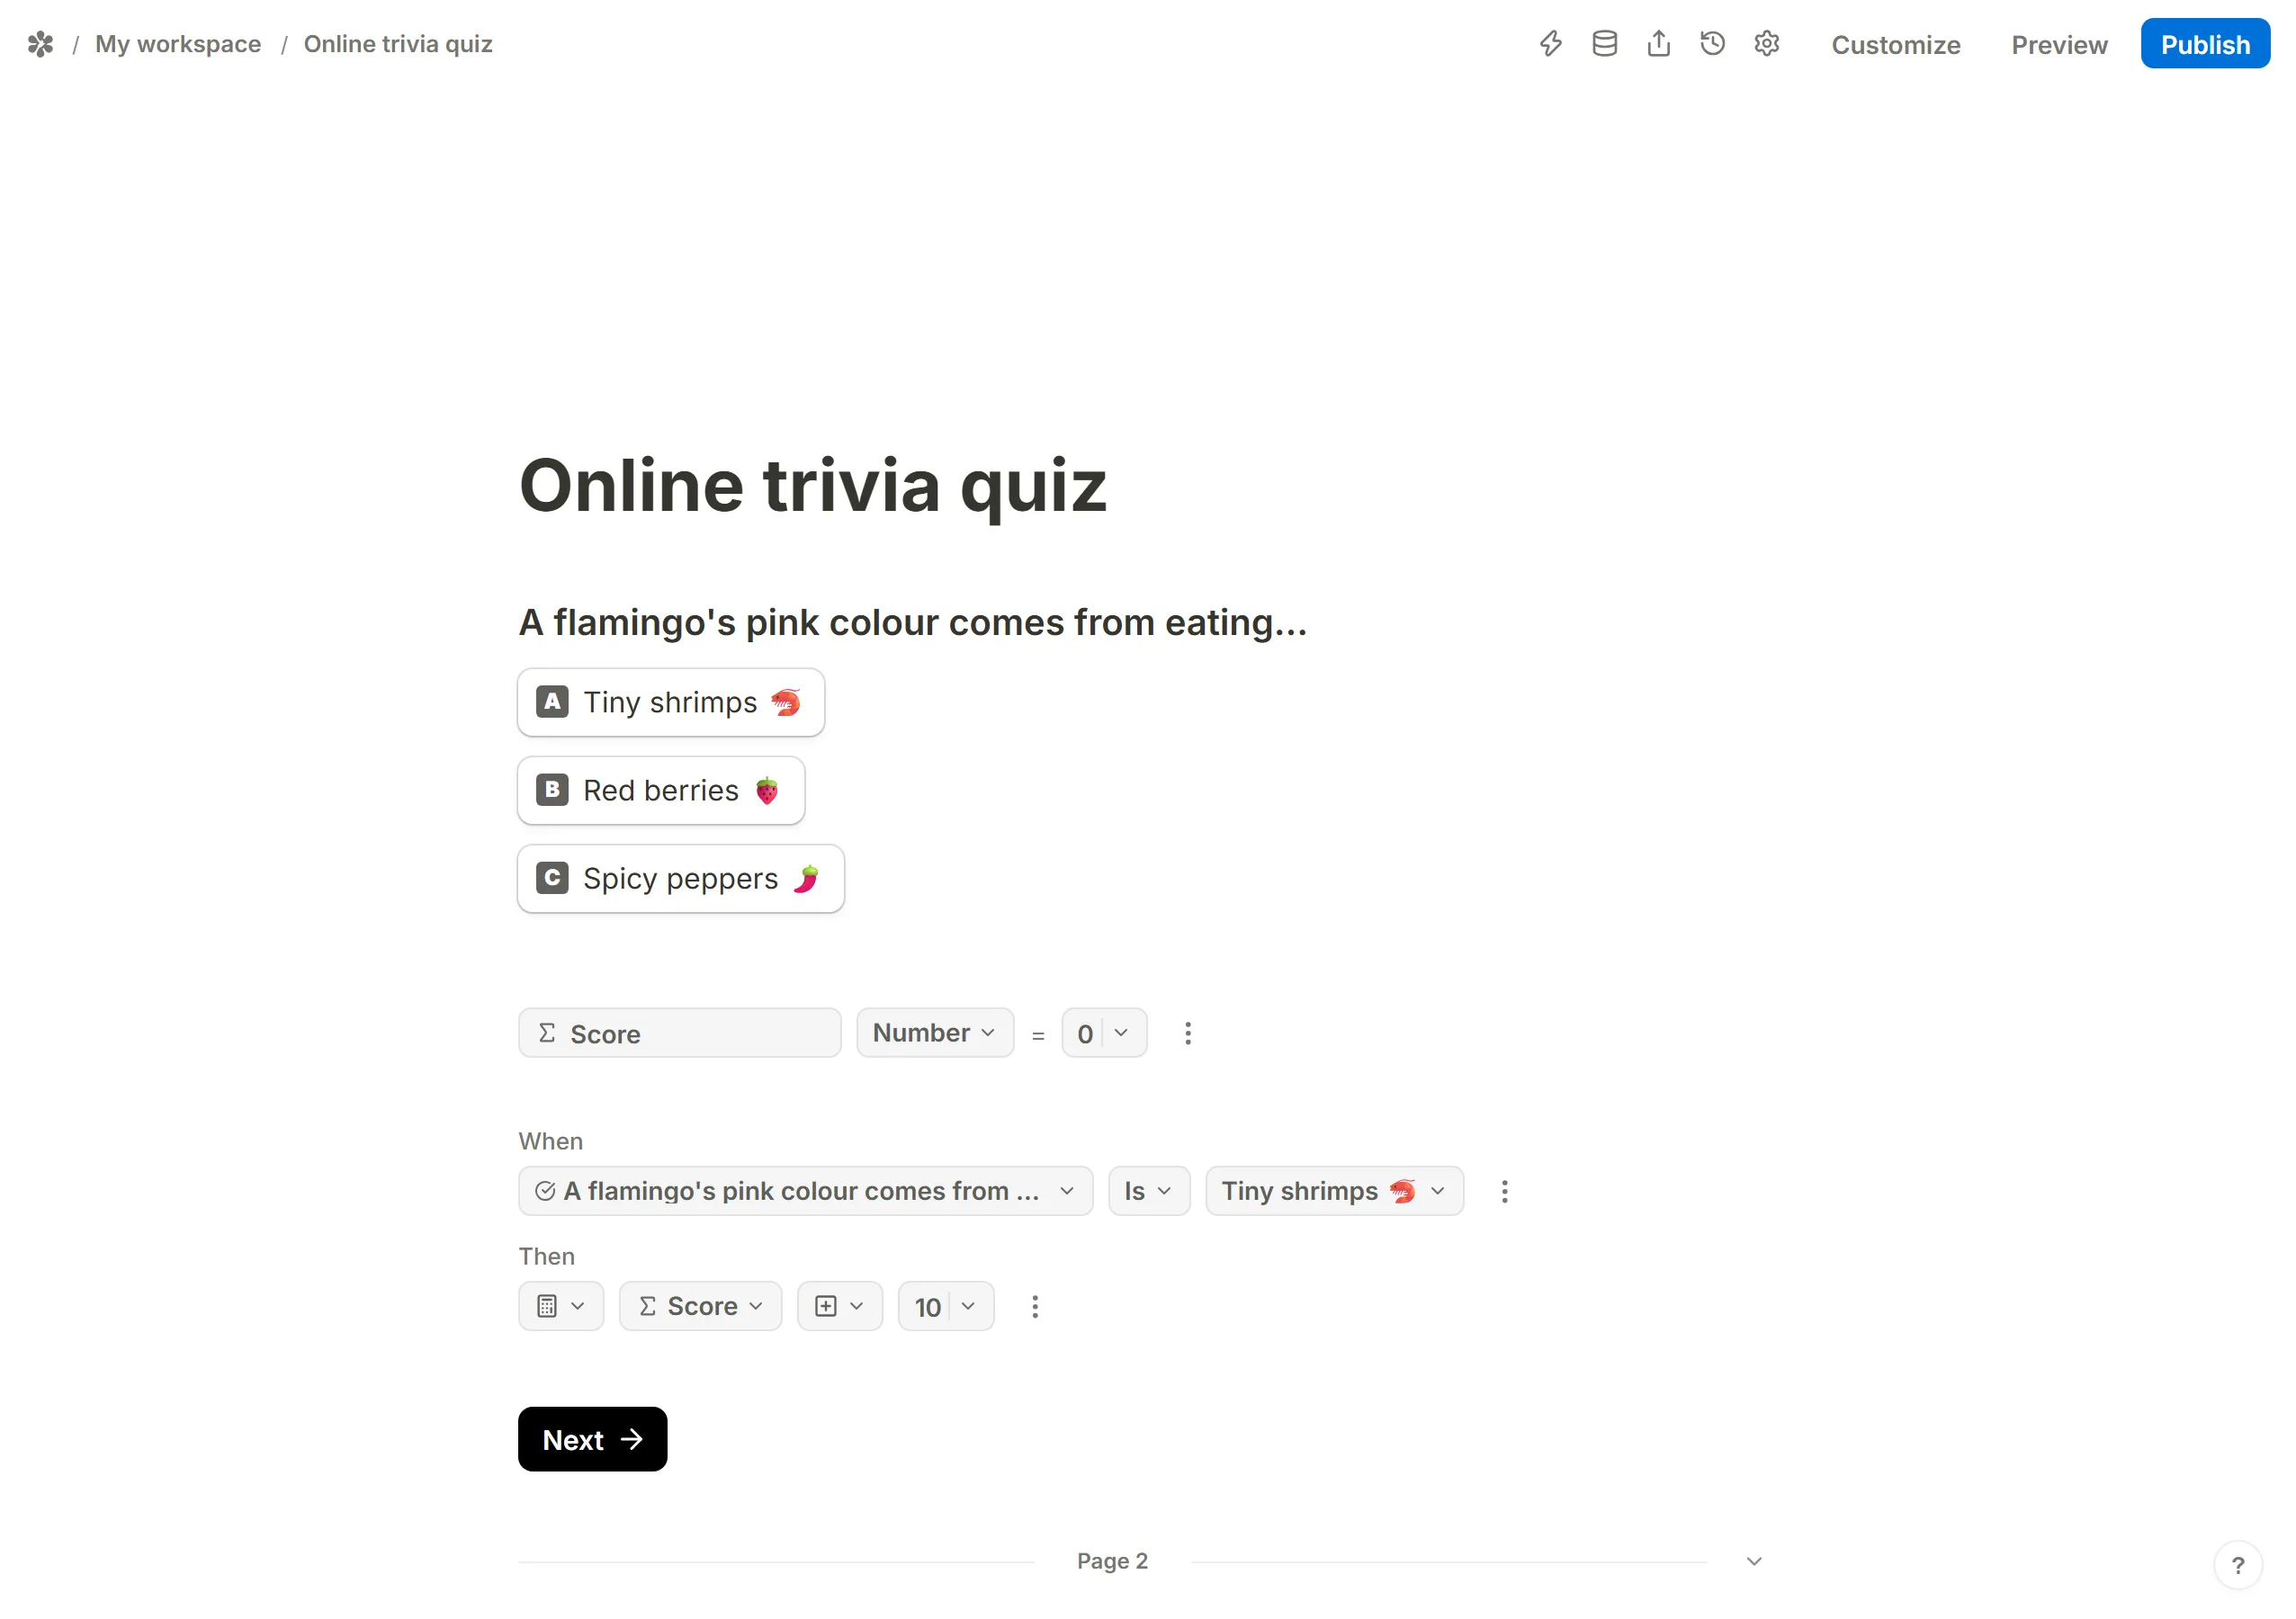
Now award the points. Under each question:
Insert a logic block
Type/directly below the question and chooseConditional logic.Write the condition
When the question's answer is the correct option.Pick the Calculate action
ChooseCalculate, pickScoreas the target, chooseAddand enter the points for that answer. In the example below the correct answer ("Tiny shrimps") is worth 10.Repeat
Do the same under every question. Only the first question has the calculated field above its logic block; the rest carry the logic block alone.
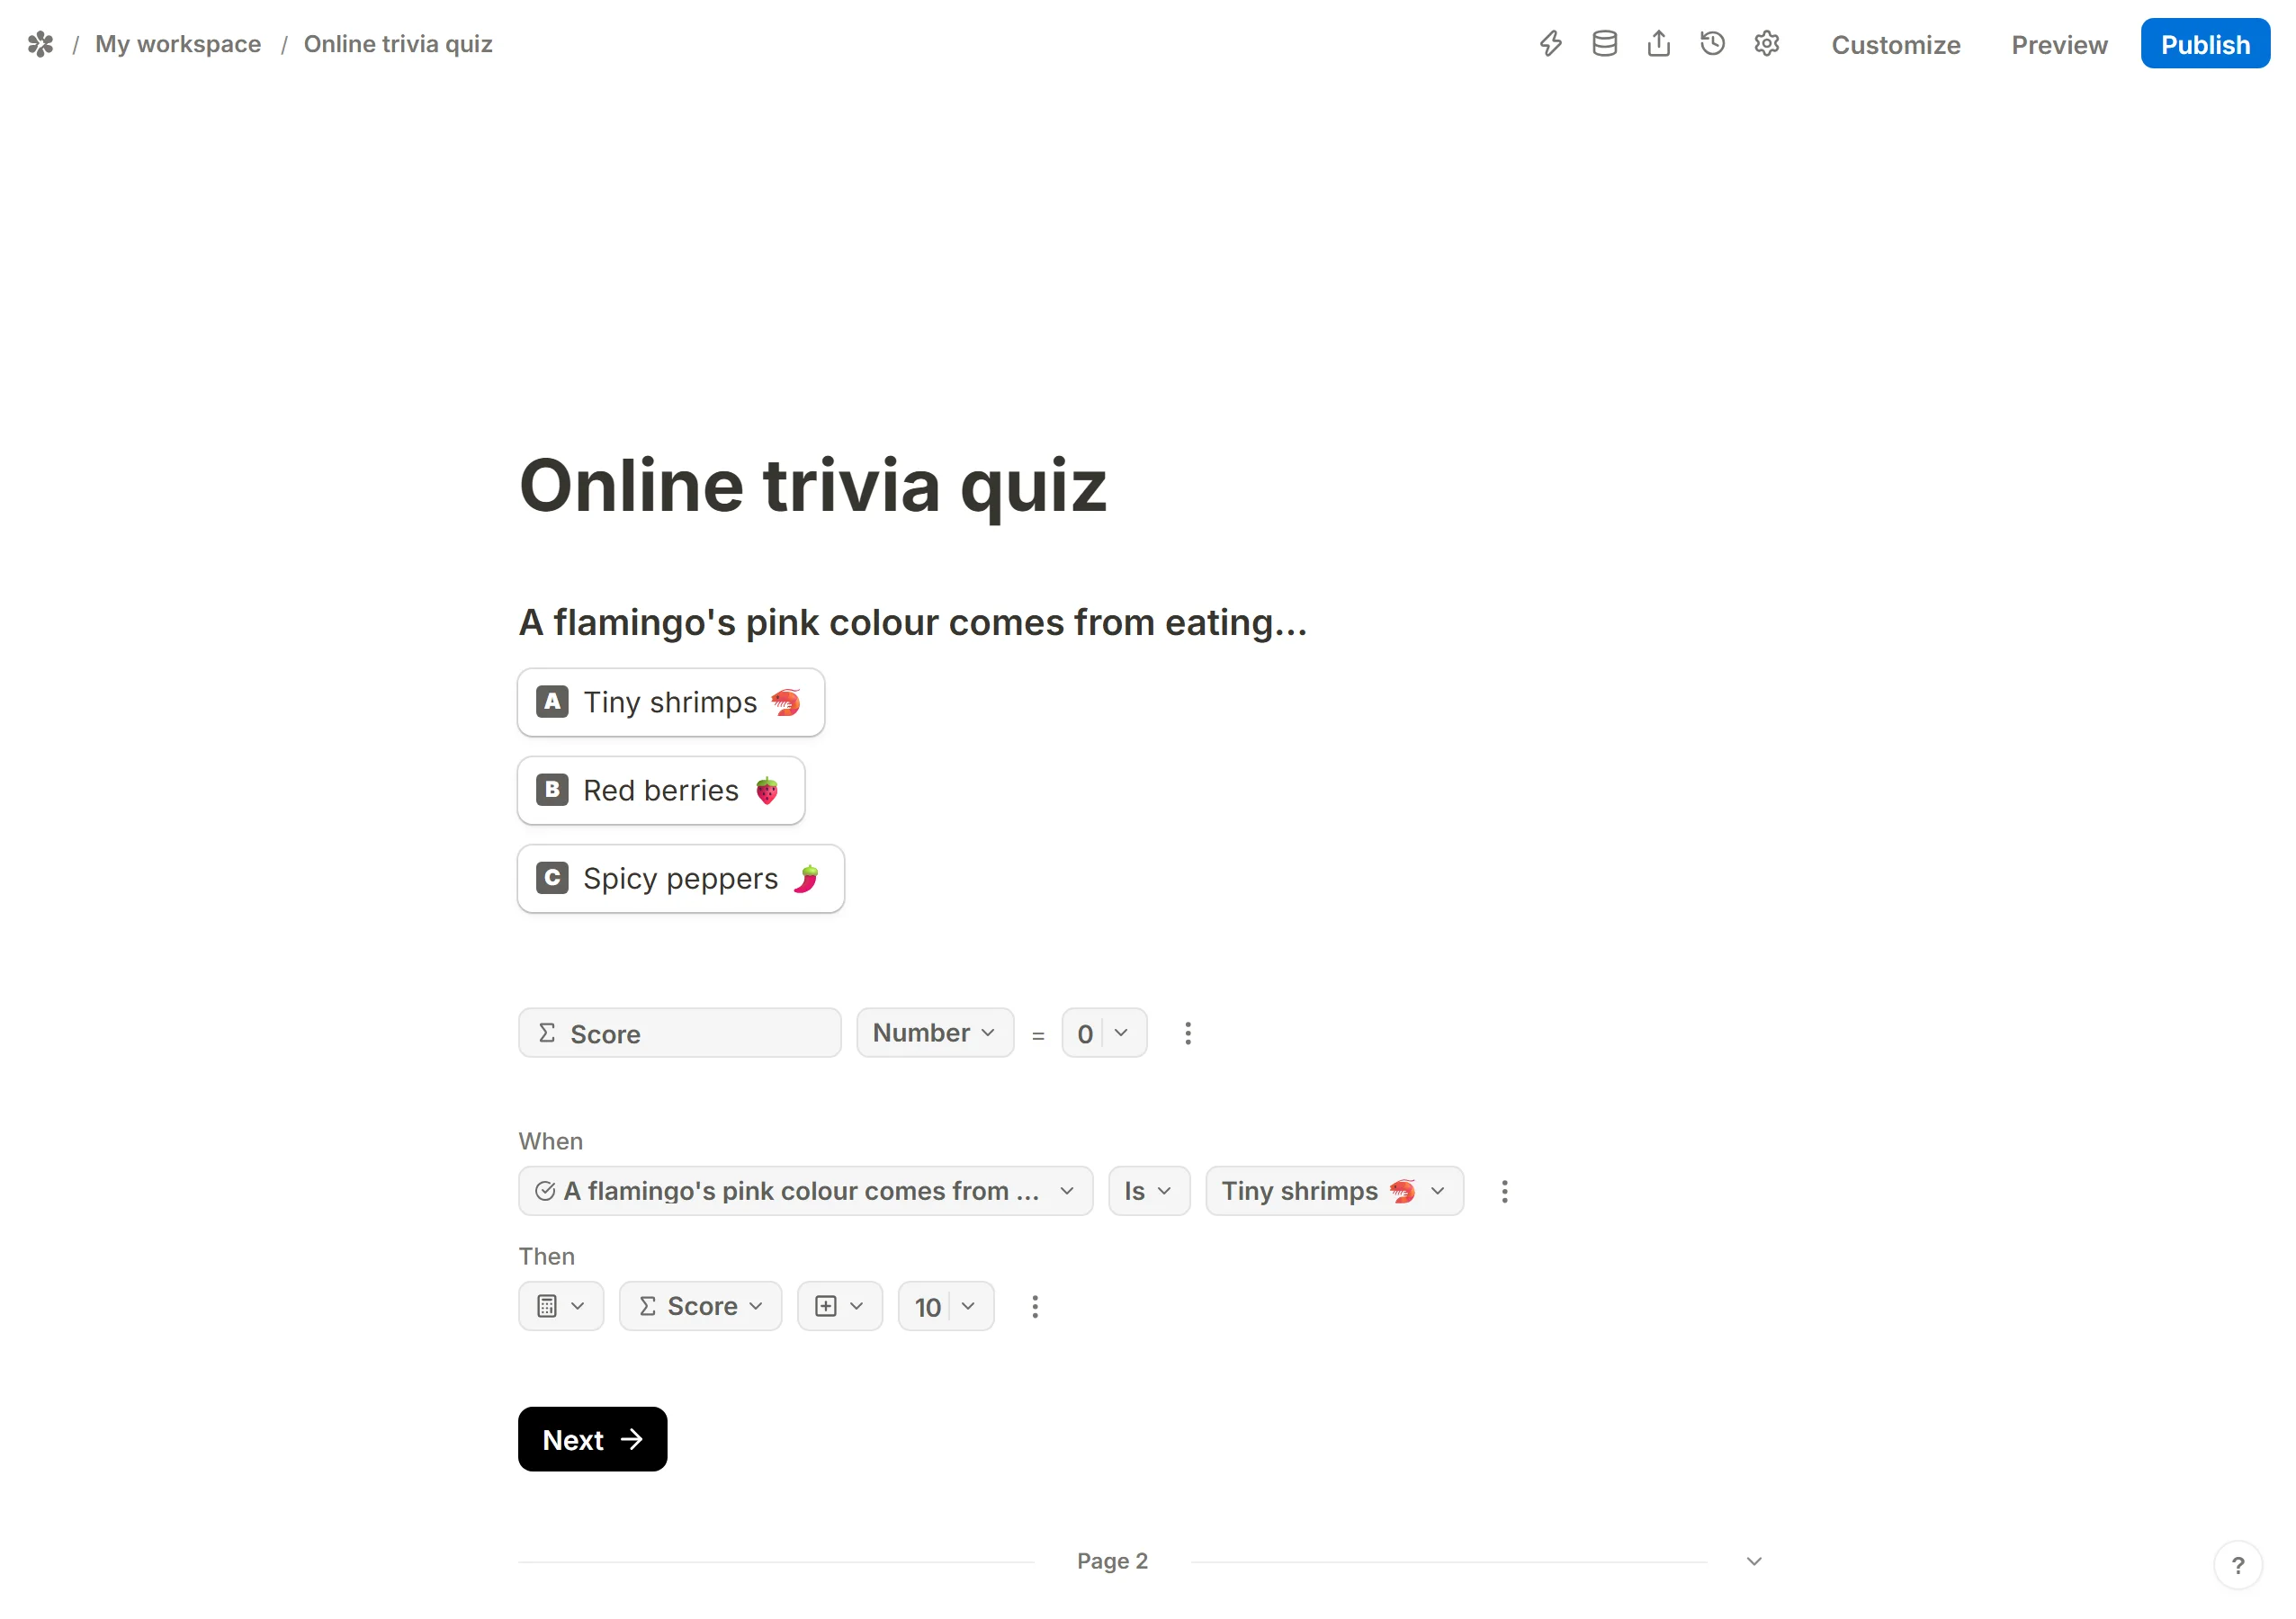
The Calculate action also offers Subtract, Multiply, Divide, Assign and Formula, which is how you would take points off for a wrong answer or weight one question more than another. Calculated fields has the full list.
3. Show the result
The respondent sees their score on a Thank you page, which is the page drawn after they press Submit. To add one:
- If the form already ends with a
New pageblock, switch on that block's'Thank you' pagetoggle. - Otherwise type
/after the last question and pick'Thank you' pagefrom the insert menu.
Write whatever you want the respondent to read. The page takes headings, coloured text, images and video like any other page. To print the score, type a sentence such as "Your score is" and then type @; the mention menu opens, and the field is listed under Mention a calculated field. Pick Score.
If a low score and a high score deserve different pages, add a second 'Thank you' page block under the first and write the other message there.
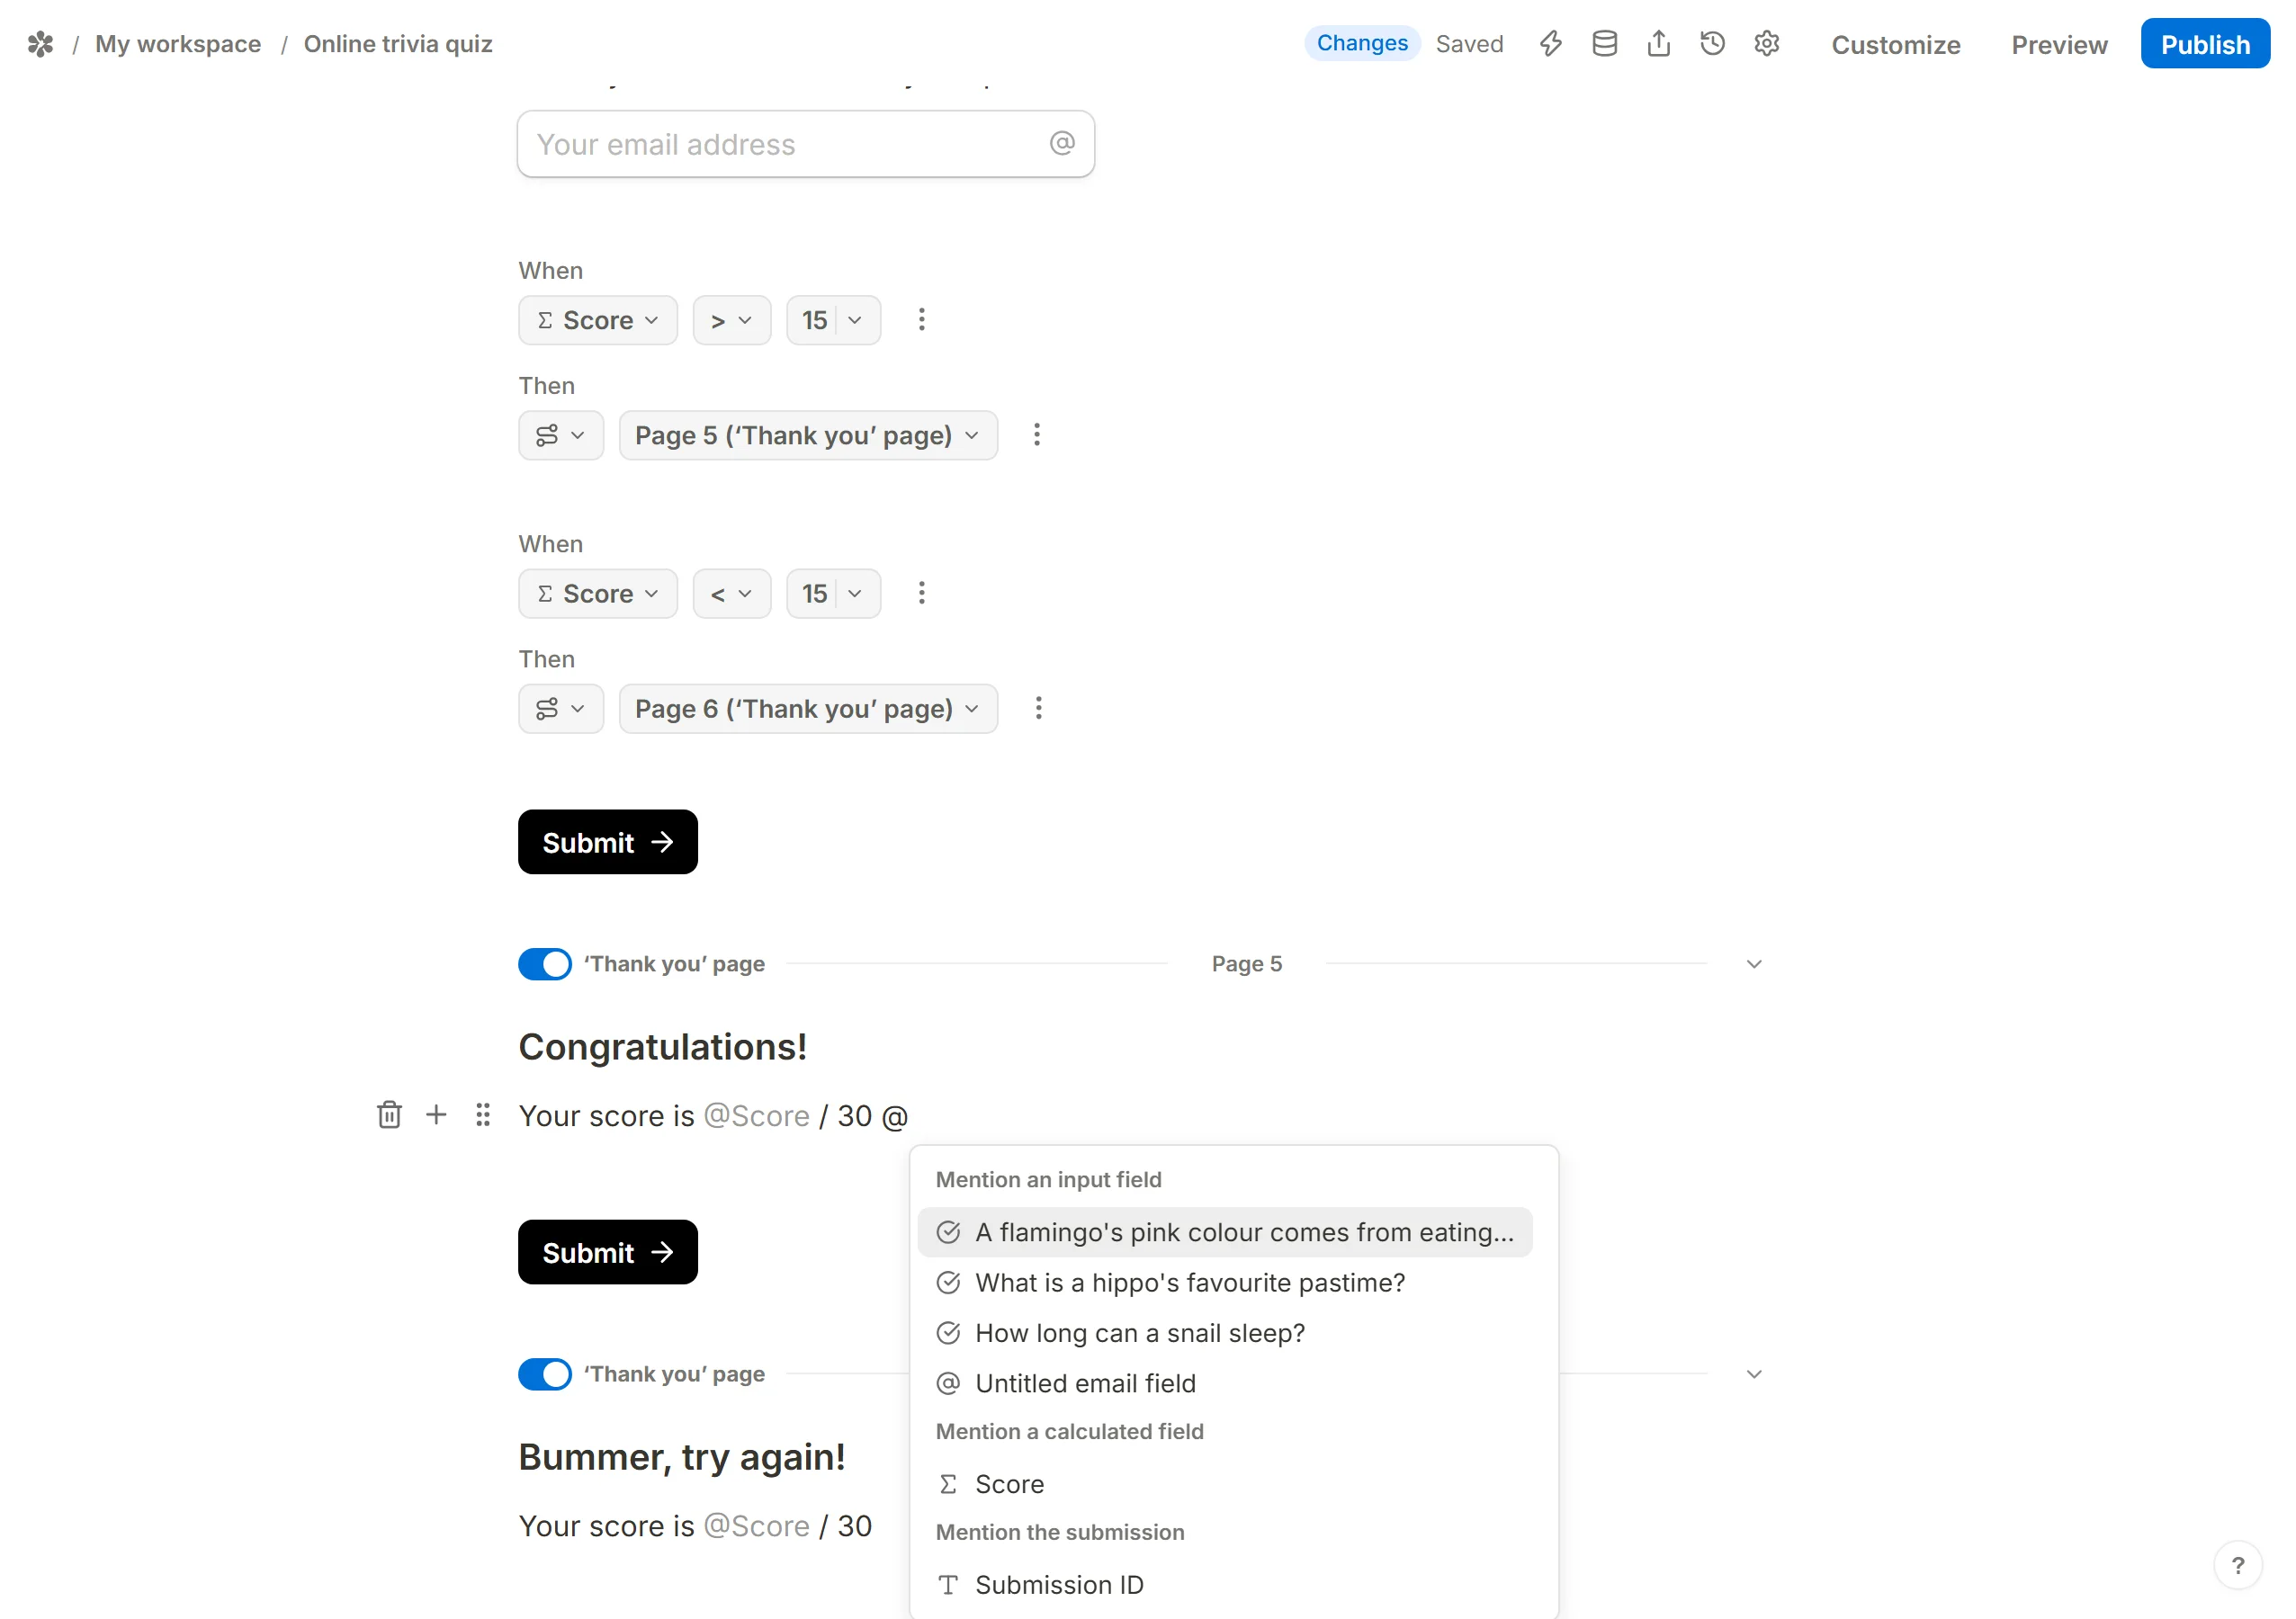
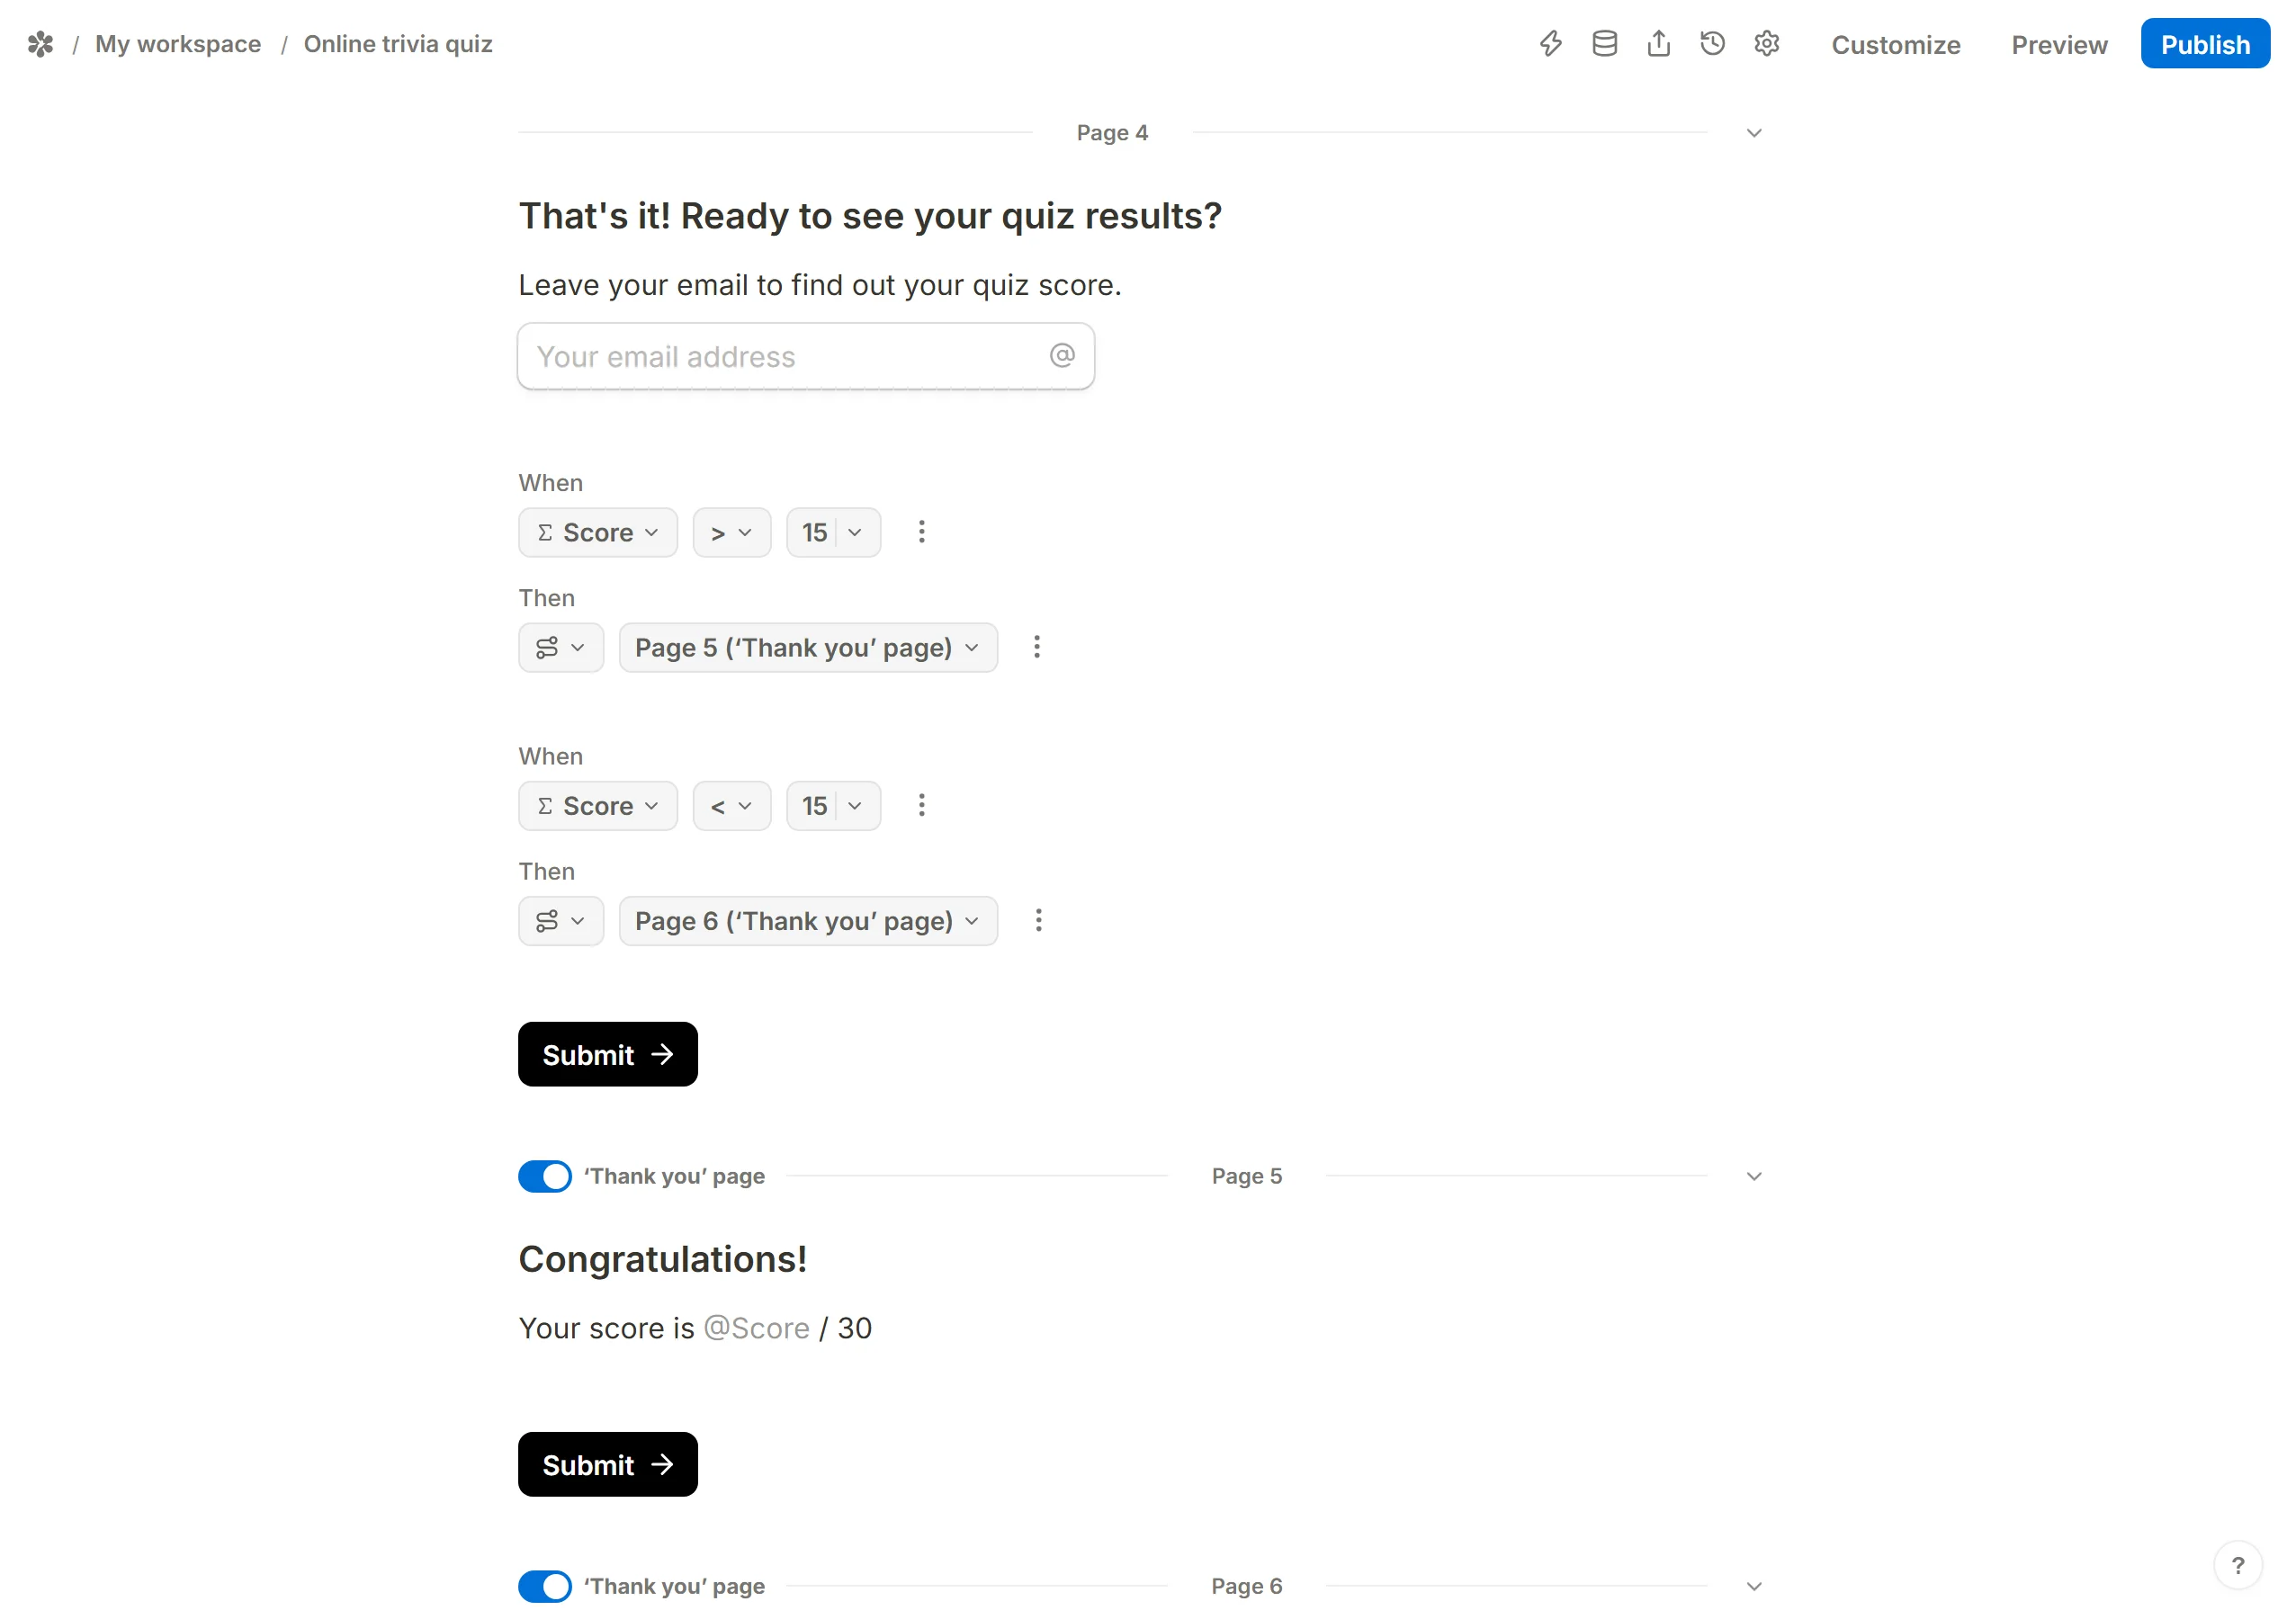
The last piece is the rule that decides which of the two pages a respondent lands on. Insert a Conditional logic block on the final question page, before the first Thank you page, and give it the Jump to page action. Jump to page runs when the respondent presses Submit on that page, which is why it has to sit before the ending pages rather than on them.
In the example, a score of 15 or more goes to the first Thank you page and anything lower goes to the second.
Put the quiz on your website
A published quiz lives at /r/<id> and can be sent as a link. To put it on a page of your own, open the form's Share tab: the embed dialog offers a Standard frame, a Popup and a Full page version, each with a snippet to paste. Embed your form covers the options.
Email the result to the respondent, and to yourself
To hear about every completed quiz, switch on Self email notifications in the form's Settings tab. Leave the address empty to notify everyone in the workspace, or enter the addresses that should get it.
For the respondent's copy, the form needs their email address first, and then a Respondent email notifications message that quotes the score. Both notification rows are free on every install.
1. Ask for the email address
An Email question can go at the start of the quiz, so you have the address even if someone abandons it halfway, or at the end, so nobody is put off before they have started. Each placement has a cost, and the right one depends on what the quiz is for.
You can also leave the question optional. Someone who skips it still sees their score on the Thank you page; they do not get the email.
The example puts the email question on a page of its own after the last question:
Add a page
After the last question and its logic block, type/pageand pickNew page.Move the jump rules
The twoJump to pagelogic blocks from step 3 above need to sit on this page now, since it is the page whoseSubmitdecides the ending.Add the question
Type/emailand insert theEmailquestion. It is markedRequiredby default; open its menu to make it optional.Add any wording
A heading or a line of text explaining why you are asking.
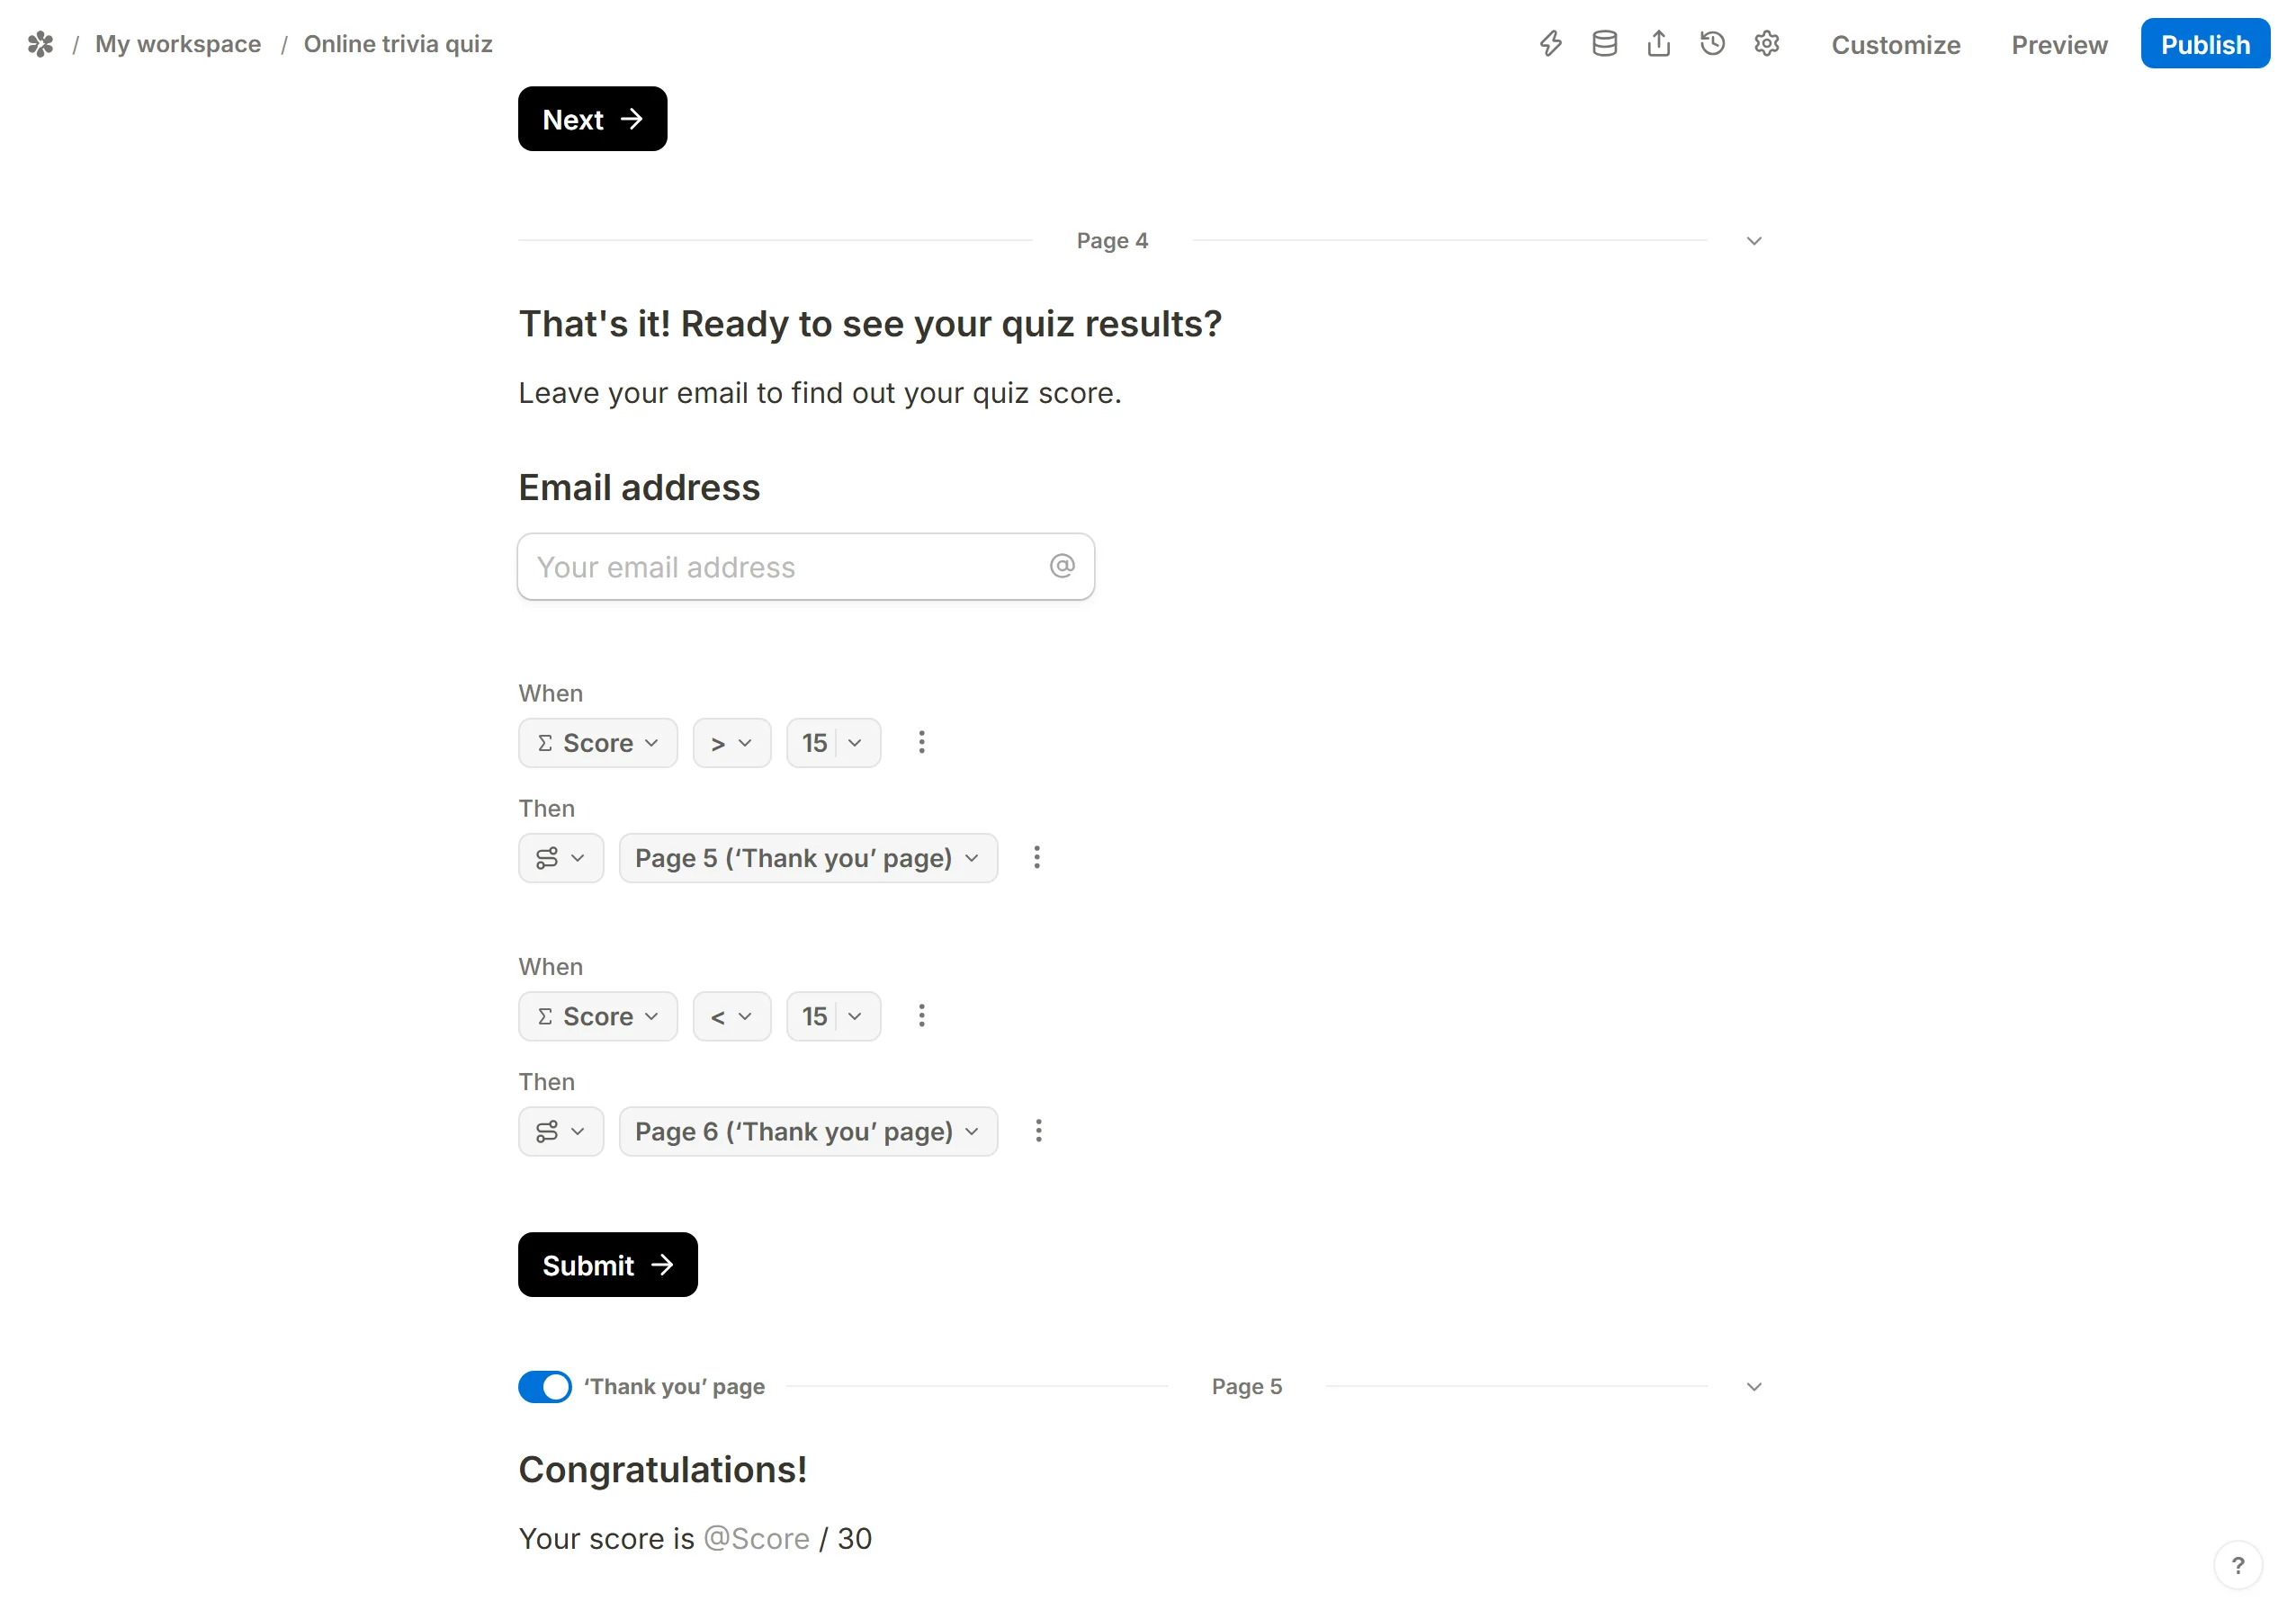
This is what the respondent sees after the last question:
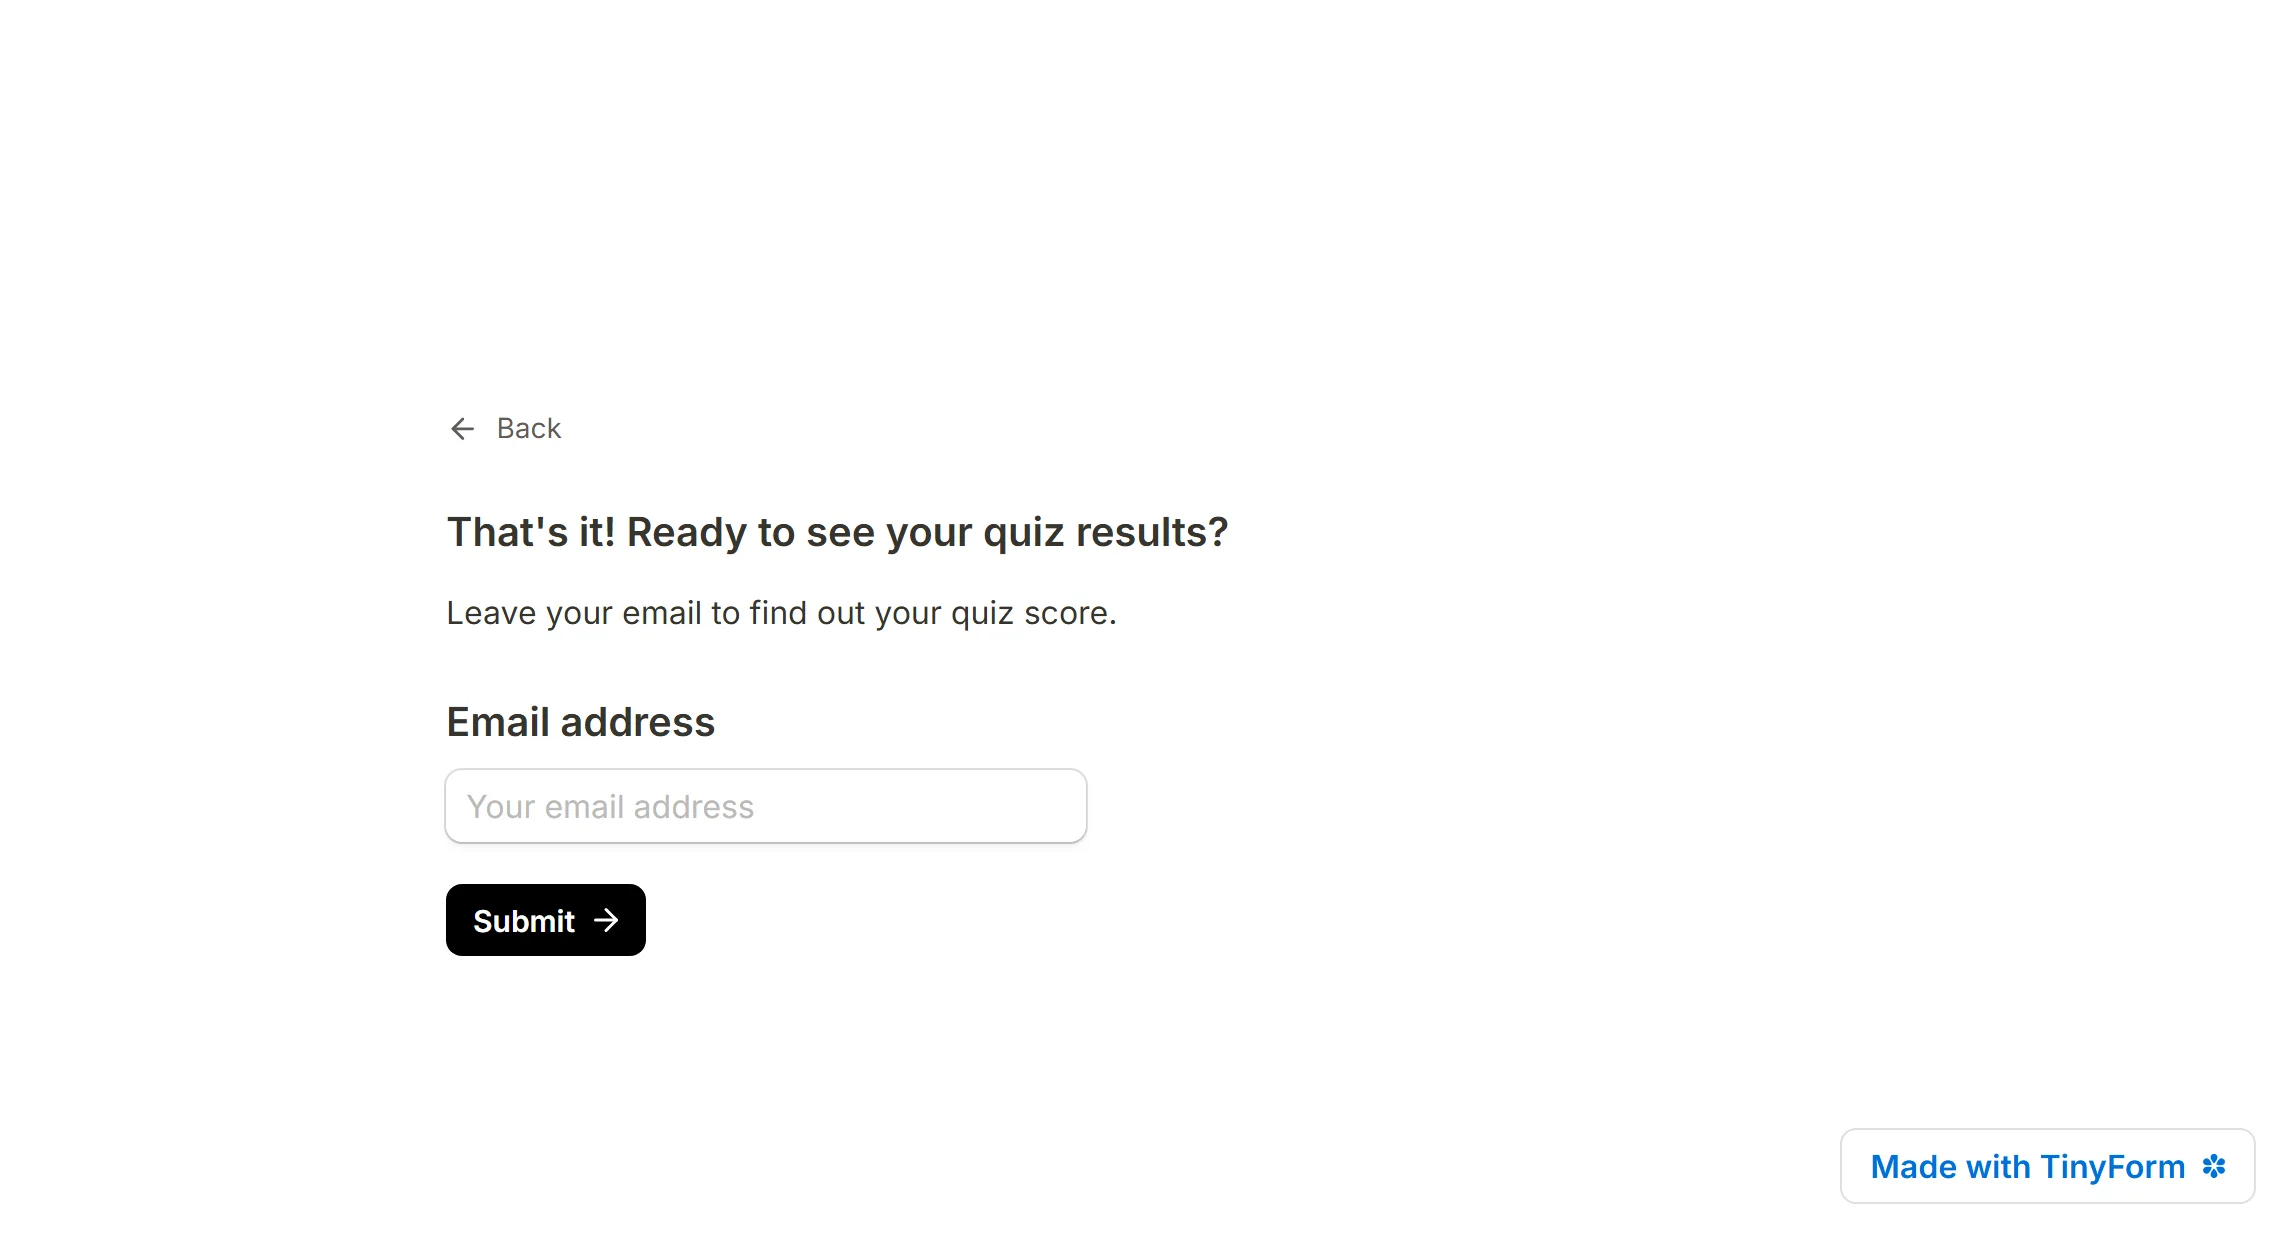
2. Write the respondent's email
In the form's Settings tab, switch on Respondent email notifications. In the To: field pick the email question, then write the subject and body.
- Anywhere in the body, type
@and pickScorefrom the menu to quote the result. - The same menu offers every other question on the form, so the email can greet the respondent by the name they typed.
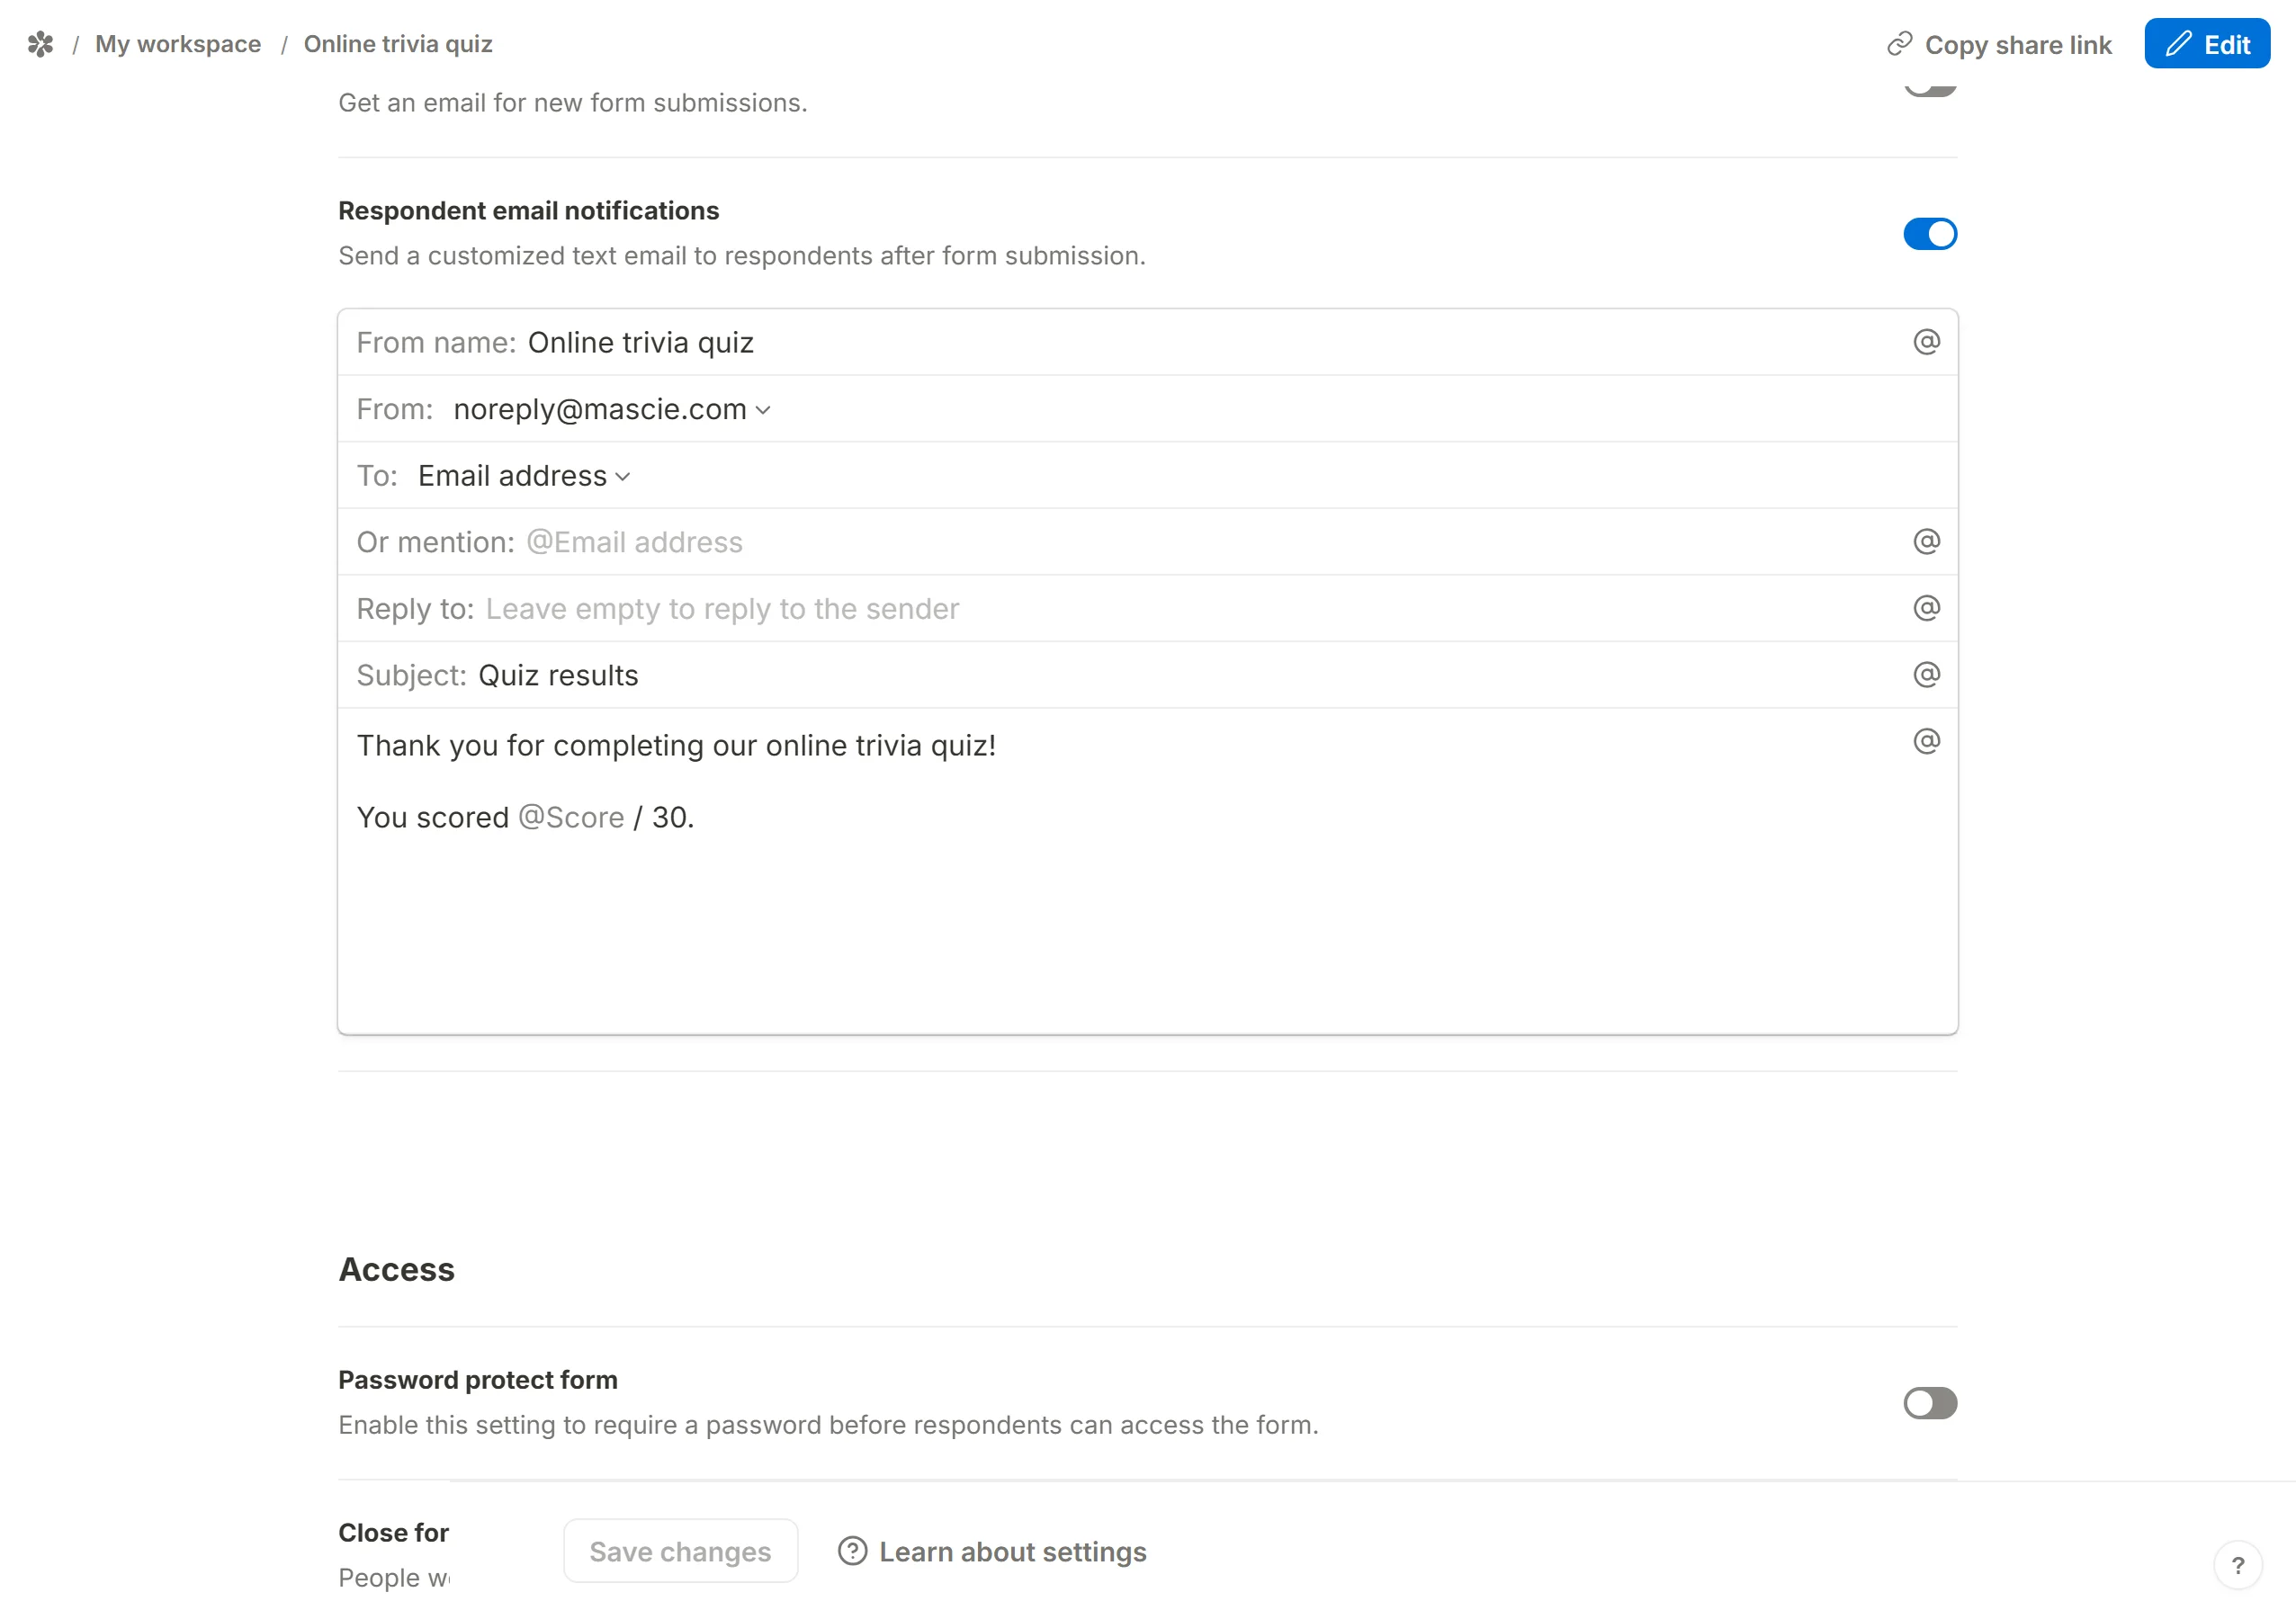
Each respondent then gets a message with their own score in it: